Getting Started with Plate Templates
Learn to use Plate Templates for fast analysis with minimal steps.
Plate Templates are used to analyze multiwell plate images in Empiria Studio (In-Cell Western, Absorbance Assay, and Cell Analysis). This page explains how to use the design of your multiwell plate assay to create a Plate Template in the Template Library & Experiment Designer  .
.
The following five points outline how a Plate Template can be used in a multiwell plate experiment.
-
Design your experiment.
-
Create a Plate Template based on your experimental design. Read on this page about how Plate Templates work and how to create Plate Templates.
-
Run the experimental protocol in lab.
-
Acquire a plate image in LI‑COR® Acquisition Software
 or Image Studio™ Software
  .
. -
Analyze the plate image in Empiria Studio using the Plate Template. Read the Empiria Studio® Software Multiwell Plate Calculations Reference for more information about well quantification and calculations.
How Plate Templates Work
The plate graphic in the Experiment Designer workflow is used to select and assign wells according to their type.
-
The wells you indicate will be quantified during analysis.
-
Empiria Studio will perform calculations based on the well types you indicated (e.g., background, positive, negative, sample).
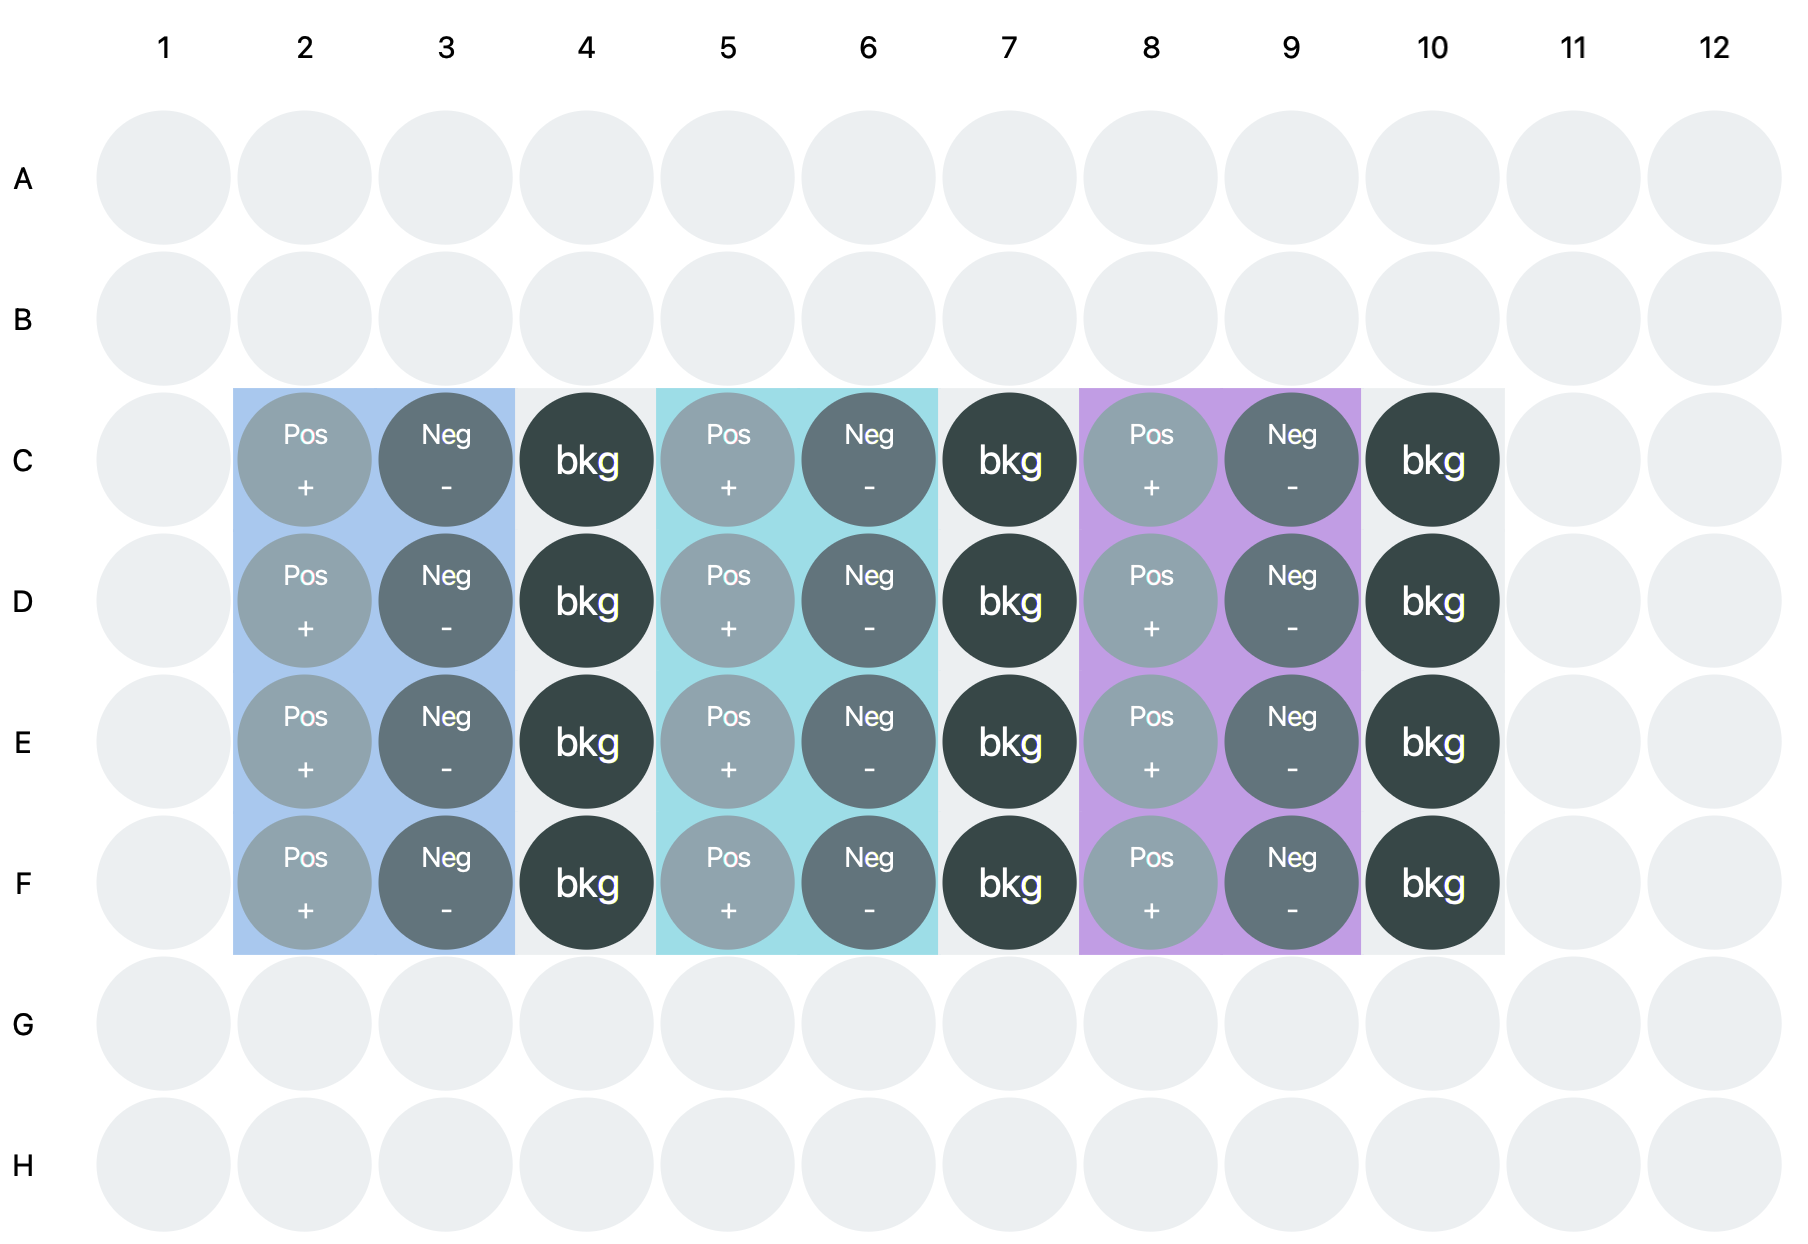
Explore: Antibody Titration Example
Click wells and Well Groups on the Plate Template image to learn more about how a Plate Template works.
How to Create a Plate Template
Start with a Preset Plate Template
Before creating a new Plate Template, determine if you can use a Preset Plate Template instead. Preset Plate Templates are provided with Empiria Studio in the Template Library (see Template Library & Experiment Designer for more information about the Template Library).
-
Preset In‑Cell Western Plate Templates are designed according to LI‑COR's recommended best practices.
-
Preset Absorbance Assay Plate Templates are provided for commonly used Protein Assays (i.e., assays for estimating protein concentration).
Preset Plate Templates are not editable, but you can create an editable copy by clicking the copy button next to the Preset Plate Template that you want to use.
-
Open the Template Library
. -
Locate the Preset Plate Templates.
Preset Plate Templates have [Preset] in the name and are displayed with a lock . If there are many Plate Templates, click the Status column header to sort the Template List by the status icons. This will sort all the Preset Plate Templates together in the list.
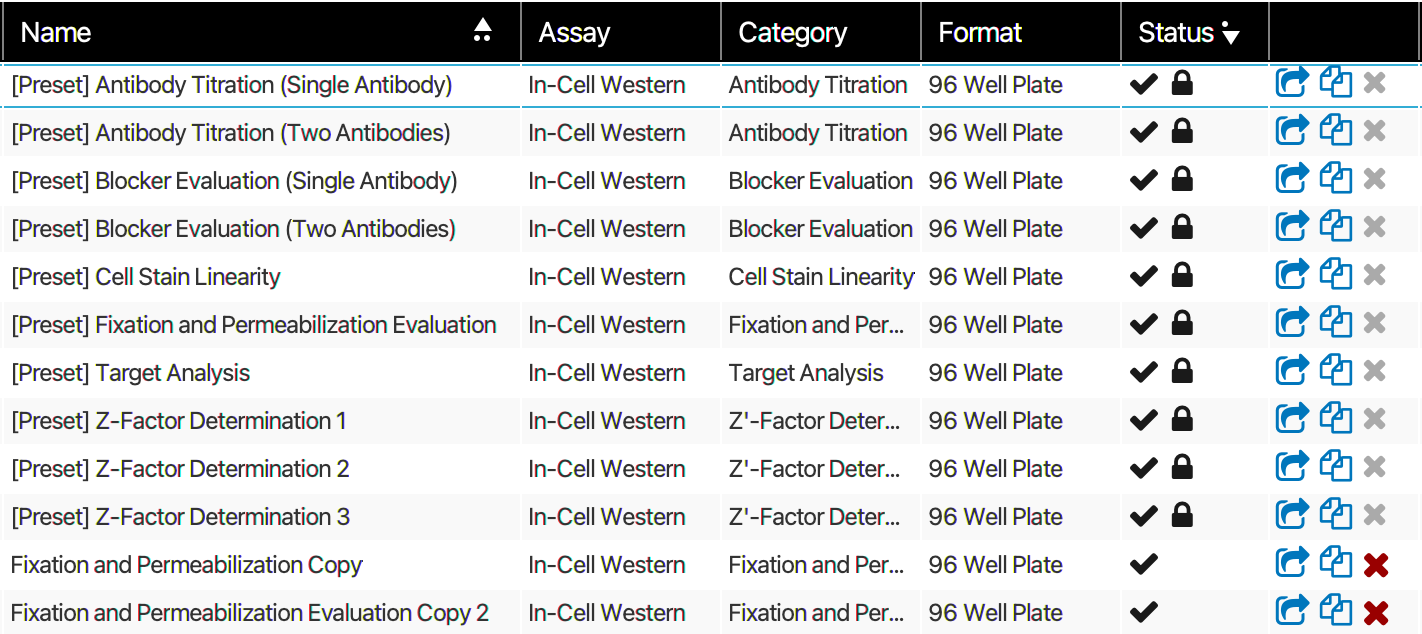
A Template Library has been sorted to group Preset Plate Templates together. Use SHIFT + Click to click a second column header to also sort by the second column. -
Click to open a Preset Plate Template.
Consider your experimental design. Is there a Preset Plate Template that you could use exactly as it is?
If there is a Preset Plate Template that is close but not exactly what you need, click copy next to the Preset Plate Template to make an editable version.
Removing [Preset] and -Copy from the name helps keep templates organized!
Create a New Plate Template (In‑Cell Western, Absorbance Assay, and Cell Analysis)
You can also create a completely new Plate Template for an In‑Cell Western, Absorbance Assay, or Cell Analysis following the directions below. Within Empiria Studio, In‑Cell Western includes On-Cell Western Assays. The steps below contain examples based on the In‑Cell Western Antibody Titration example shown above.
Start by clicking Create Template in the Template Library, then follow the steps in the Experiment Designer workflow.
Add Details
Give the template a memorable name and helpful description for your records. Choose an Assay (In‑Cell Western, Absorbance Assay, or Cell Analysis), Well Format, and Category to help link the correct template to the image during analysis.
Select Assay first to see Category options.
-
In‑Cell Western: Use this workflow to analyze In‑Cell Western or On-Cell Western plate images. Both the In‑Cell Western and On-Cell Western are quantitative immunofluorescence assays performed in multiwell plates. Data analysis is based on whole-well fluorescence quantification.
-
Absorbance Assay: Use this workflow to analyze plate images from absorbance assays, including ELISA (enzyme-linked immunosorbent assay) and Protein Assays (i.e., assays for estimating protein concentration).
-
Cell Analysis: Cell Analysis refers to a broad range of assays for studying the function and localization of proteins in living and fixed cells. Cell Analysis covers assays that are not more precisely described as one of the other Multiwell Plate Assay types.
The Well Format is the number of wells in the plate.
| Category | Summary | Assay |
|---|---|---|
| Antibody Titration | Determine the antibody concentration that provides optimal signal and lowest background. | In‑Cell Western, Absorbance Assay, Cell Analysis |
| Blocking Buffer Evaluation | Determine the best blocking buffer for your experiment. | In‑Cell Western, Absorbance Assay |
| Cell Stain Linearity | Determine the range where the normalization stain is proportional to cell number. | In‑Cell Western |
| Fixation and Permeabilization Evaluation | Determine the optimal fixation and permeabilization conditions for your experiment. | In‑Cell Western |
| Z'-Factor Determination | Test the quality and robustness of an assay. | In‑Cell Western |
| Target Analysis | Determine the effect of a treatment or condition on your target. | In‑Cell Western, Absorbance Assay, Cell Analysis |
| Protein Assay | Estimate the concentration of protein in samples. | Absorbance Assay |
Example Plate Template 

This slide shows the options to select to create the example Antibody Titration Plate Template. This example shows an In‑Cell Western Plate Template. Select the correct Assay, Well Format, and Category. In particular, the Assay and Category labels help you find the Plate Template during analysis (see next slide).
Example Plate Analysis 

Set Backgrounds
Designate which wells will contain background control. During analysis, background wells are quantified and automatically used to calculate background-subtracted values for other wells.
For an Absorbance Assay, background wells are required for quantification of sample wells and calculation of background-subtracted values. The Next button will be enabled once background wells have been assigned.
-
Click and drag to select a set of background wells.
You can also click to select individual wells.
-
Click Set As Background.
Example Plate Template

Example Plate Analysis

Set Positive Controls
Designate which wells will contain positive controls. During analysis, positive control wells will be quantified for comparison with other wells, such as negative control wells and sample wells.
-
Click and drag to select a set of positive control wells.
You can also click to select individual wells.
-
Click Set As Positive.
-
Repeat as needed for each separate set of positive control wells.
Example Plate Template

Example Plate Analysis

Set Negative Controls
Designate which wells will contain your negative controls. During analysis, negative control wells will be quantified for comparison with other wells, such as sample and positive control wells.
-
Click and drag to select a set of negative control wells.
You can also click to select individual wells.
-
Click Set As Negative.
-
Repeat as needed for each separate set of negative control wells.
Example Plate Template

Example Plate Analysis

Set Samples
Designate which wells will contain sample. During analysis, sample wells will be quantified to determine your target's response to the experimental change being studied.
-
Click and drag to select a set of sample wells.
You can also click to select individual wells.
-
Click Set As Sample.
-
Repeat as needed for each separate set of sample wells.
The Antibody Titration example does not use Sample wells.
Set Well Groups
Click and drag around a set of wells to group them for analysis. If you want all the wells on the plate to be in one group, click All Wells.
Follow these steps to create Well Groups from a sub-set of wells on the plate:
-
Click and drag to select a group of wells.
Select Include all backgrounds if you want to use all background wells for the Well Group you are creating. The average Total value for all background wells will be calculated and used to calculate background-subtracted values for other wells.
-
Click Selected Wells.
The Well Group will be created.
Example Plate Template

Example Plate Analysis
