To remove the backup battery, unplug the battery wire terminal from the charge controller, remove the datalogger from the riser plates, and lift out the battery. Follow local guidelines and restrictions if you need to dispose of the battery.
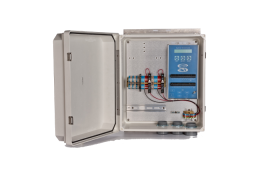
Charge Controller Maintenance
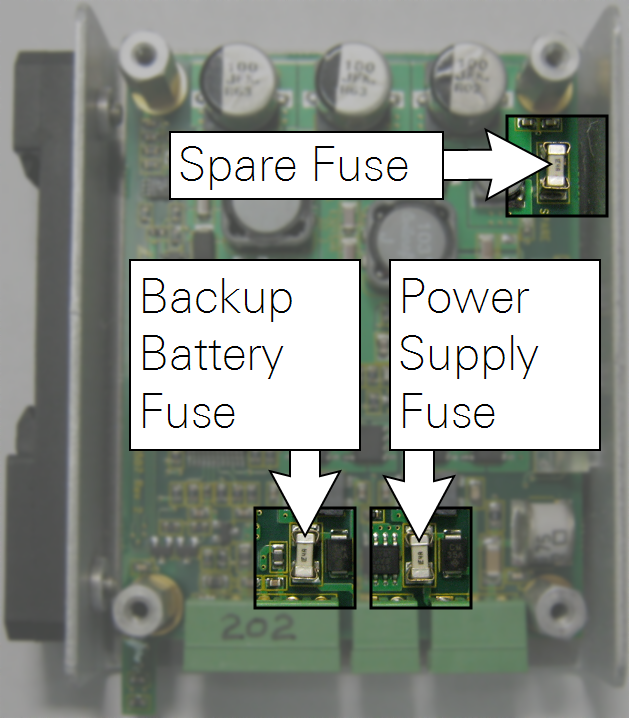
The charge controller has two internal fuses to protect the circuitry. One spare fuse is included in the unit to replace a blown fuse. If the charge controller fails to function properly, check the fuses and replace the blown fuse with the spare.
Fuse Indicators
A blown fuse will be indicated by the following:
- Power supply fuse: If the Power LED will not light, check the system power supply to be sure it is adequate. If the charger has power but the LED is dark, the power supply fuse may be blown.
- Back-up battery fuse: If the Battery LED will not light, but the main power LED will, the battery fuse is probably blown or the battery has failed. Check the fuse with an ohm meter.
Replacing the Fuses
Note: When removing the cover, wear an anti-static wrist strap to prevent accidental static discharge that may damage the circuitry.
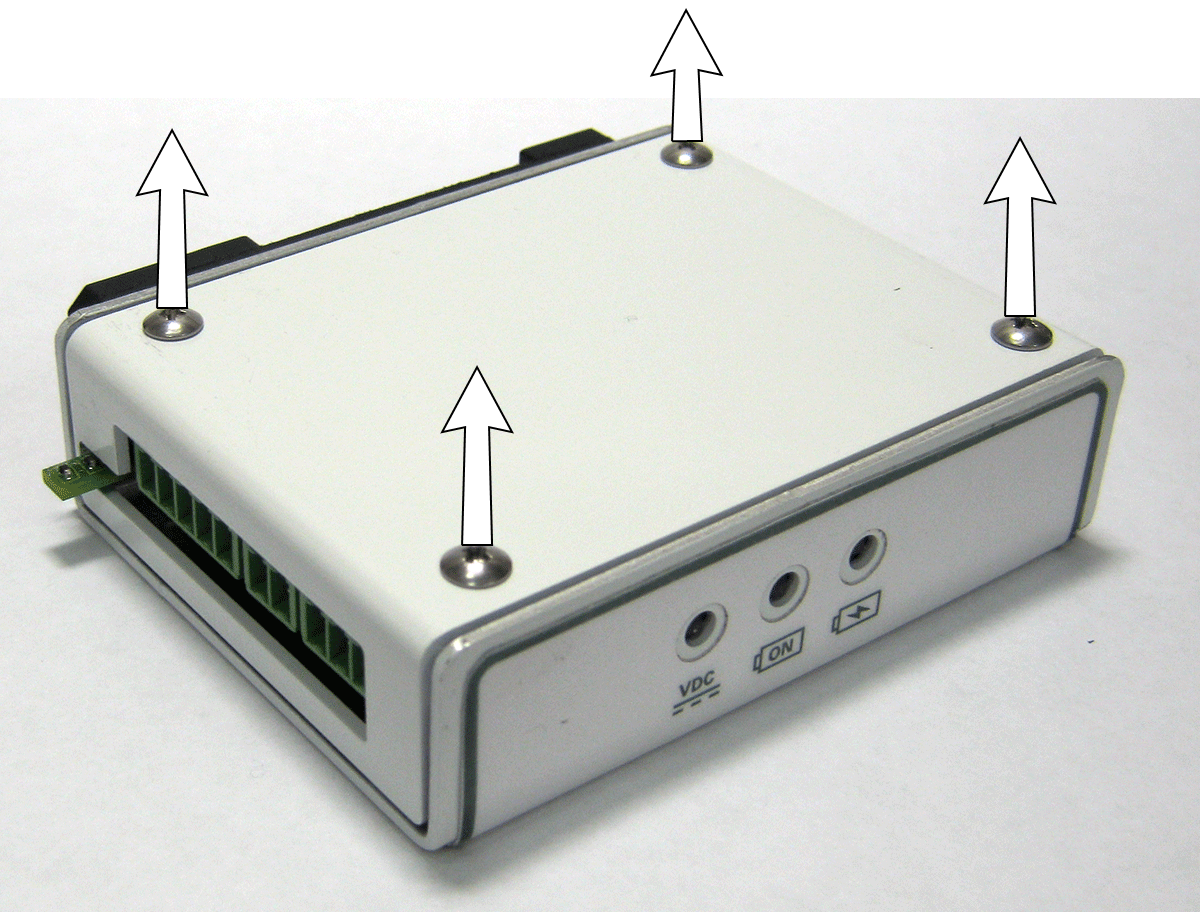
- Disassemble the charge controller.
- Remove the screws that secure the back plate and remove the plate to gain access to the fuses.
- Check the fuse with an ohm meter.
- Resistance of <1Ω (ohm) across the fuse indicates that it is OK.
- Replace the fuse if necessary.
- To remove a fuse, grip it with a needle-nose pliers or tweezers and pull it out of the mount.
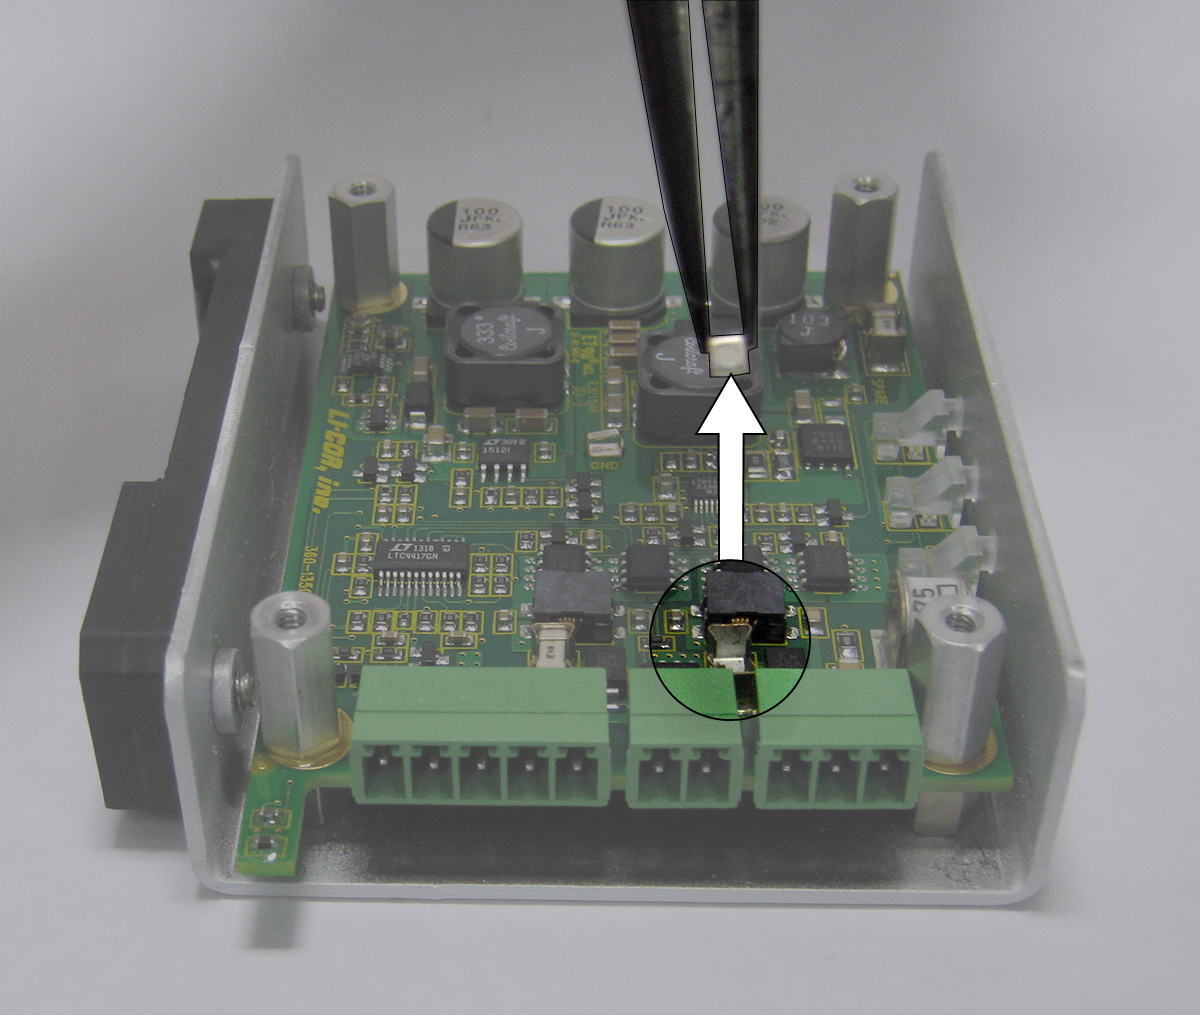
- Install the spare fuse in place of the blown fuse.
The fuse is a 4 amp Nano2 SMF Fuse (Littelfuse part number 0453004.MR). Contact Littelfuse, Inc. for replacements: http://www.littelfuse.com/contact-us.aspx.