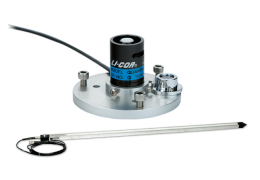
For best performance and longevity, treat the sensor carefully. The protective cap that came with the LI-190R can be used later when shipping the sensor for factory recalibration.
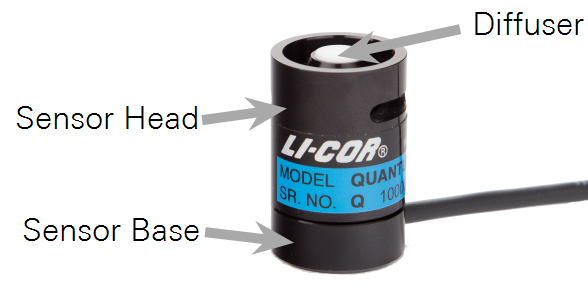
The vertical edge of the acrylic diffuser (see Figure 6‑1) must be clean to maintain calibration and correct cosine response. Use warm water and a soft, lint-free towel or cotton-tipped swab to remove dust and other soluble deposits. If needed, use a mild detergent to clean the sensor. Use a solution of vinegar and water for stubborn hard water deposits or salt buildup.
Important! Refrain from applying pressure to the diffuser when cleaning the sensor. Scratches on the surface of the diffuser will degrade the cosine performance of the sensor.
The sensor head may be disconnected from the sensor base of the LI-190R (Removing a Cable), but do not attempt to disassemble the sensor head. Doing so will alter the sensor's calibration, void the sensor's warranty, and potentially provide entry points for water, which will damage the sensor.
Factory Recalibration
Each sensor is fully calibrated at the factory. The recommended recalibration interval is every 2 years.
Note: A sensor's certificate of calibration indicates the last date of calibration. You can acquire the certificate of calibration for your sensor by entering the sensor serial number at licor.com/support/.
Return your sensor to LI-COR for recalibration. If possible, replace the protective cap that came with the sensor. Ship the sensor head attached to the base and cable assembly when possible. For tower installations, solar arrays, or other cases where it would be better to leave the cable behind, the sensor head may be removed from the base and cable assembly for shipment (see Removing a Cable).
Note: For sensors that are paired with an SMV adapter, be sure to send both the sensor head and the paired SMV adapter. The SMV adapter will be adjusted to standardize the output of the sensor.
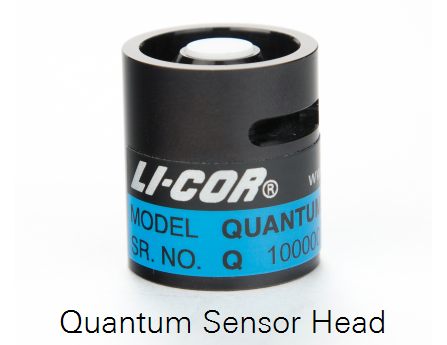
For uninterrupted data collection, you have the option of purchasing sensor heads without cables. These calibrated sensor heads can be used as spares.
Removing a Cable
-
Remove the sensor from the mounting and leveling fixture to gain access to the machine screws on the bottom of the sensor base.
-
Remove the three screws from the bottom of the sensor base with a number 1 Phillips screwdriver.
-
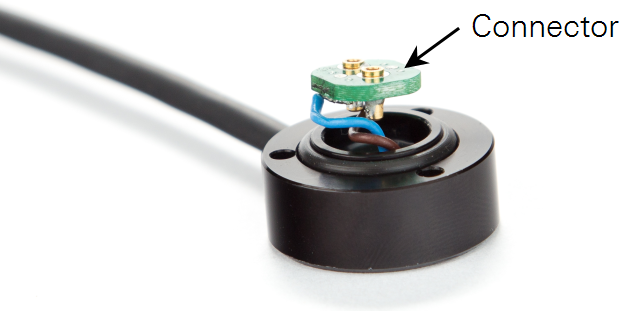
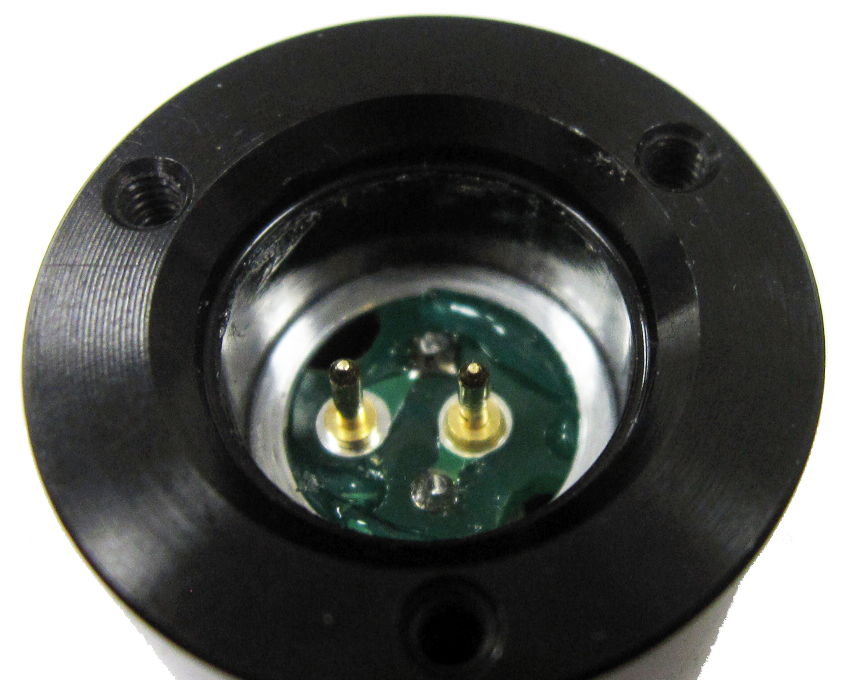
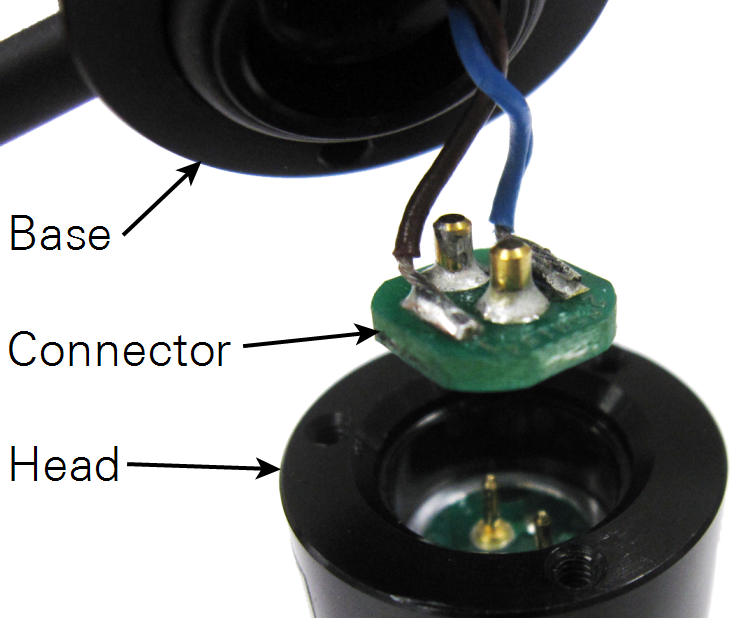
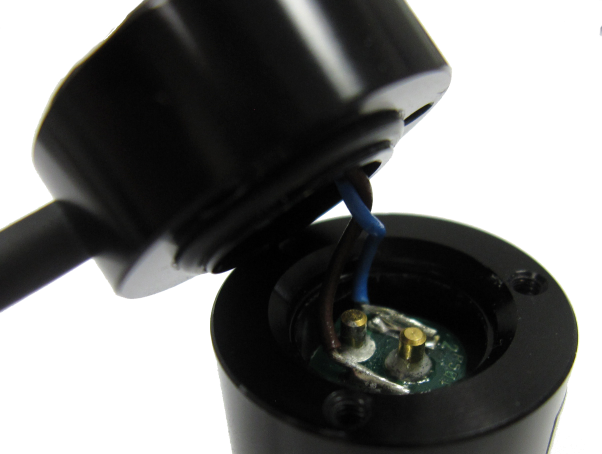
Pull the sensor head away from the base until the two-pin female connector separates from the base pins; pull the two components straight apart without twisting.
-
If the sensor base will be left exposed, install a cover (see Sensor Base Cover).
Any cable can be used with any sensor head without altering the calibration. Cables are interchangeable between the LI-190R, LI-200R, and LI-210R sensors.
Sensor Base Cover
When a sensor base must be left behind while the head is being factory recalibrated, protect it by attaching a 2001S Sensor Base Cover, available from LI-COR. Attach using the same screws that held the sensor head to the base.
Installing a Cable
- Place the protective cap (shipped with the sensor) on the sensor head or use another method to protect the acrylic diffuser on top of the sensor head.
- Turn the sensor head upside down and check the pins to ensure they are not bent. Inspect the o-ring in the base and replace if it is damaged.
- Press the female connector firmly onto the pins of the light sensor head using your finger or a small flat-blade screwdriver. The two-pin connector is polarized so that it can only be attached in one orientation.
- Orient the light sensor and base so the mounting holes align and insert the three machine screws through the light sensor base and into the sensor head.
- Tighten the screws with a number 1 Phillips screwdriver. If you are using a torque screwdriver, tighten the screws to 0.41 Nm (58 oz-in).
Replacement Parts
LI-190R Replacement Parts
The following components are available individually.
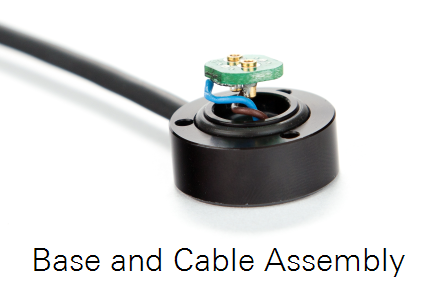
| Base and Cable Assemblies | |
|---|---|
| Cables with BNC | Cables with Bare Leads |
|
|
You can replace a damaged cable assembly, or change the cable length and terminal by purchasing a new cable assembly and installing it onto the sensor head.
Calibrated LI-190R, LI-200R, or LI-210R sensor heads (without cables) are available for purchase. Sensor heads can replace damaged heads, or be used as spares. Any cable assembly can be used interchangeably with any LI-190R, LI-200R, or LI-210R sensor head.
- Flat head Phillips machine screw, 2-56 threads, 1/2" long, 82° countersink, stainless steel (for securing the sensor base to the sensor head), part number 122-12774. Three screws are required for each sensor.
- O-ring AS-014 Viton75 (for the sensor base), part number 192-14878.
LI-191R Replacement Parts
- 2222LQ-2: 2-meter cable with a BNC terminal on each end
- 2222LQ-5: 5-meter cable with a BNC terminal on each end