Authors: LI-COR, Inc.
Correspondence: envsupport@licor.com
Instruments: LI-192 and LI-193
Keywords: photosynthetic photon flux density, photosynthetic photon flux fluence rate, underwater, PAR
Abstract
Phytoplankton, algae, and aquatic plants use photosynthetically active radiation (PAR) with wavelengths between 400 and 700 nanometers for photosynthesis. This radiation comes from the sun and its intensity is characterized as Photosynthetic Photon Flux Density (PPFD) in units of micromoles of photons per square meter per second (μmol/m2/s). These organisms are also illuminated by reflections from the bottom surface and particles suspended in the water. The total number of photons incident on a point from all directions is called Photosynthetic Photon Flux Fluence Rate (PPFFR), also in units of μmol/m2/s.
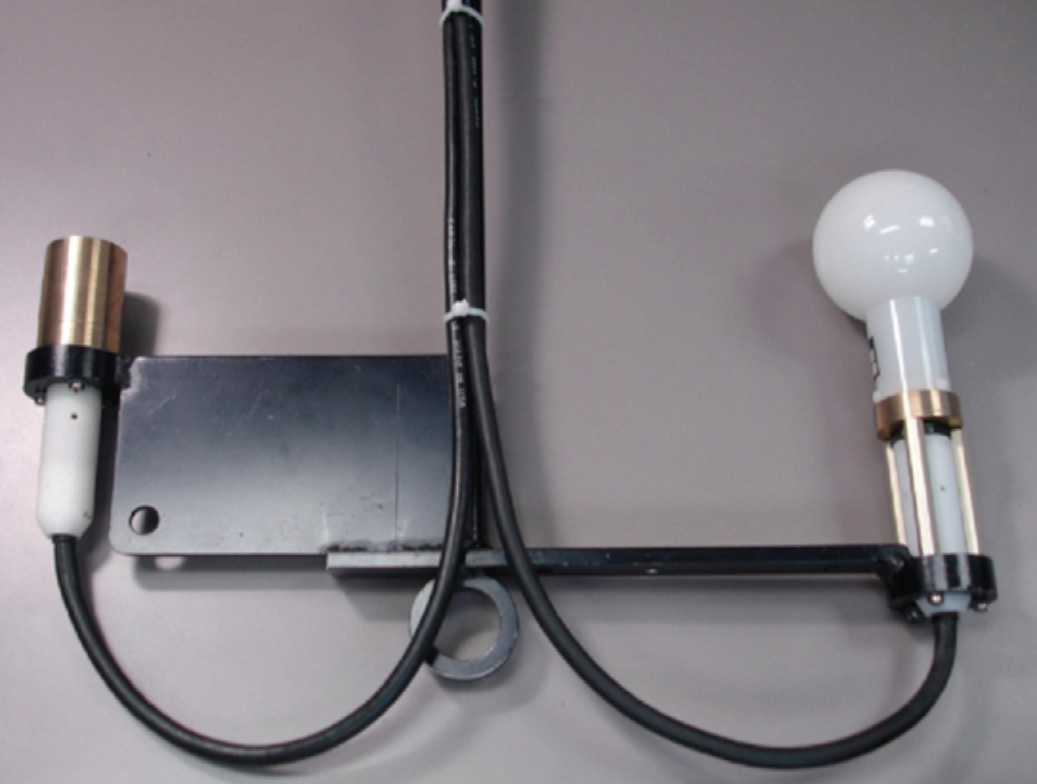
These underwater organisms can use direct and reflected light equally efficiently for photosynthesis, and for this reason, scientists may want to measure both the downwelling PPFD as well as the PPFFR. This measurement can be performed with an LI-192 Underwater Quantum Sensor for downwelling PPFD and an LI-193 Spherical Quantum Sensor for PPFFR. Both of these sensors should face upward towards the sun when deployed in an ocean, a lake, or a stream.
The 2009S Lowering Frame was designed to hold one upward-facing and one downward-facing sensor. However, with a few modifications and parts, you can mount two upward-facing sensors to the frame. You will need to purchase three 6-32 standoffs (2 inches long, 170-09852) and three 6-32 headless screws (3/4 inches long, 142-05469). In addition, you will need the three shrink-wrapped screws from the 9901-220 Underwater Parts Kit that comes with each sensor.
-
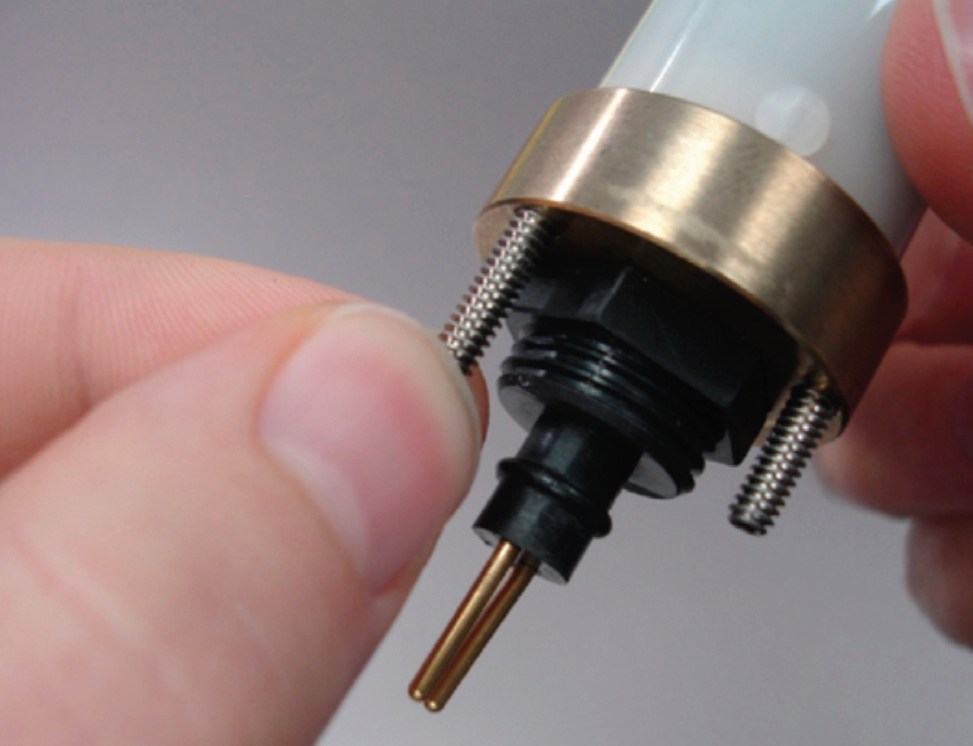
Thread the headless screws into the base of the LI-193 Spherical Quantum Sensor to hand-tight.
-
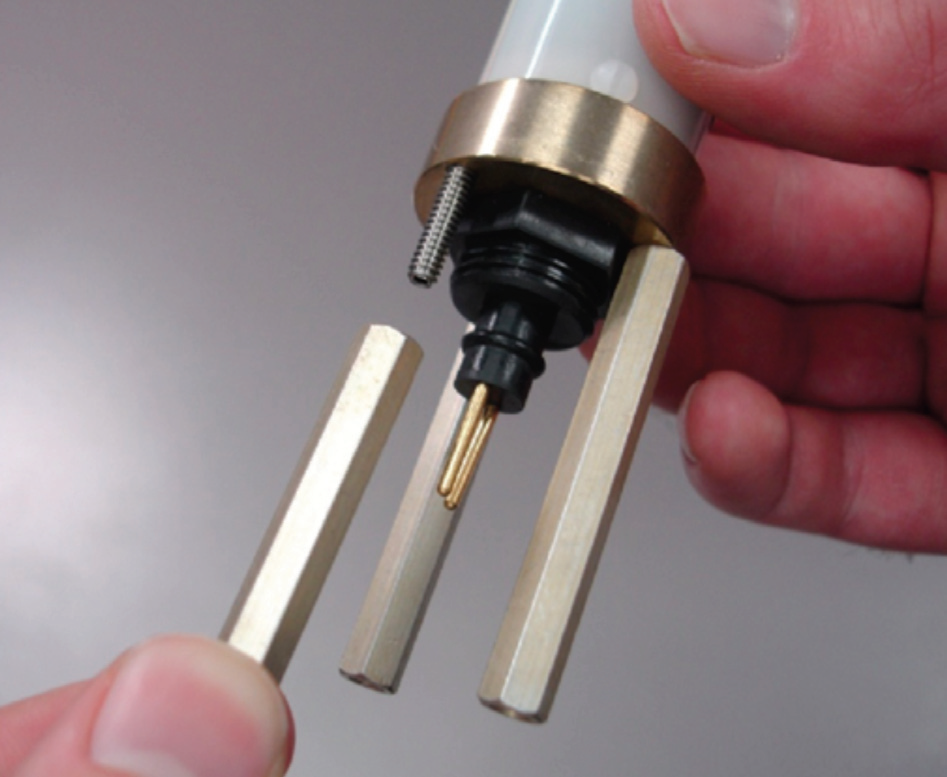
Thread the standoffs onto the screws to hand-tight.
-
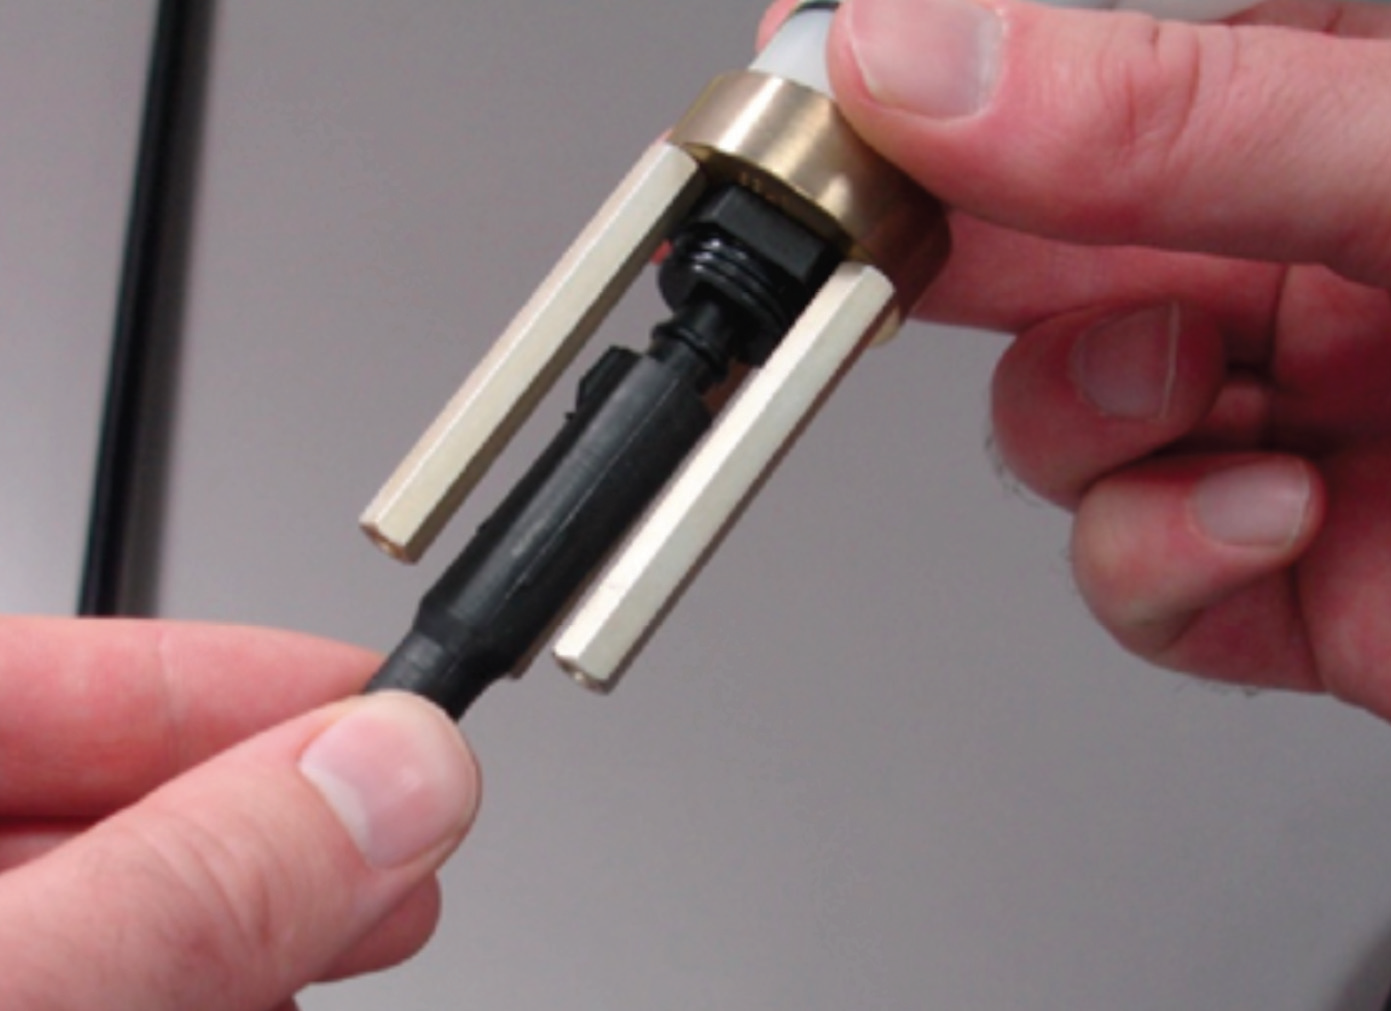
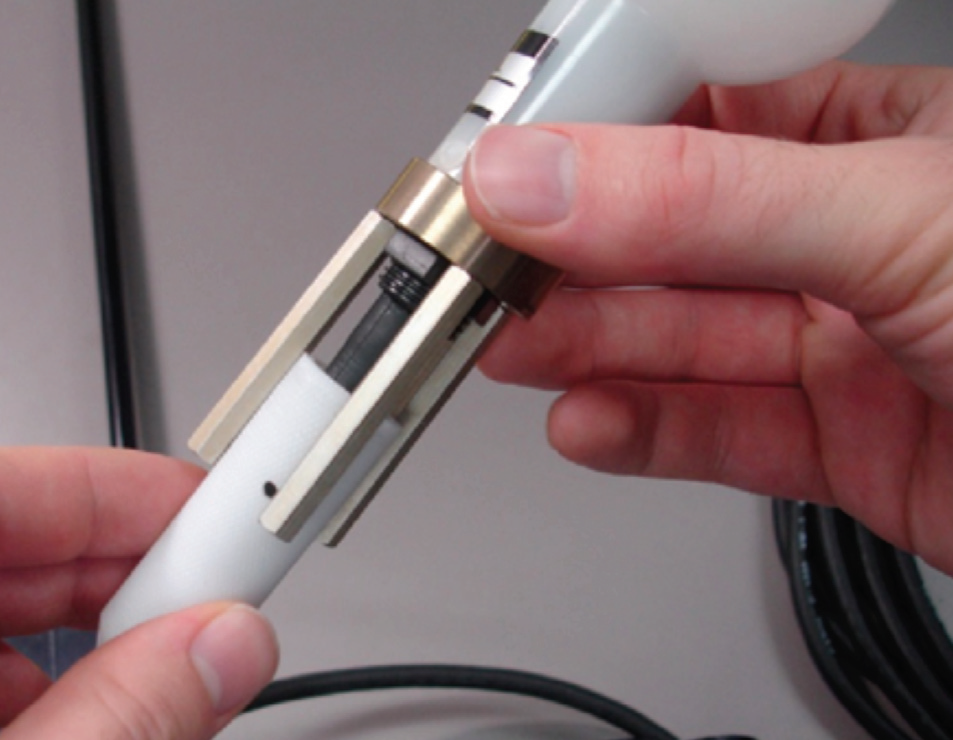
Connect the 2222UWB Underwater Cable to the sensor.
Make sure to insert it through the 2009S Lowering Frame’s lower ring first. Align the yellow dot on the base of the sensor with the raised nub on the cable. Take care not to bend or twist the pins—they are more fragile than they appear and may break if not properly connected. Then press the cable onto the sensor until there is an audible ‘pop’ as it snaps into place.
-
Slide the white collar onto the sensor connector and thread until hand tight.
Some pressure may need to be applied, as the standoffs rub against the collar.
-
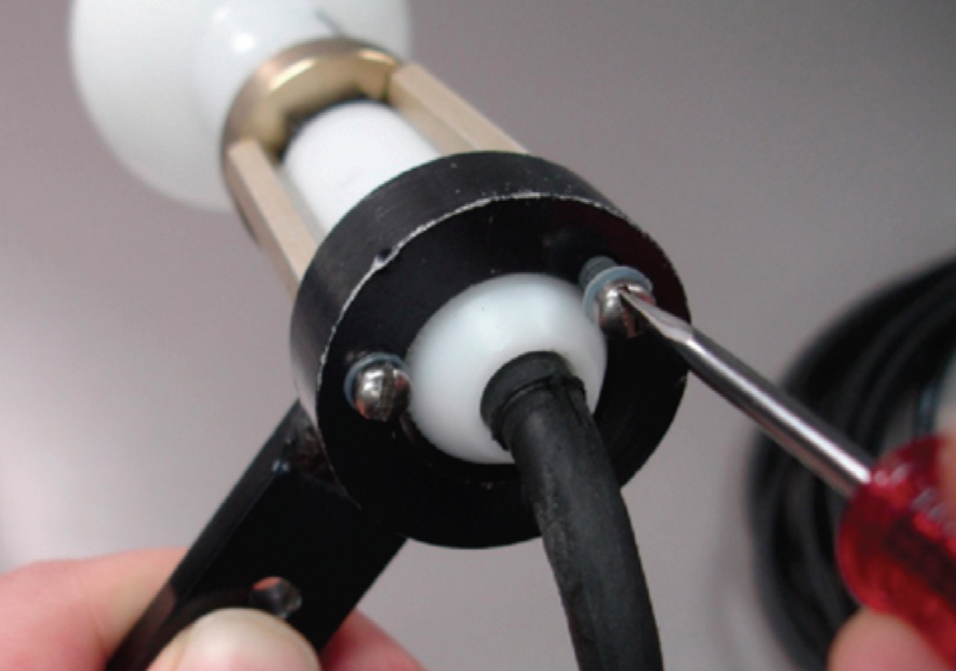
Insert the shrink-wrapped screws from the Underwater Parts Kit through the ring of the lowering frame and thread them into the standoffs.
This will require a small flathead screwdriver.
Once this sensor has been mounted to the lowering frame, insert the LI-192 Underwater Quantum Sensor into the other ring. Connect the cable before inserting the shrink-wrapped screws to ensure that the yellow dot and the raised nub align. Use the cable ties from the Underwater Parts Kit to attach both underwater cables to the frame, ensuring that there is enough slack in the cable to prevent strain. Attach a rope or lowering cable to the ring at the top of the frame. The two sensors should now be roughly the same height and ready for measurements.