LI-3050C Transparent Belt Conveyer
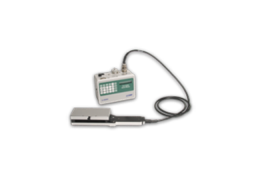
The LI-3050C Transparent Belt Conveyer Accessory allows the LI-3000C to be used for measuring area of large numbers of detached leaves. The two instruments are coupled by sliding the LI-3000C scanning head into the LI-3050C, such that the upper and lower belts pass through the scanning head. In this mode, the conveyer belts move at a constant speed to provide the encoded length information to the LI-3000C (the length encoding cord is not used).
WARNING: The LI-3050C contains moving parts that can present a crush hazard.
WARNING: The LI-3050C contains moving pulleys that can entangle hair or clothing during insertion of the leaf.
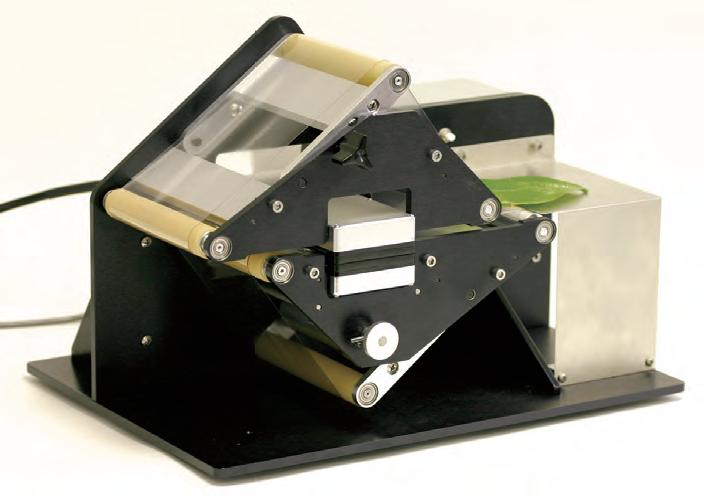
Samples are placed on the lower transparent belt and allowed to pass through the LI-3000C scanning head. Accumulated area is shown on the LI-3000C display as the sample(s) passes through the scanning head. Area can also be displayed in the Windows Application Software by enabling Realtime Capture mode on the LI-3000C, as described later in this section.
The LI-3050C replaces the older LI-3050A; the LI-3050A cannot be used with the LI-3000C, as the motor in the LI-3050A will not receive power (contact LI-COR for upgrade information). The LI-3050C, however, is compatible with older LI-3000 and LI-3000A consoles.
Setup and adjustment
WARNING: There are no user-serviceable parts inside the LI-3050C. Unplug the power cord before opening the rear cover of the LI-3050C; failure to do so can result in a severe shock hazard.
NOTE: An instructional video that demonstrates how to replace the upper and lower transparent belts can be viewed at: http://www.licor.com/3050C-belt
The LI-3050C ships without the two transparent belts installed. To install the belts, loosen the two knobs (Figure 5‑1, labeled 'A') on both sides of the upper pulley assembly and allow the upper assembly to lower itself. Slide a transparent belt onto the upper pulley assembly from the front, over the pulleys at the locations indicated by ‘F’ in Figure 5‑1. Center the belt on the pulleys, lift at the knobs, and tighten when the desired belt tension is obtained.

- Upper pulley assembly knobs
- Lower pulley assembly idler arm
- Scanning head support block knob
- Reset button
- Upper pulley assembly hex screws for belt tracking adjustment
- Upper pulley assembly
- Lower pulley assembly hex screws for belt tracking adjustment
- Sample tray
Lift the weighted lower pulley assembly (Figure 5‑1, label ‘B’), and support with a piece of foam rubber to hold it up. Slide a transparent belt onto the lower pulley assembly from the front. Remove the foam support and center the belt while lifting the lower pulley. When the belt is centered, release the lower pulley. The weight automatically provides the proper tension. When mounting the lower belt, it may be useful to place a sheet of paper under the lower surface of the upper belt to prevent cohesion as the lower belt is put into place.
NOTE: Place the belts so that the edges and seams of one are slightly misaligned with the other. When the edges are aligned, background counts can occur.
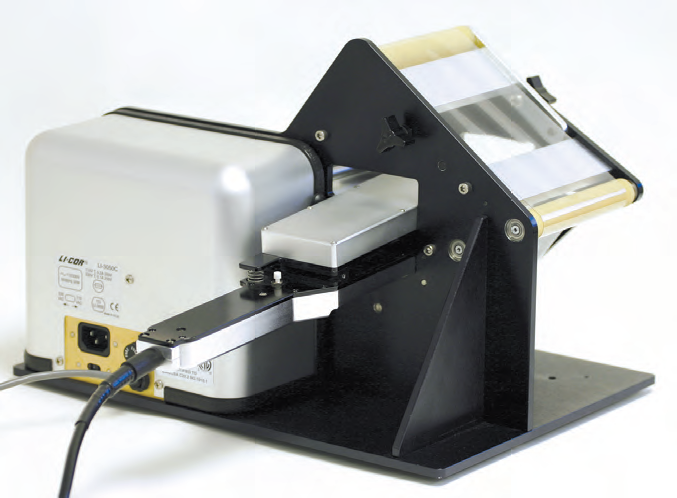
Turn the knob on the front of the lower pulley assembly (Figure 5‑1, label ‘C’) counterclockwise to lower the scanning head support blocks. Open the scanning head and slide it into the LI-3050C (Figure 5‑2). When the scanning head is inserted fully, so that about 1/8" is protruding from the front of the
LI-3050C (Figure 5‑3), raise the scanning head support blocks by turning the knurled knob (Figure 5‑1, label ‘C’) clockwise until it rests against the right hand stop.
Turn the support block knob left or right to lower or raise the support blocks.
Do not lower the scanning head support blocks while the belts are moving. Only lower the scanning head support blocks when the scanning head is going to be removed.
Note that the LI-3050C has its own power cable; it has no power switch, however, but is powered on using the on/off switch on the LI-3000C console back panel. To power the LI-3050C, follow these steps:
- Turn the LI-3000C off, or unplug its power cable.
- Connect the bulkhead connector on the end of the LI-3050C cable into the connector labeled ‘LI-3050C’ on the LI-3000C console back panel.
- Check the 115/230 voltage selection switches before connecting the AC cords or turning on the LI-3000C.
- Connect the AC power cord to the LI-3050C, and plug the other end into a power outlet. Use only safety agency approved (rated to at least 1 Amp) power cords (such as supplied by LI-COR) with a three prong “grounding plug”, and plug into a properly grounded or ground-fault protected Mains AC source (115/230 VAC, 50-60 Hz.)
- The LI-3000C can be powered by either battery or AC power. Use the power switch on the LI-3000C console back panel to turn on both the LI-3000C and LI-3050C.
Reset the system by pressing the white reset button (Figure 5‑1) located above the LI-3050C sample tray. Pressing the reset button has the same effect as pressing CLEAR X on the LI-3000C keypad.
Allow the 10 cm2 calibration disk (in the spares kit, p/n 6512-095) to pass through the scanning head to see if the belts are tracking correctly. Catch the disk as it passes out of the conveyer, or place a protective pad on the LI-3050C base plate. Failure to do this can cause damage to the finish.
Calibration accuracy of the LI-3050C is maintained by the relationship between the parameters ‘Cal Target’ (190), ‘3000 Threshold’ (95), and ‘3050 Threshold’ (80). If the LI-3000C scanning head is calibrated using these values, the specified LI-3050C accuracy should be achieved, and can be verified with the calibration disc(s).
The purpose of the ‘3050 Threshold’ parameter is not to calibrate out spurious counts on the belt system, but rather to provide 1% accuracy on a clean belt. If the belt is dirty (resulting is spurious counts), it is preferable to clean the belt rather than adjust the ‘3050 Threshold’ parameter.
If the belts do not track acceptably, loosen the hex screws (Figure 5‑1, label ‘E’) on the front of the instrument with a 5/32” hex key, and twist the upper pulley assembly. To produce inward belt travel, apply clockwise pressure to the upper pulley assembly (Figure 5‑1, label ‘F’). The opposite procedure is used for the lower pulley assembly; loosen the 3 hex screws on the lower pulley assembly (Figure 5‑1, label ‘G’). Do not remove the screws; loosen them only enough so that they remain finger tight. Retighten the screws and observe the belt track. Adjust as needed.
Using Realtime Capture Mode with the LI-3050C
The Realtime Capture function causes data from the LI-3000C to be transmitted through the LI-3000C console, and into the Windows Application Software.
Data are not stored in the LI-3000C; this function is most commonly used in combination with the LI-3050C Transparent Belt Conveyer Accessory, where large numbers of leaves are measured and captured directly with the LI-3000C Application Software. Bypassing the LI-3000C console can save time, as files do not need to be transferred to the computer after collection; because the files are not stored on the LI-3000C, they do not occupy memory in the instrument.
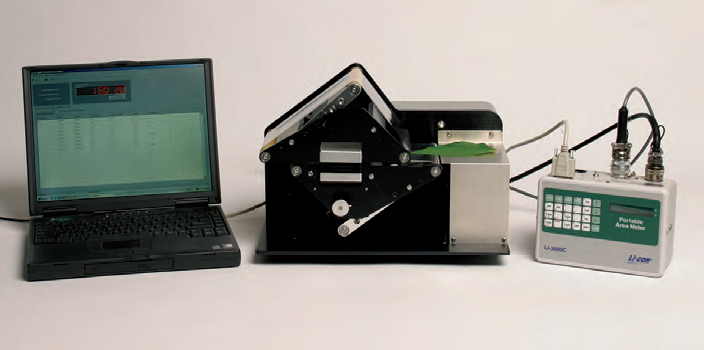
Connect the LI-3000C scanning head and LI-3050C as described earlier in this section. Connect the RS-232 or USB cable to the computer, and start the 3000-500 Windows Application Software. Choose Connect from the Connection menu, and choose USB or Serial. On the LI-3000C keypad, press the Menu key, and scroll down to Realtime Capture. Press Enter.

Press any key to exit Realtime Capture mode.
As leaves pass through the LI-3050C and LI-3000C scanning head, data are sent directly to the Windows Application Software, where it can be viewed, saved, and/or printed.
When in Realtime Capture mode, data shown in the main window of the Application Software can be cleared in a number of different ways:
- Clicking the reset button on the LI-3000C scanning head one time (when the LI-3050C is not connected).
- Clicking the reset button on the LI-3050C.
- Pressing the Clear X key on the LI-3000C keypad.
- Clicking the Reset Counter button in the main window of the Application Software.
Similarly, the current data can also be logged in a variety of ways:
- Clicking the reset button on the LI-3000C scanning head two times (when the LI-3050C is not connected).
- Pressing the Add key on the LI-3000C keypad.
- Clicking the Log Data button in the main window of the Application Software.
Note that when in Realtime Capture mode, clicking the Add button on the LI-3000C keypad, and double-clicking the button on the scanning head provide different functionality than when the LI-3000C is operating in its normal mode of operation.
Storage and maintenance
When the LI-3050C is not in operation, place a block under one edge of the lower pulley assembly to remove tension from the lower belt. Release tension from the upper belt also by loosening the upper pulley assembly knobs. This prevents excessive belt stretching.
If the storage area is not very clean it is best to remove the belts prior to idle periods of more than a few days. Wrap the belts in paper towels in a manner that prevents cohesion (e.g. the belt surfaces don’t adhere to one another).
The transparent belts can be cleaned with warm water and hand dish-washing detergent.
Do not lubricate the drive gears. This will interfere with the optical switch which encodes the sample length.