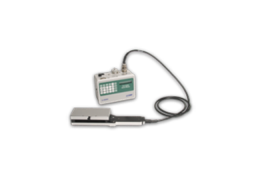
Replacing the LI-3000C Battery
Printable PDF: Replacing the LI-3000C Battery
(3000C_Battery-Replacement-20802.pdf)
Download this content as a pdf that can be saved to your computer or printed.
Replacement batteries (part number 3000C-905) are fully charged when shipped from LI-COR. After this battery replacement procedure is completed, the LI-3000C is ready for normal use. The LI-3000C uses a sealed lead-acid battery that should be recycled or disposed of properly.
Tools Required: Phillips head screwdriver, small wrench or nutdriver
Time Required: About 15 minutes
Follow these steps to replace the rechargeable battery pack in the LI-3000C:
- Remove the four screws on each side of the LI-3000C top panel/keypad.

- Carefully lift the top panel away from the enclosure; be cautious of the ribbon cable that is connected to the main PC board.
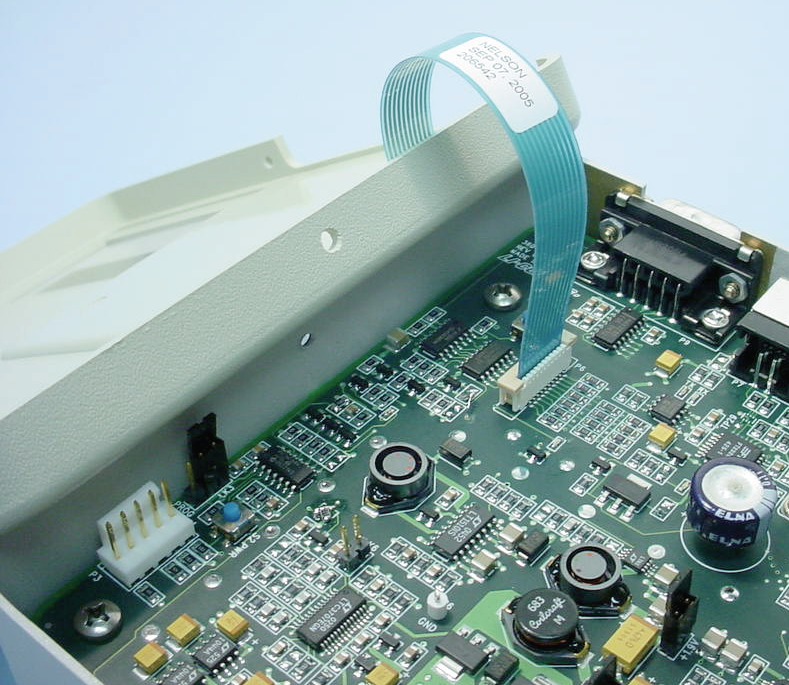
- Lift the retainer clip on the ribbon cable connector, and pull the ribbon cable up and out of the connector.
- Set the top panel/keypad assembly aside.
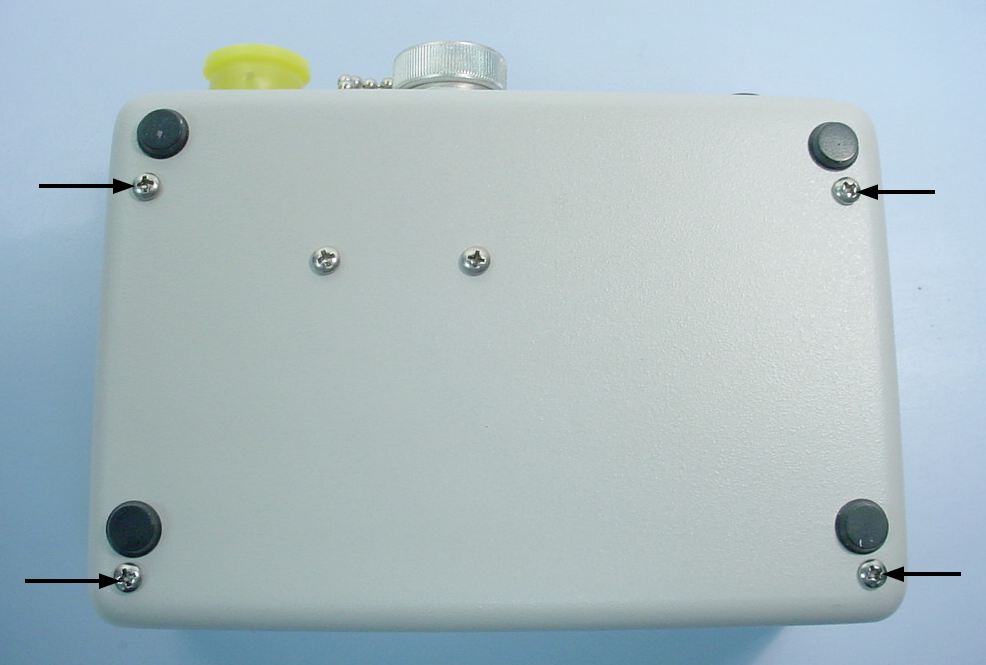
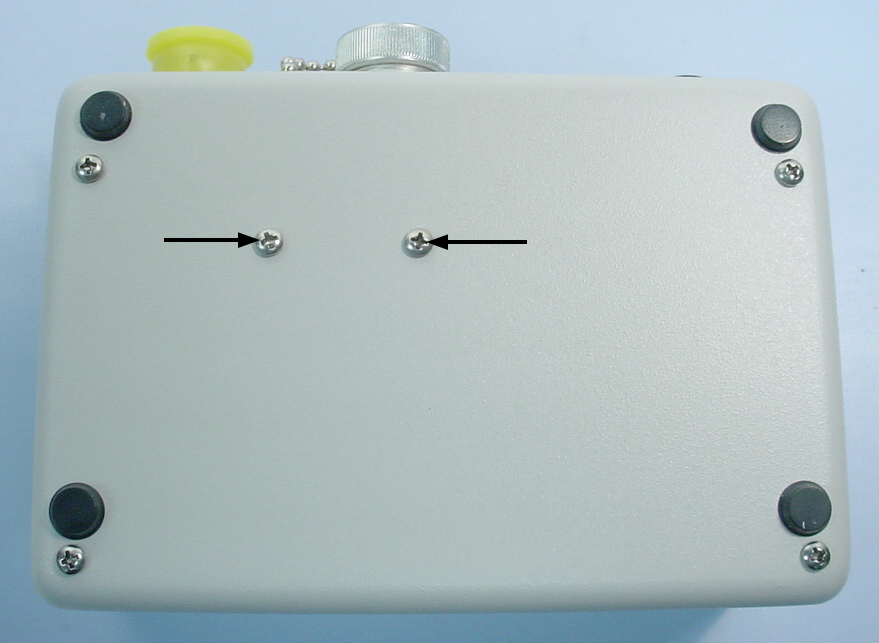
- Remove the four screws indicated below from the bottom of the instrument enclosure.
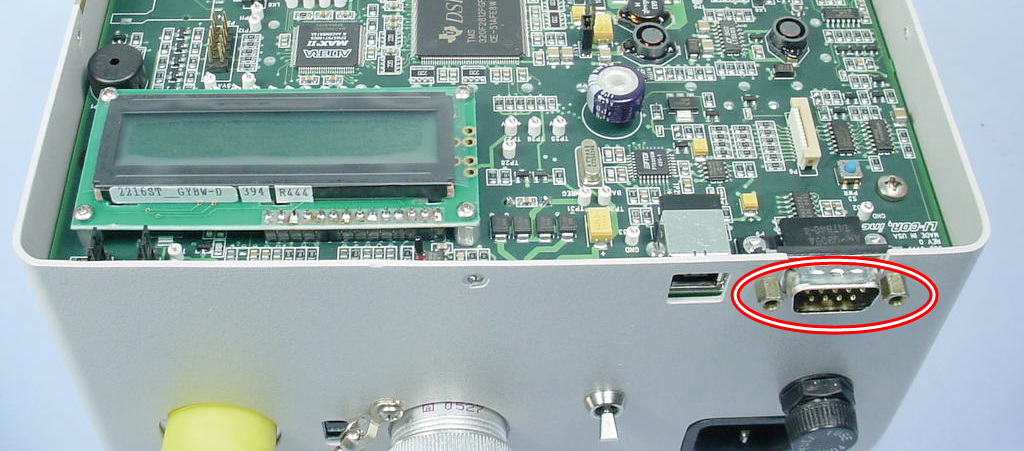
- Remove the two screw locks from the RS-232 connector using a nutdriver or small wrench.
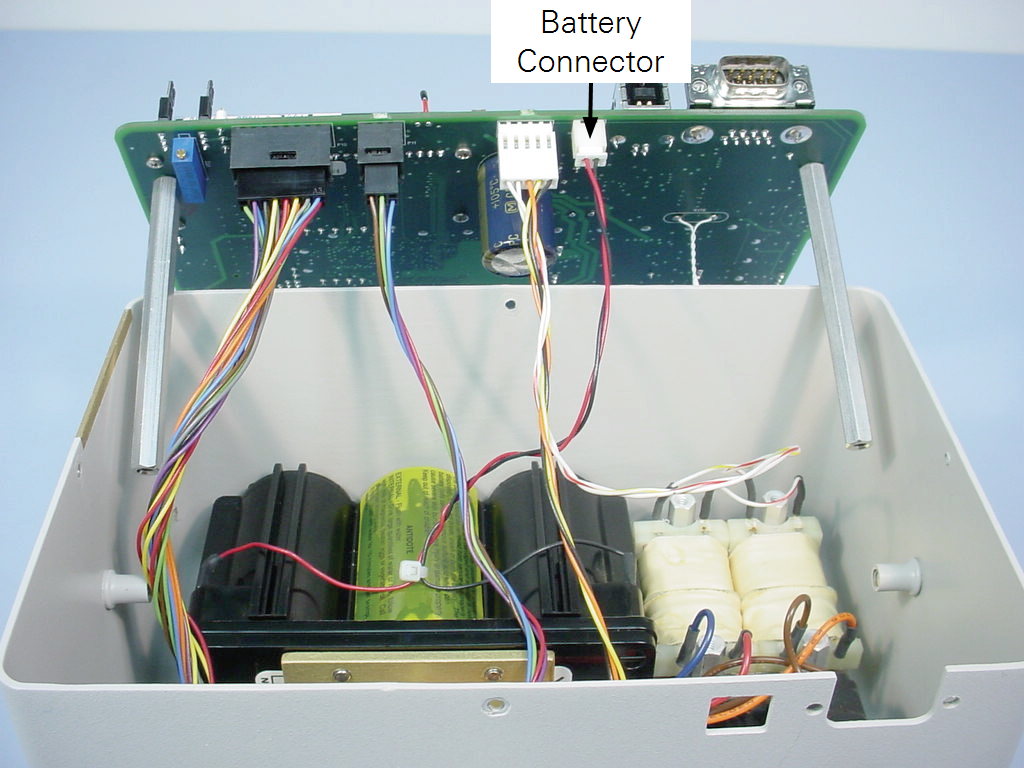
- Carefully lift the PC board out of the enclosure and unplug the battery connector.
- Remove the two screws shown below that secure the battery bracket, and remove the battery assembly from the enclosure.
- Install the new battery assembly in the enclosure using the two screws removed in Step 7 and plug in the battery connector.

- Carefully position the PC board in the enclosure and loosely install the four screws on the bottom of the enclosure.
- Loosely install the two screw locks on the RS-232 connector. After all of the screws are started, tighten the four screws on the bottom of the enclosure and the two screws on the RS-232 connector.
-
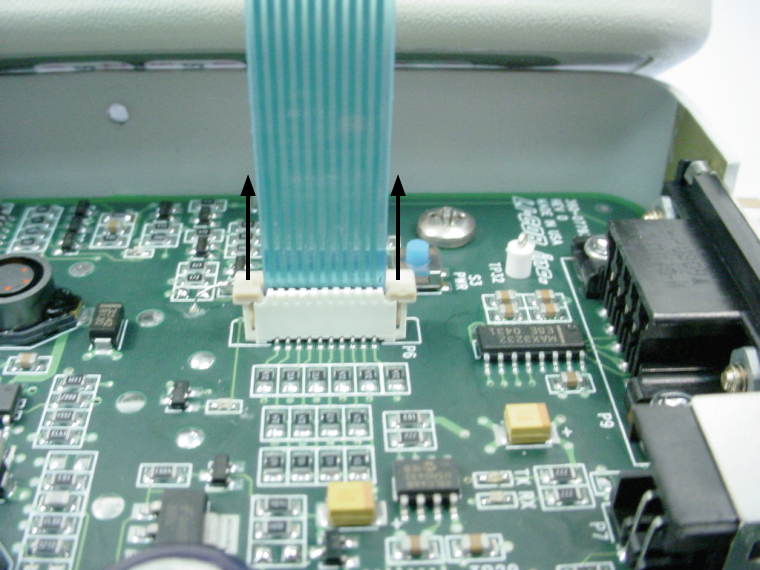
- Check the ribbon cable connector and make sure the retainer clip is in the “up” position.
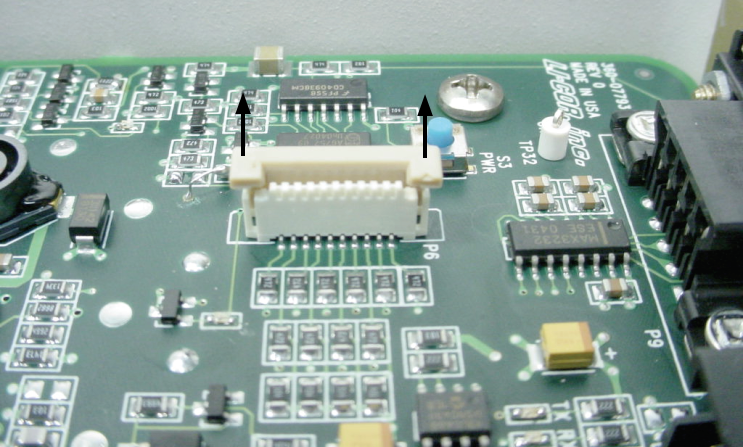
- Carefully insert the ribbon cable into the connector, making sure it is fully seated in the connector, and then press the retaining clip down to secure the ribbon cable.
- Position the front panel, and fasten with the four screws removed in Step 1.
- Set the Date and Time in the instrument as follows:
-
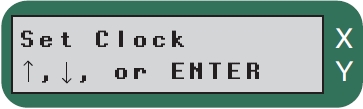
- Turn the instrument ON, and press the MENU key.
- Press ↑ or ↓ to scroll to the Set Clock function. Press ENTER.
- The date as currently set is displayed on the top (X) line.
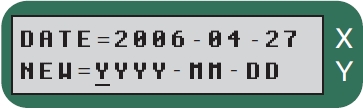
- Use the numeric keys to enter the current date. Press ← to erase an incorrect character. Press ENTER when finished.
- The display will then show the time on the top (X) line, such as:
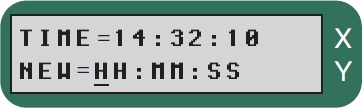
- Time is displayed on a 24 hour clock (e.g. 14:32:10 = 2:32:10 p.m.). Use the numeric keys to enter the current time. Press ← to erase an incorrect character.
- Press ENTER when finished; the display returns to the Set Clock function.
- Press ENTER to confirm that the new date is displayed; press ENTER again to confirm that the new time is displayed; press the AREA key to exit the MENU functions.