Preparations
Follow the procedure below when you are getting started.
Operational check
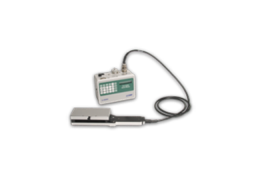
The following procedure can be used to connect the scanning head to the readout console and verify that the LI-3000C is working properly.
- Connect the scanning head to the readout console while the ON/OFF switch is OFF. Mate the cable connector with the connector on the back panel of the readout console, and then push in and turn the collar clockwise until it locks into place. Switch the ON/OFF switch to ON.
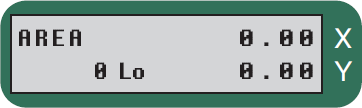
- If the symbol "Lo" appears on the display (see Recharging the Battery) when the readout console is turned on, the internal battery needs charging. The low battery message is displayed when approximately 1 hour of operational capacity remains in the battery. If your battery is low, skip down to the information on recharging the battery found later in this section.
- If the message "CALIBRATION LOST PRESS ANY KEY" is displayed when the instrument is turned on, the calibration table has been deleted. The scanning head can be calibrated to the console as described in Section 5.
- Open the scanning head by pressing on the thumb lever on the upper section. Hold the scanning head inverted and look into the long narrow window near the edge of the head. Pull the length encoding cord out and retract it. You should be able to see the LEDs as they rapidly pulse.
- NOTE: Retract the cord by holding the knob and allowing the cord to draw into the head by its own force. The cord should not be allowed to snap back into the head. Also, do not push the cord and cause slack; internal backlash may result.
- If you have been holding the head open while pulling the encoding cord, you will notice that numbers are being accumulated on the display. This is because the photodiodes will only accept the collimated light from the LEDs when the components are positioned properly. This characteristic was designed into the instrument to prevent stray light from affecting normal data collection. With the scanning head open, the LEDs and the photo- diodes are out of alignment, so area is recorded as the length encoding cord is moved. If the cord is drawn or retracted at a rate greater than 1 m/second, an error message is displayed (the error message can be cleared by pressing the CLEAR X key).
- Clear any logged area data by pressing the white reset button located on the scanning head handle.
Recharging the battery
The LI-3000C uses a sealed lead acid battery. This battery is rechargeable, and gives about 12 hours of use. The symbol Lo appears on the display (as shown below) when approximately 1 hour of battery life remains. Using the instrument until automatic shutoff occurs will cause no damage to the instrument; the last measurement data may be lost, however.
User data are not lost in the event of battery discharge. To prolong the useful life of the battery, however, charge continuously or at least every 2 months for 5 or more hours during long-term storage.
To charge the battery, slide the voltage selector on the readout console connector panel to the proper voltage. Connect a safety agency approved (rated to at least 1 Amp) power cord (such as supplied by LI-COR), which has a three-prong “grounding” plug in good condition, to the readout console, and plug the cord into a properly grounded or ground-fault protected Mains AC source (115/230 VAC, 50-60 Hz).
The battery should normally be charged overnight. An automatic charge rate adjustment occurs after 12 hours of charging, to allow the battery to be charged indefinitely. The instrument may be operated while it is charging; however, the time needed to fully recharge the battery will be increased. Hint: Charging during a lunch break can add several hours of operational time on a long day of field measurements.
In the unlikely event of a charging circuit malfunction in which the charging current remains at maximum or out of control, a ‘HI’ indicator will appear on the display, and an audible beep will sound every few seconds. If this occurs, disconnect the power cord and contact technical support at LI-COR. You can continue to use the instrument until repairs can be made, but should disconnect the power cord whenever the ‘HI’ message is displayed.
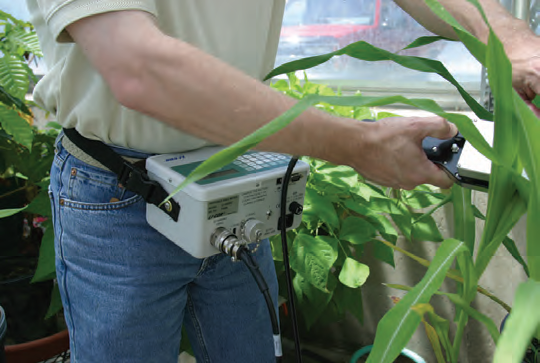
Using the waist strap
An adjustable strap has been provided so that the readout console can be worn around the waist for portable operation. The waist strap is connected to the console using the screws found on the right and left sides of the console.
For maximum comfort, the waist strap should be positioned so that the strap is about the same level as a belt on a pair of pants. In this position the weight of the console will rest on the pelvic bones and not on the "fleshy" part of the back.