Adjusting and Replacing the LI-3050C Transparent Belt Conveyer Accessory
Printable PDF: Adjusting and Replacing the LI-3050C Transparent Belt Conveyer Accessory
This content as a pdf that can be saved to your computer or printed.
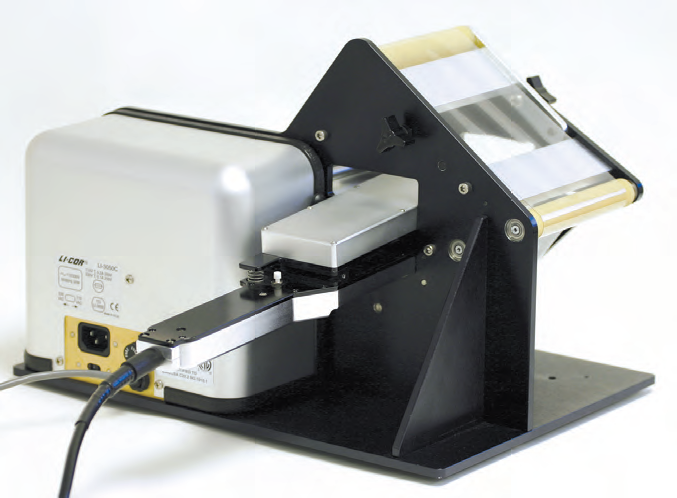
If the upper belt does not track acceptably, loosen the hex screws ‘E’ on the front and back of the instrument with a 5/32” hex key, and twist the upper pulley assembly ‘A’ slightly. To produce inward belt travel, apply clockwise pressure to the upper belt assembly. The opposite procedure is used for the lower belt assembly ‘C’ loosening hex screws ‘G’.
Do not remove the screws; loosen them only enough to twist the pulley assembly. They should remain finger tight. Retighten the screws and observe the belt tracking.
This procedure may need to be repeated. Both sides may require this twisting action.
NOTE: Only attempt the following step if the previous step was not successful.
If the belts still do not track acceptably, then slightly loosen the pulley assembly spacer screws on the belt tensioners with a flat blade screwdriver, and again twist the pulley assemblies (‘A’ and ‘C’). There are screws on both sides. Do not remove the screws; loosen them only enough to twist the pulley assembly. They should remain finger tight. Retighten the screws and observe the belt tracking. This also may require repeating.

- A – Upper pulley assembly knobs
- B – Lower pulley assembly idler arm
- C – Scanning head support block knob
- D – Reset button
- E – Upper pulley assembly hex screws for belt tracking adjustment
- F – Upper pulley assembly
- G – Lower pulley assembly hex screws for belt tracking adjustment
- H – Sample tray