Printable PDF: Tips for the LI-3100C Lamp
Tips for the lamp in LI-3100, LI-3100A, and LI-3100C.
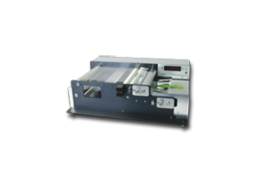
Extending Lamp Life
LI-COR recently improved the method for preparing the fluorescent lamp in the LI-3100 series Area Meters. The lamp now provides greater uniformity along its entire length, which minimizes variations in area data over the sample lane positions, and minimizes errors due to changing the lamp.
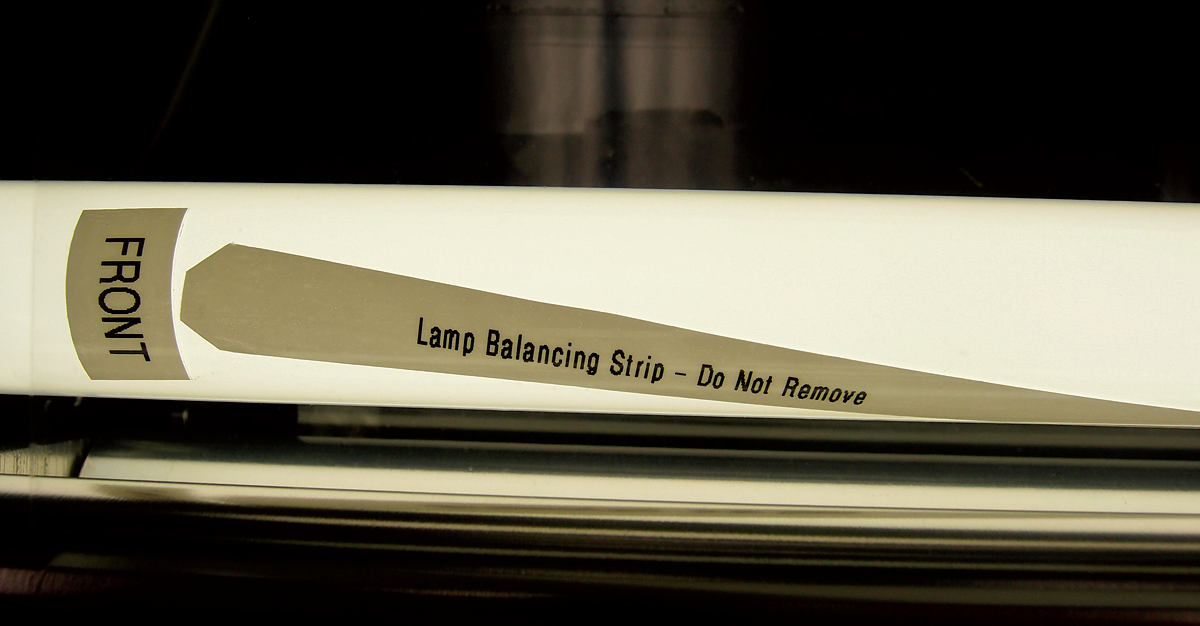
Each lamp is individually calibrated to mitigate areas of the lamp that may be brighter relative to other areas; along the ends of the lamp, for example. In Figure 1‑1 below, note that Lamp Balancing Strips are now strategically placed to reflect light to areas for higher illumination and create more uniform illumination along the length of the lamp.
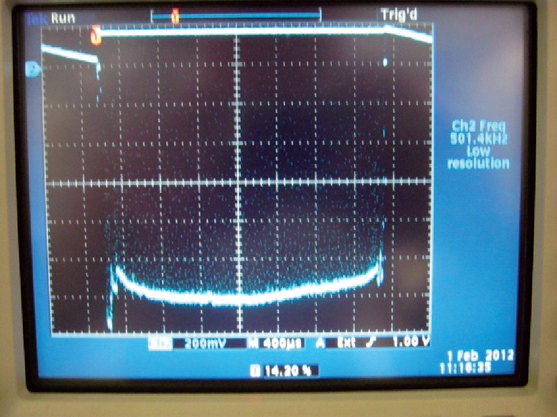
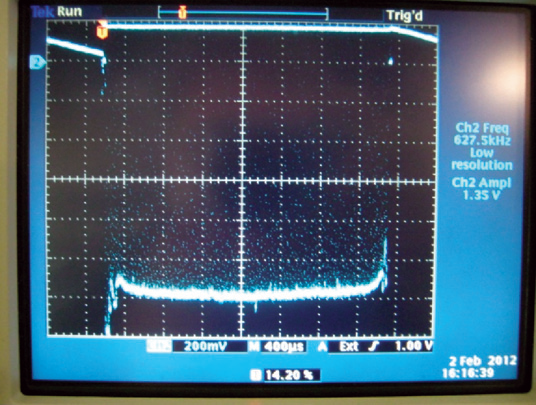
The waveforms shown below illustrate how the Lamp Balancing Strips help provide more uniform illumination; the leftmost waveform in Figure 1‑2 below shows illumination of the lamp before calibration. The rightmost waveform shows illumination after calibration; note that the waveform is much flatter along its length, particularly at both ends.
The lamp provided with the LI-3100 should be used as long as possible; the lamp life should provide for a minimum of 5,000 start/stop cycles, or up to 10,000 hours of illumination when used for sessions of one hour or more. Better data are obtained by allowing the lamp to warm up for at least 5 minutes before making measurements. It is also better to run the lamp steadily for several hours rather than starting it repeatedly during the course of a day for short runs of only a few minutes.
Spurious Counts
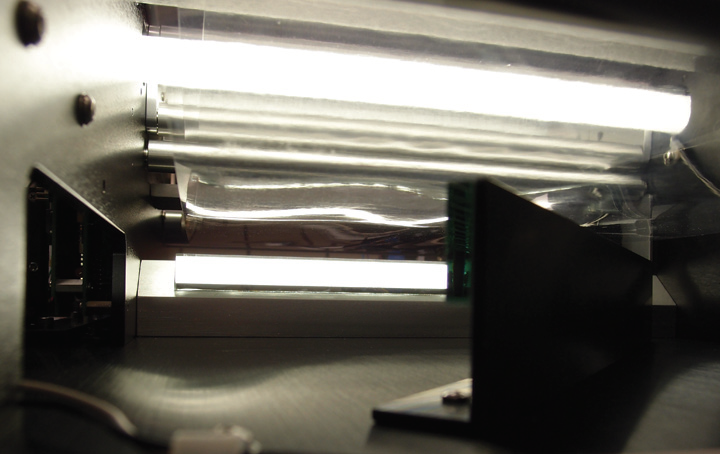
Excessive blackening inside the glass near one or both ends usually indicates a burned out lamp. If the lamp is suspected in causing spurious counts, observe the bottom of the lamp by looking at its reflection in the long mirror directly below the lamp. To do this, position yourself at eye level with the lamp, looking from beneath the large belt rollers at the left end of the instrument (as you face the front of the instrument). There is a second angled mirror visible from this vantage point; look to the left of the angled mirror, toward the long mirror, where the reflection of the lamp will be visible (Figure 1‑3).
If you can see black spots that are not on the belt, but appear to be inside the lamp, they are generally small circular pieces of mercury residue. You can tilt the instrument about 30° toward either end of the lamp to roll the mercury residue to one end of the lamp, where they will disappear. Spurious counts due to calibration errors, or dirty mirrors or belts are not causes for lamp replacement.
Lamp Fails to Light
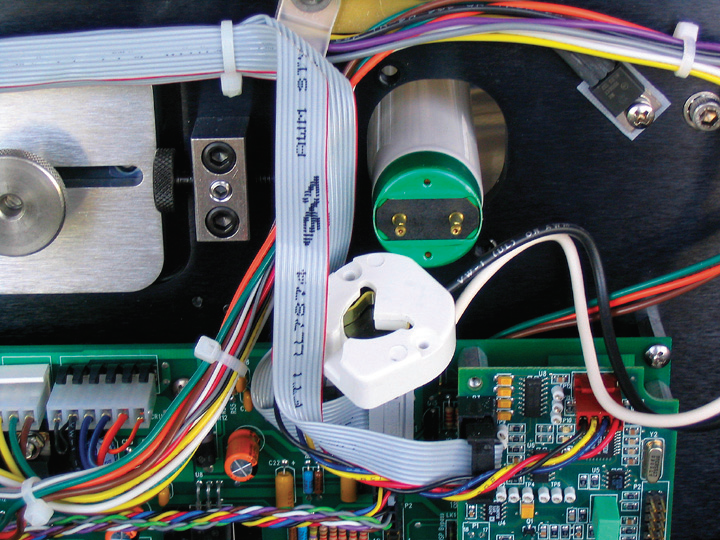
When the LI-3100 is turned on, the transformer nearest the motor makes a faint noise, except when the lamp start button is depressed; the noise indicates the main circuits are working properly. The motor noise can mask the transformer, so if necessary the back cover can be removed to better hear the transformer. When the lamp start button is depressed the ends of the lamp should glow slightly. If the lamp ends do not glow on startup, make sure the fuse has not blown, and that the line voltage is set correctly. Check to see that the lamp is inserted correctly; the pins should be at about a 60° angle, and then twisted until the pins are horizontal to snap into the proper position (Figure 1‑4).
Lastly, we recommend that you depress the lamp start button for 2 seconds, and then release the button quickly so that the button snaps back out. It may take several attempts before the lamp lights; this is not a defect, and does not mean that the lamp needs to be replaced. The faint noise from the transformer resumes when the lamp lights. If the lamp flashes but does not light after several attempts, the lamp start circuit is working, but a more serious problem with the inverter or power supply may be indicated.
Lamp Replacement
When lamp replacement is necessary, such as due to breakage, install the new lamp as described in the LI-3100 Instruction Manual, Sections 2.1, 2.3, 5.1, and 8.3. After replacing the lamp, perform a lamp calibration as described in Section 3.4, using the 9931-021 perforated calibration pack.