Installing the 600-01F fluorometer upgrade kit
Printable PDF: Installing the 600-01F fluorometer upgrade kit
(600_Fluorometer-installation-guide.pdf)
Download this content as a pdf that can be saved to your computer or printed.
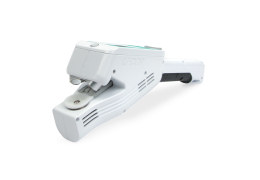
The 600-01F Fluorometer Upgrade Kit for the LI-600 adds the fluorometer module to the porometer-only model (LI-600P) to convert it to the porometer/fluorometer model (LI-600PF). The kit has the following accessories for your instrument.
| Description | Quantity | Part Number |
|---|---|---|
| Fluorometer optics assembly | 1 | 9960-308 |
| Foam swabs | 4 | 610-16093 |
| Screws | 8 | 150-14386 |
Installing the fluorometer
The following tutorial describes the steps to take when removing the fluorometer blank and inserting the fluorometer.
- Prepare the LI-600.
- Power off the instrument. Properly ground yourself to avoid electrostatic discharge that can damage the electronics. Use an anti-static wrist strap or electrostatic discharge grounding mat or occasionally touch bare metal that has a clear path to the ground, such as an unpainted computer case.
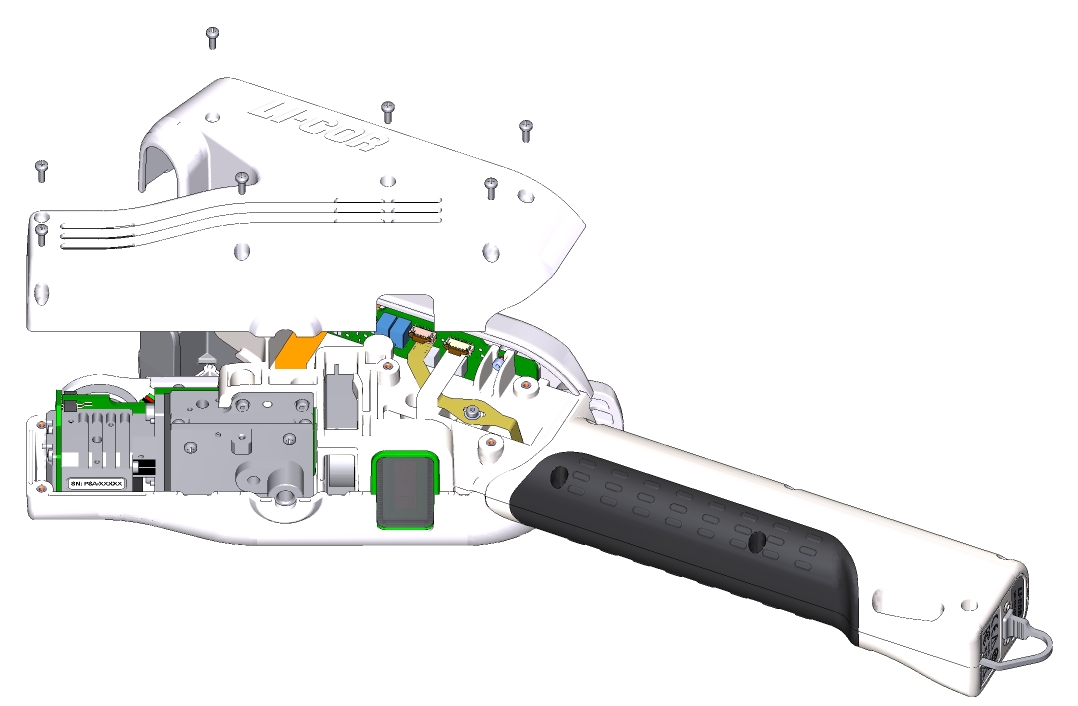
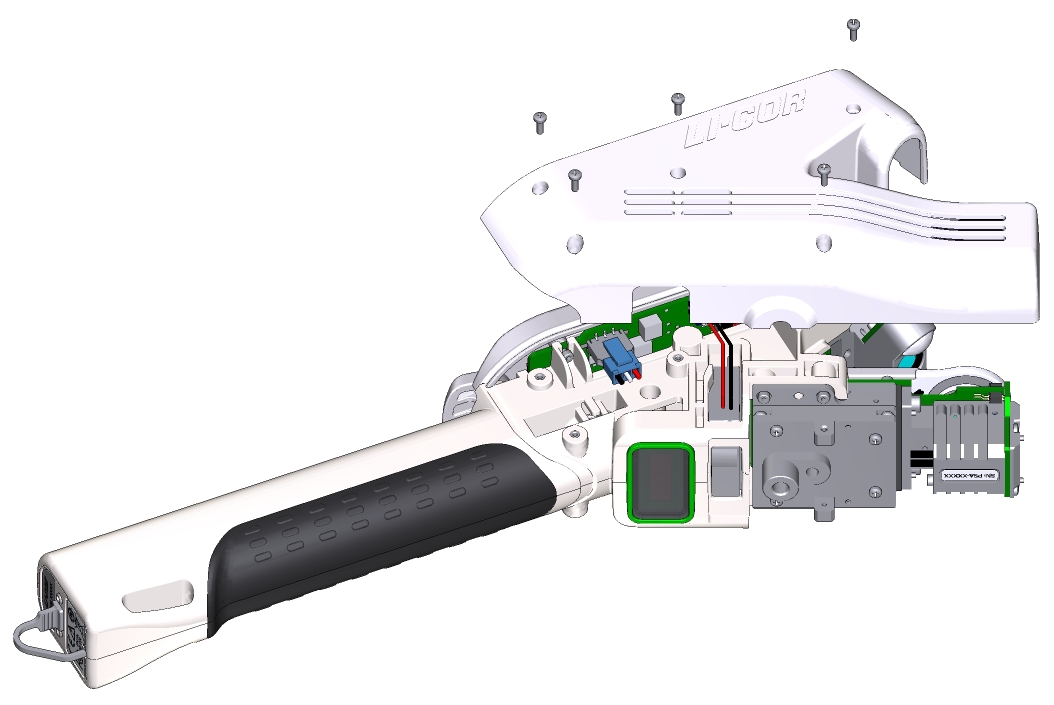
- Remove the shells.
- Remove the seven screws on the left then the five screws on the right of the instrument head. Set the shells safely aside.
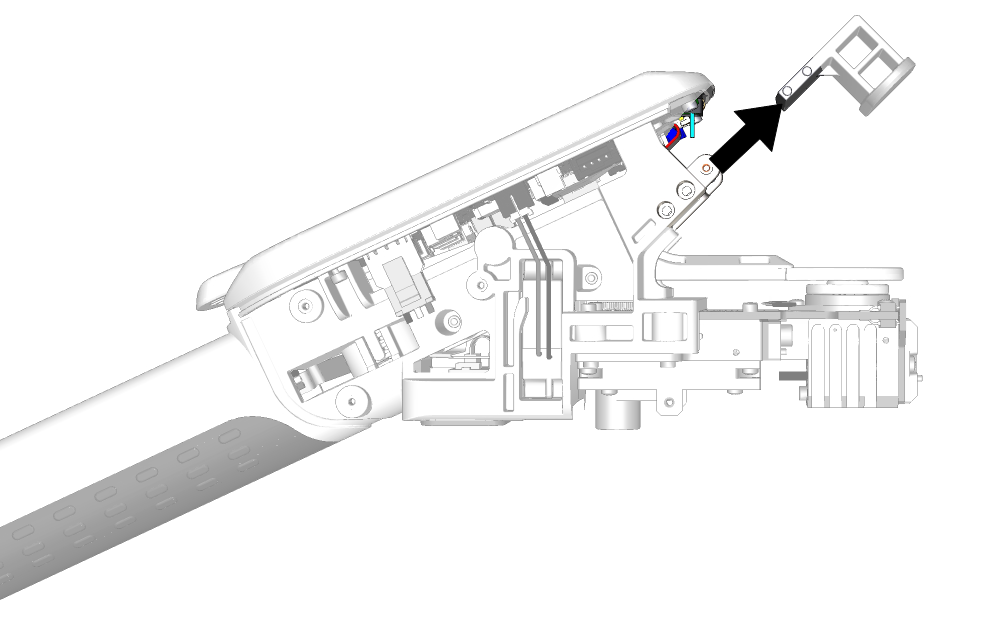
- Remove the fluorometer blank.
- The fluorometer blank is held in place by bosses, not screws, and is installed at a slight angle; pull out the fluorometer blank at the same angle for easy removal.
- Keep the fluorometer blank if desired or discard it.
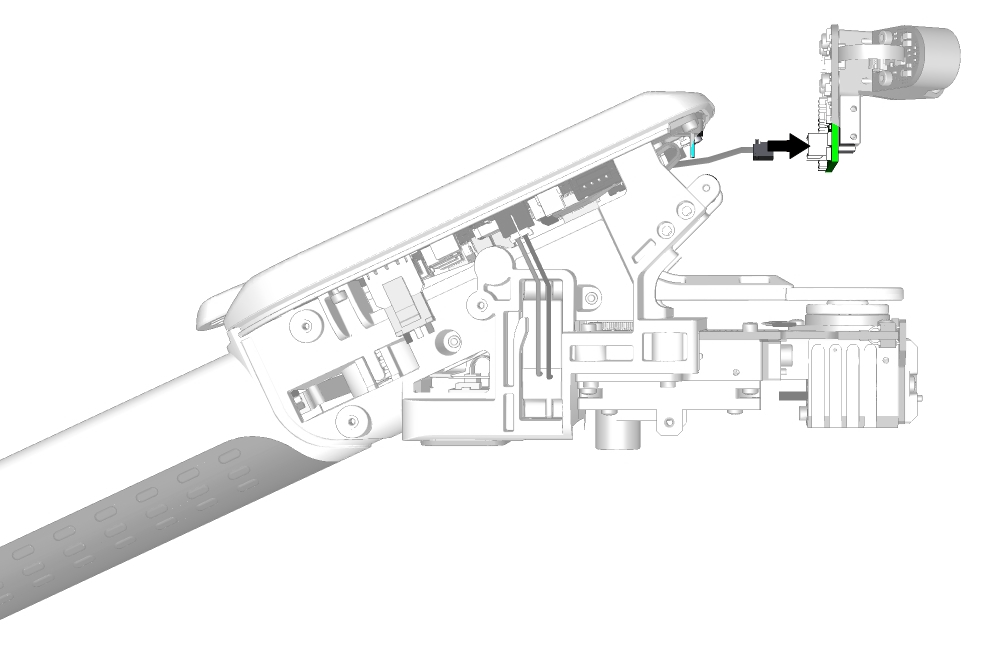
- Attach the gray ribbon cable.
- Connect the gray ribbon cable to the fluorometer, positioning the fluorometer board perpendicular to the aperture clamp for easy attachment.
- Always handle the aluminum parts of the fluorometer and remain grounded as a safety precaution. If the optics are accidentally handled, clean them using foam swabs after installation is complete.
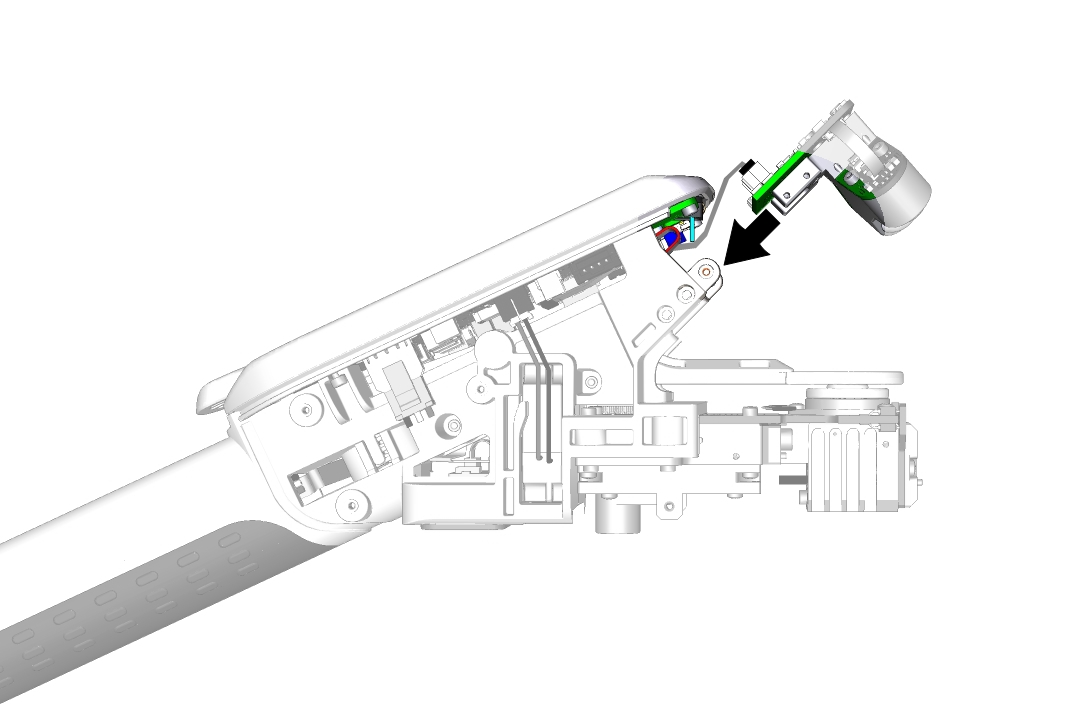
- Insert the fluorometer.
- Slide the fluorometer into position, folding the connected gray ribbon cable behind the fluorometer.
- Ensure that the aluminum face of the fluorometer is flush with the plastic face of the fluorometer compartment.
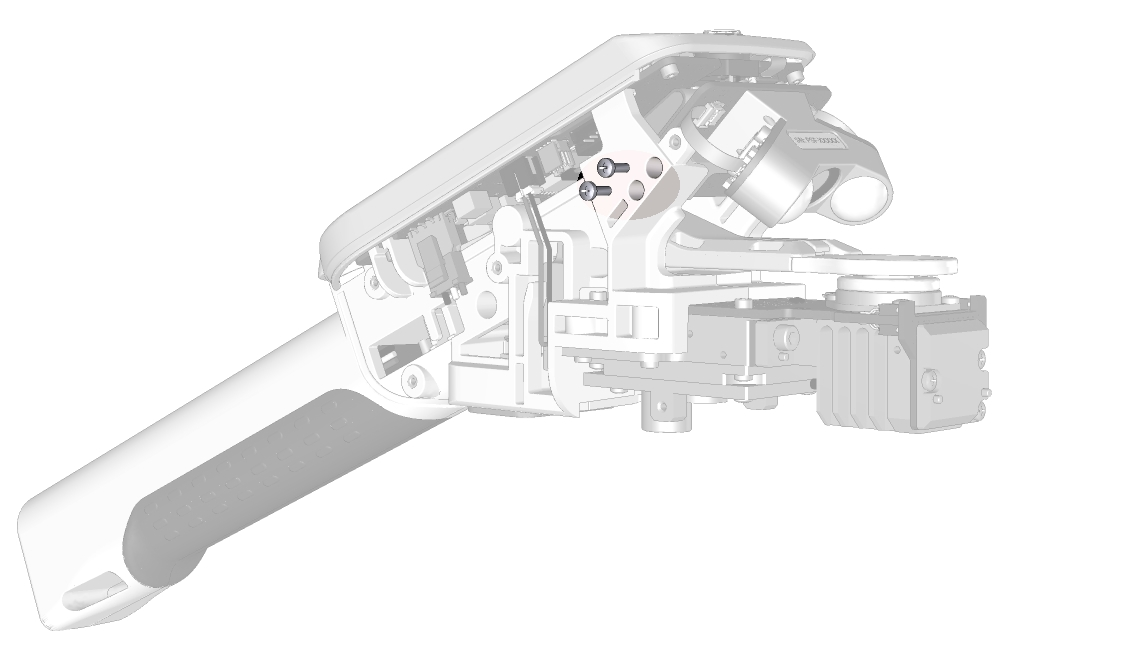
- Secure the fluorometer.
- Insert two screws on each side of the fluorometer to attach it to the instrument then torque them to secure it. Always insert all four screws prior to torquing them. Do not overtorque the screws; torque recommendation is 32 oz-inch or 0.226 N-m.
- Replace the shells.
- Insert the five screws into the right shell then the seven screws into the left shell of the instrument head. Torque the screws to secure both shells. Always insert all the screws for a given shell prior to torquing them. Do not overtorque the screws; torque recommendation is 32 oz-inch or 0.226 N-m.
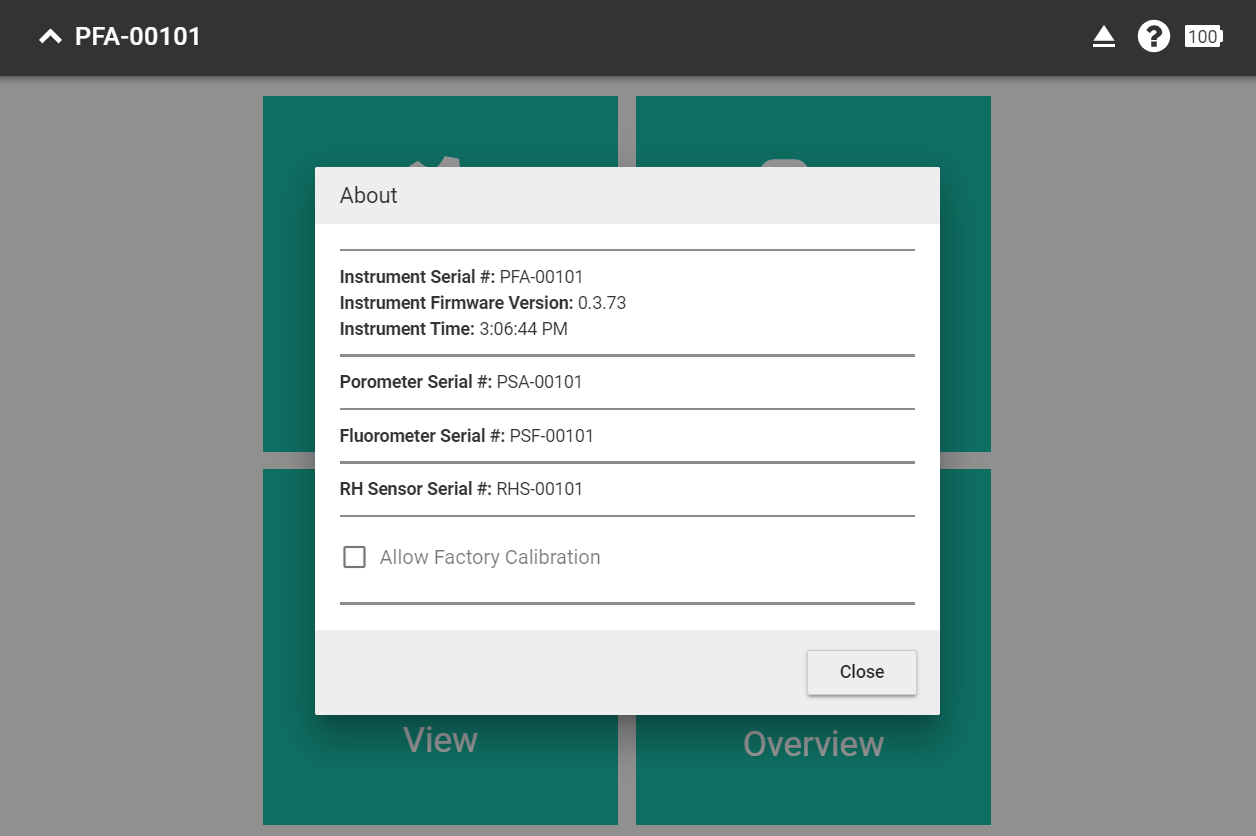
- Verify the fluorometer.
- Power on the instrument and connect it via USB cable to the computer. In the LI-600 computer software, open About Instrument and verify that the fluorometer serial number is present and matches that of the fluorometer module; serial number and calibration coefficients are automatically identified by the instrument. Alternatively, open Live View and verify that fluorometer values are detected.