
Catch Rod Repair Kit
Instructions for replacing the catch rod in the LI-6400/XT sensor head handle.
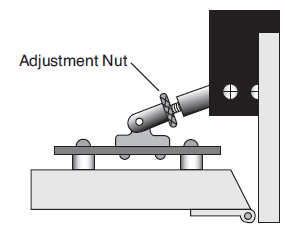
- Compress the sensor head handle and open the leaf chamber, if it is not already open. Unscrew the adjustment knob (turn counterclockwise) completely, until it is free of the upper leaf chamber cuvette.
-
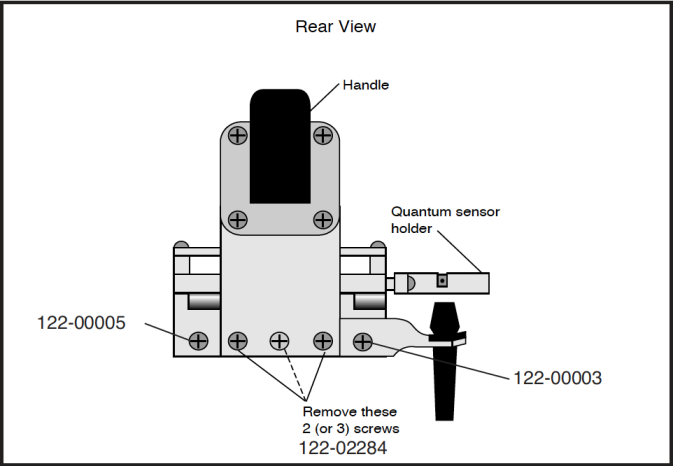
- Remove the two screws that attach the handle to the rear of the leaf chamber and remove the handle. Unplug the log switch connector, if necessary.
- NOTE: Instruments manufactured before July, 1995, have three screws that secure the handle. Note that the center screw is shorter than the other two.
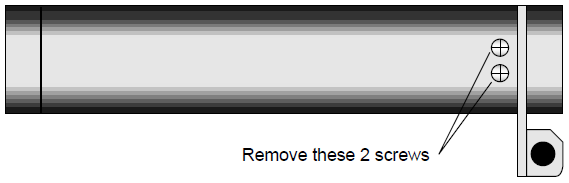
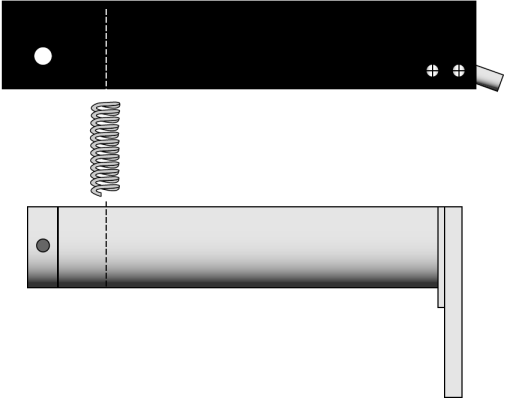
- Use a 7/64” hex head wrench to remove the hex head screw at the rear of the handle. The upper (black) portion of the handle can now be removed. The spring will also fall out.
-

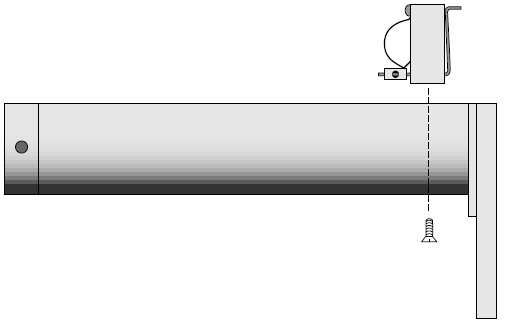
- Remove the two screws on the underside of the handle that hold the catch rod mount.
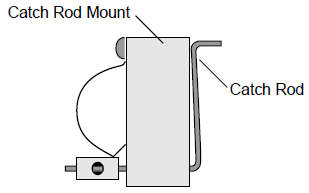
- Install the new catch rod mount assembly with the catch rod facing the front of the handle.
-
- Reassemble the handle. Turn the black upper portion of the handle over and place the spring in the recessed hole closest to the front of the handle.
-

- Turn the sensor head over and put the two pieces of the handle together, keeping the spring in place. Grip the two halves of the handle in one hand and compress the spring until the hex head screw can be inserted. Tighten the screw securely.
-
- Reattach the handle to the rear of the leaf chamber.
- Reattach the adjustment knob.
- Reconnect the log switch connector, if necessary.