Getting Data From Serial Devices
Data for Real Time Measurements
Suppose you have some sort of instrument that outputs data on RS-232 that you’d like to feed into the LI-6400. Suppose that each record that it output had a time stamp, a temperature, and a relative humidity, so a short piece of the data stream might look like what is shown in Figure 11‑40.

For each item you’d like to pick off from this data stream, you need to define a variable. We’ll add two: one for the temperature we’ll call xTair, and one for humidity we’ll call xRH. Once that’s done, we need to configure the Comm port for this.
Adding xTair and xRH
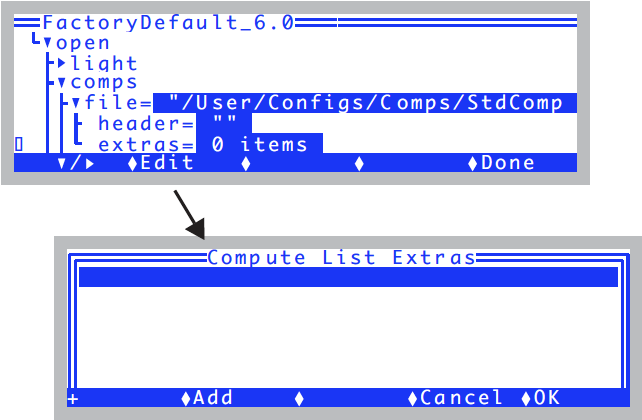
- Access the “extras” node in the configuration tree
- In the configuration tree (Config Menu | View/edit), find the <open><comps> <file> <extras> node, and edit it (Figure 11‑41).
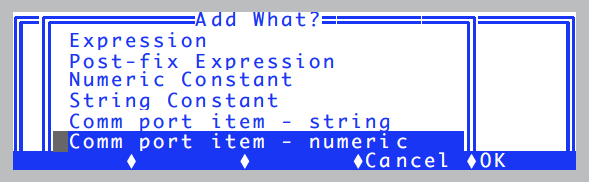
- Add a numeric comm port item.
- Press f2 (Add), and you will be prompted to identify the type of item you wish to add. Pick Comm port item - numeric (Figure 11‑42).
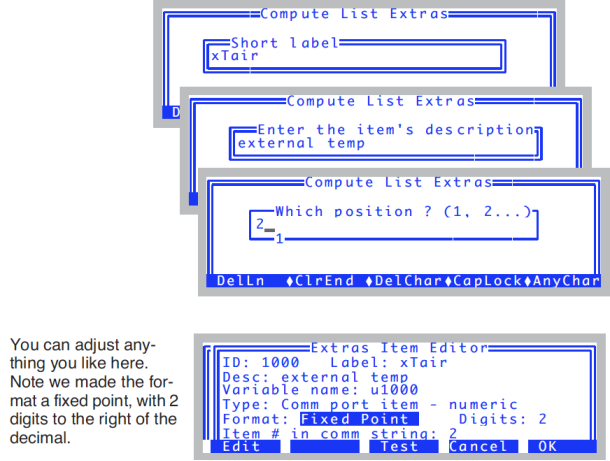
- Fill in the details
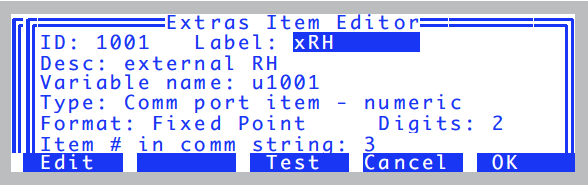
- You will be prompted for a label, a description, and what position in the incoming RS-232 record to look for the value (Figure 11‑43).
- Finish it
- Press f5 (OK).
- Now add an RH variable
- Repeat the process to add a second item. Call it xRH. It will be the 3rd item in the incoming data stream.
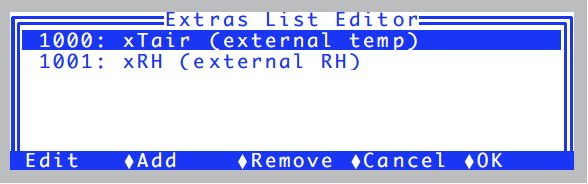
- After you OK it, your extras list should look like (Figure 11‑45).
- OK the List
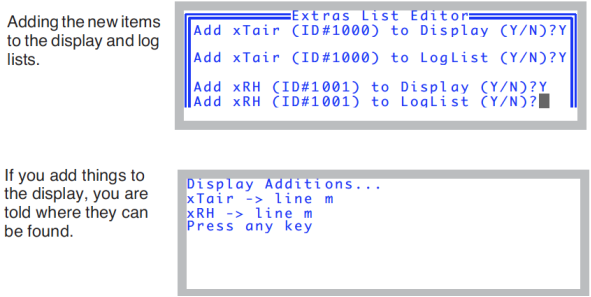
- Press f5 (OK) to keep the list. You will be asked if you want to add these items to the New Measurements display, and to the log list. You do, so press Y in response to each question (Figure 11‑46).
Configuring the Comm Port
To make this work, we need to configure the comm port, in two regards: 1) the baud rate, data bits, etc., and 2) Tell OPEN to parse incoming data. This latter item will happen automatically, since you have a user item that requires it.
- Access the Comm Config node
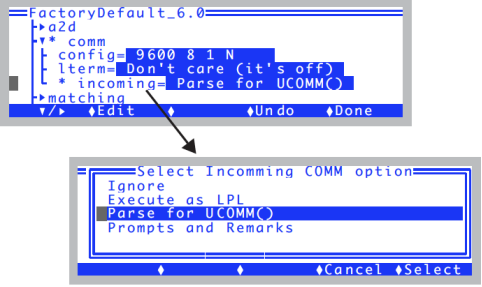
- In the configuration tree, find the <open> <comm> node (Figure 11‑47).
Some Rules to Remember
Incoming data records are parsed according to the following rules:
- Records end with a newline character
- This character has a decimal value of 10.
- Delimiters are space, tab, and comma
- This record:
-
123,45.67 89
- would be considered to have three items available; Item #1 is “123”, and item #2 is “45.67”, and item #3 is 89 (note there are multiple spaces between items 2 and 3).
- Double quotes override delimiter characters
- The record
-
10.56 "123,45.67",The End
- would be considered to have four items: Item#1 is “10.56”, item #2 is “123,45.67”, item #3 is “The”, and item #4 is “End”. If an item is quoted, the quotes are stripped from the returned string.
- String and Numeric
- Lines are parsed as strings. If you are specifically looking for a numeric item, the string piece that is parsed has one more step to convert it to a floating point value. If the string is not a valid number, the value will be 0.
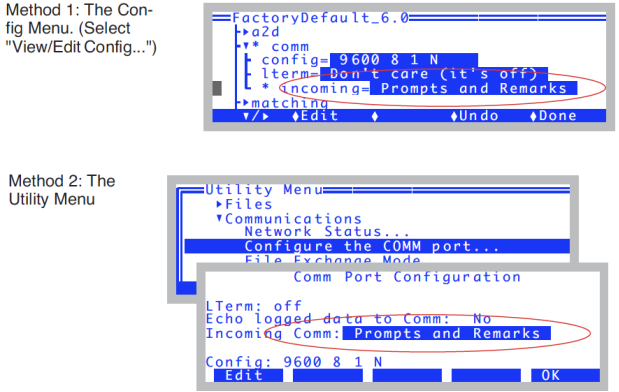
Data for Prompts and Remarks
Suppose you have a bar code reader, and want to be able to scan a label associated with each measurement site right before the measurement. The destination for this information might be the remarks field in a file, or a constant that you are prompted for prior to each measurement. All you have to do to make this happen is configure the comm port to match your (RS-232) bar code reader, and set the incoming comm node in the configuration to “Prompts and Remarks”.