
Match Valve Maintenance
Unsticking the Match Valve
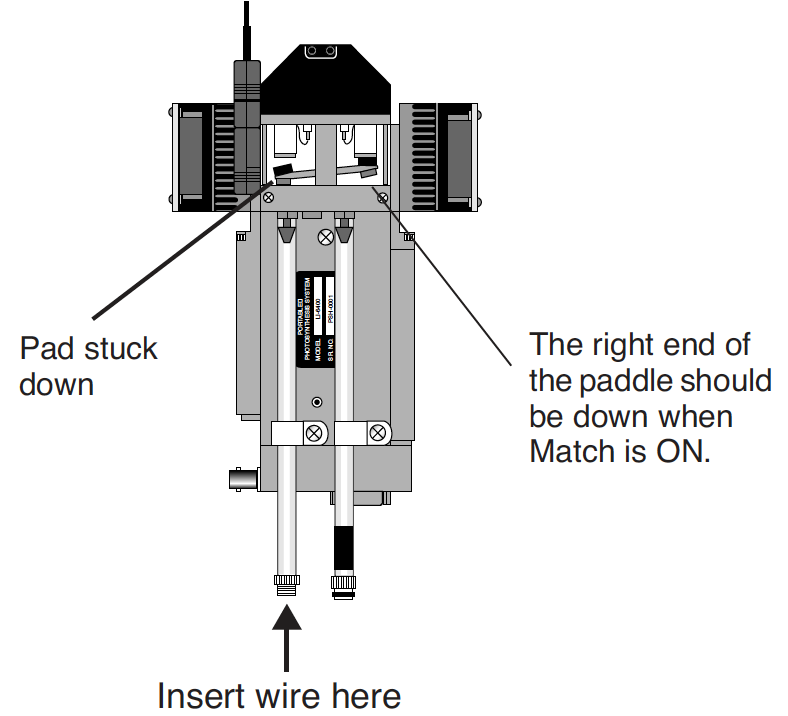
The match valve pads are coated with molybdenum disulfide, a grey powdery dry lubricant, used to prevent the pads from sticking. These pads might have a tendency to stick down (usually after a period of storage) and prevent the valve from moving. There are a few courses of action to take, should this happen to you.
Exercise
Home Menu|Tests & Diagnostics|Match Valve Tester is a program that allows you to “manually” (via the function keys) control the match valve.

Often a stuck valve can be freed by cycling the valve several times. Note that when one exits this program, the match valve is returned to the position it was in when the program was launched.
Orthoscopic Surgery
If the “Match Valve Tester” solution fails, there is a direct approach, requiring a thin, stiff piece of wire. Disconnect the IRGA tubing, and insert the wire up the appropriate tube (usually the reference tube) and through the hose barb to pop the match valve free. Subsequent exercise using the “Match Valve Tester” program is recommended.
Open Heart Surgery
If all else fails, or if the problem persists, then perhaps a cleaning and lubrication is warranted. To do this, lay the sensor head on its back so it is level.
- Disassemble
- Remove the four screws that hold the black cover in place, and lift off the cover. Lift the match valve housing up from the paddle end, exposing the pads. Do not remove the plastic cover.
-
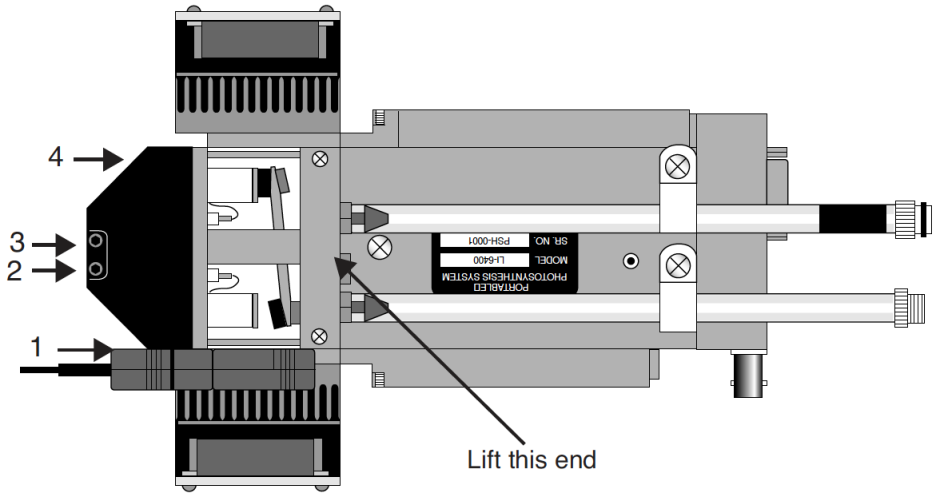
Figure 19‑27. Remove the match valve cover by removing four screws, and lifting the cover from the indicated end. - Clean the pads
- Clean the surface of each pad with alcohol, then apply the molybdenum lubricant1. Rub the powder into the surface of the pad with the side of a toothpick. Tap off the excess powder so it will not enter the system plumbing.
- Clean the holes
- Clean the edges of the holes where the pads make contact.
- Reassemble
- Replace the match valve, and the black cover. Make sure that the two wires under the black cover are not pinched. Do this by sliding the cover back and forth a bit to see if you can feel the wires between the cover and the block.