
Printable PDF: 6400-12 Coprocesser Installation Guide
This content as a pdf that can be saved to your computer or printed.
CAUTION! The 6400-12 Coprocessor chip is a static-sensitive part. DO NOT REMOVE THIS PART FROM THE STATIC BAG until you are properly grounded at a static-free work station. Also, this installation requires a fair amount of manual dexterity.
Installation
Disconnect the batteries and remove from the console. Disconnect all hoses and cables from the console.
Remove the eight screws (nine screws on console serial numbers PSC101-160) on both sides of the LI-6400 console case with a Phillips head screwdriver. Grip the carrying handle and lift the card cage straight up and out of the case.
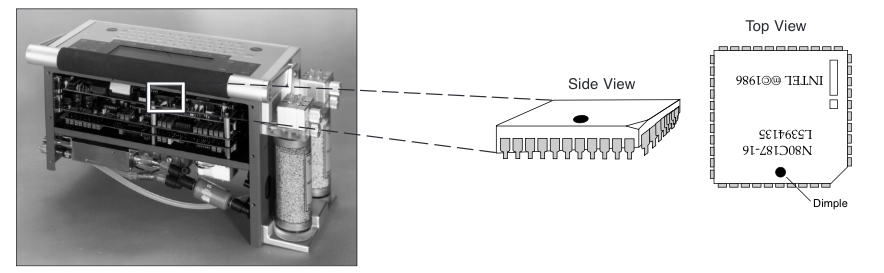
The coprocessor socket is located near the outer edge of the uppermost circuit board, under the display. Orient the coprocessor so that the Intel logo is up, and the edge with the dimple is facing the outside of the board. It may help to hold the coprocessor with a pair of tweezers; make sure that the chip is level, and very carefully press it evenly into the socket. When properly installed, the upper face of the chip will be nearly flush with the top edge of the socket. Reassemble the LI-6400 console case.
Verification
There are two methods that can be used to verify that the coprocessor was installed correctly; the first method is a bit faster than the second.
Turn the LI-6400 ON, and press escape to prevent OPEN from loading. Press K. At the prompt type hascopro print and press Enter. If the coprocessor is properly installed, a 1 will be printed. If it is not installed correctly, a 0 will be printed.
While OPEN is running, access the Welcome menu and select “About this unit...”. If the coprocessor is properly installed, the last item in the information list will be Coprocessor Installed.