
Authors: LI-COR, Inc.
Correspondence: envsupport@licor.com
Instruments: LI-6400/XT
Keywords: wireless, router
The LI-6400XT Portable Photosynthesis System is a versatile instrument with a wide variety of features. These features include several fun leaf chambers, light sources, outstanding IRGAs, wired network connectivity, and a generally pleasant personality to help you acquire your scientific data. However, there are occasionally features that we’re asked for that we haven’t yet been able to include. One such feature is wireless network connectivity. Although not included with a LI-6400XT, it is possible to easily add this feature yourself. However, this feature can only be added to LI-6400XT instruments that have the CompactFlash slot, so if you have a LI-6400, you’ll need to get the XT upgrade first.
To do this, you first need a wireless router. We recommend the battery-powered TP-Link TL-MR3040. It’s relatively inexpensive and currently widely available. While technically any wireless router may work, we think having a battery powered one is handy for a portable instrument. And, while it’s also technically possible to convert (probably) any AC-powered wireless router into a battery powered one1, we think a router designed to operate on batteries from the start is a good idea. Thus, we’ll focus on using the TP-Link TL-MR3040. We’ve found it to be a stable router with reasonable battery life (at least 3-4 hours) and can be powered off of AC power if needed.
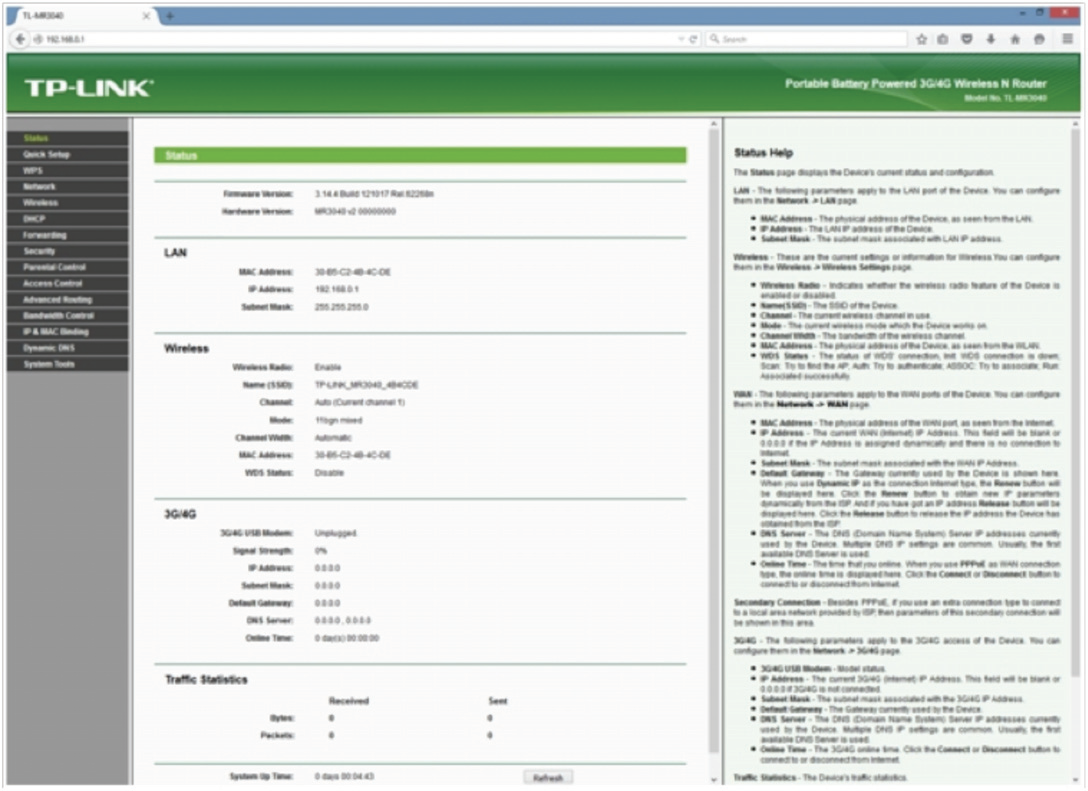
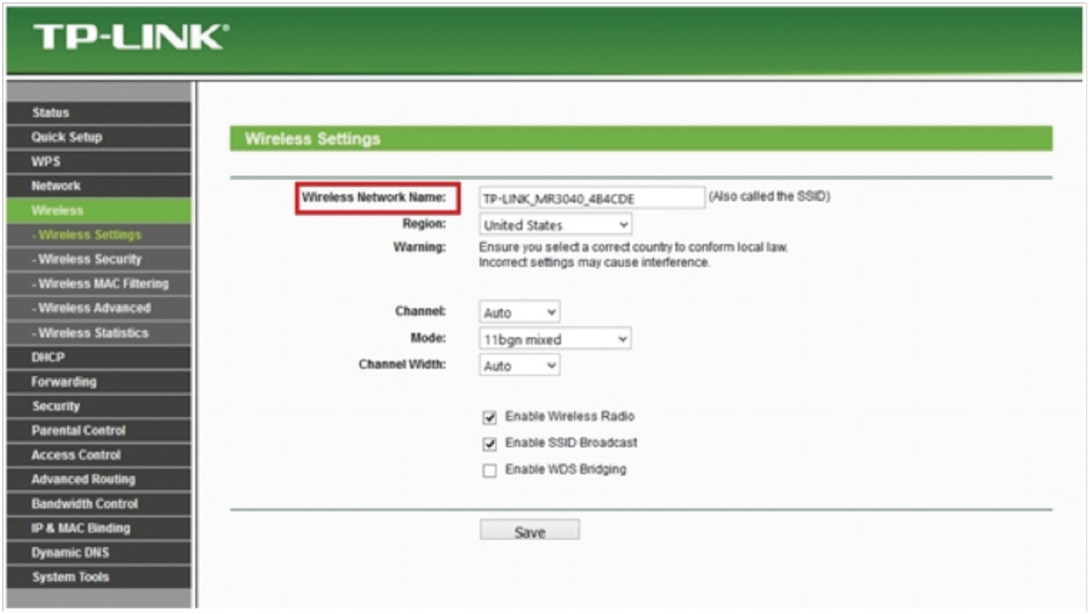
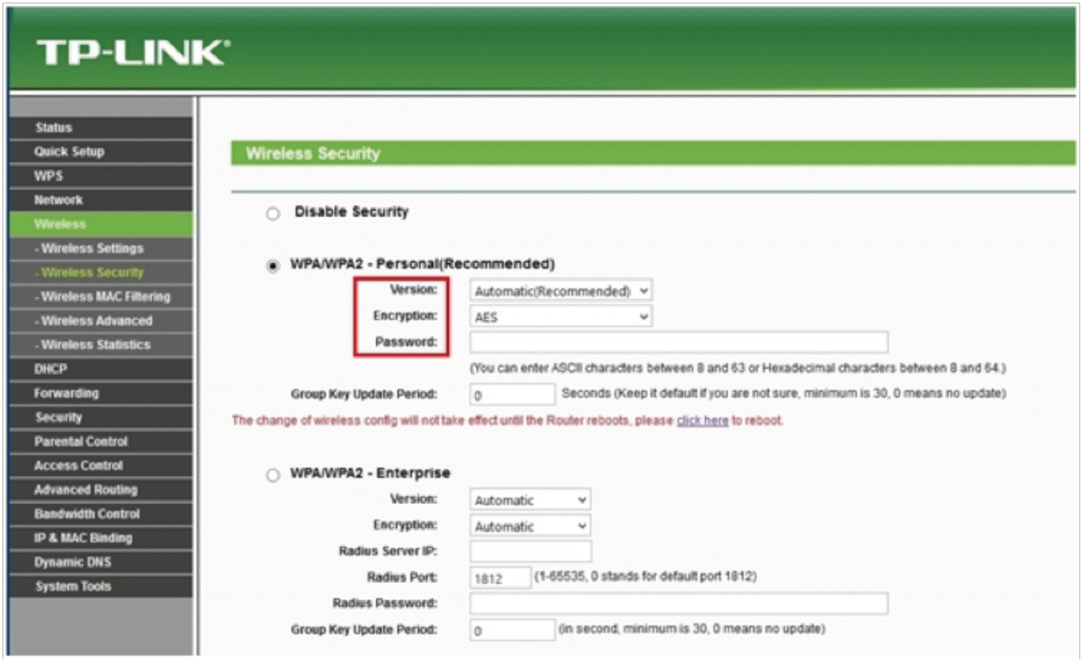
Once you get the router, you’ll need to set it up. TP-Link provides a quick installation guide on how to do this, or you can get a lengthier manual and a list of FAQs at their technical support website (http://www.tp-link.com/en/download/TLMR3040.html). Briefly, first install the battery and then power the router using the supplied AC adapter/battery charger. The battery will take a few hours to reach a full charge. Turn the switch on the side of the router to “3G/4G” if it’s not already in that position. Connect a computer to the router’s Ethernet port using the supplied cable, and make sure the computer’s wireless card (if equipped) is turned off and that its network settings are set to “obtain an IP address automatically”. From here you can configure the router by typing the following IP address into a web browser: 192.168.0.1, and enter “admin” for both the user name and password. Once the router configuration is accessed, it’s possible to configure the router to your liking. In general, it’s a good idea to have the wireless network secured with WPA encryption; use a reasonably strong password, and use a wireless network name (called an SSID) that you’ll recognize. See Figure 1 to Figure 3 for some of the setup screens that you’ll need to use.
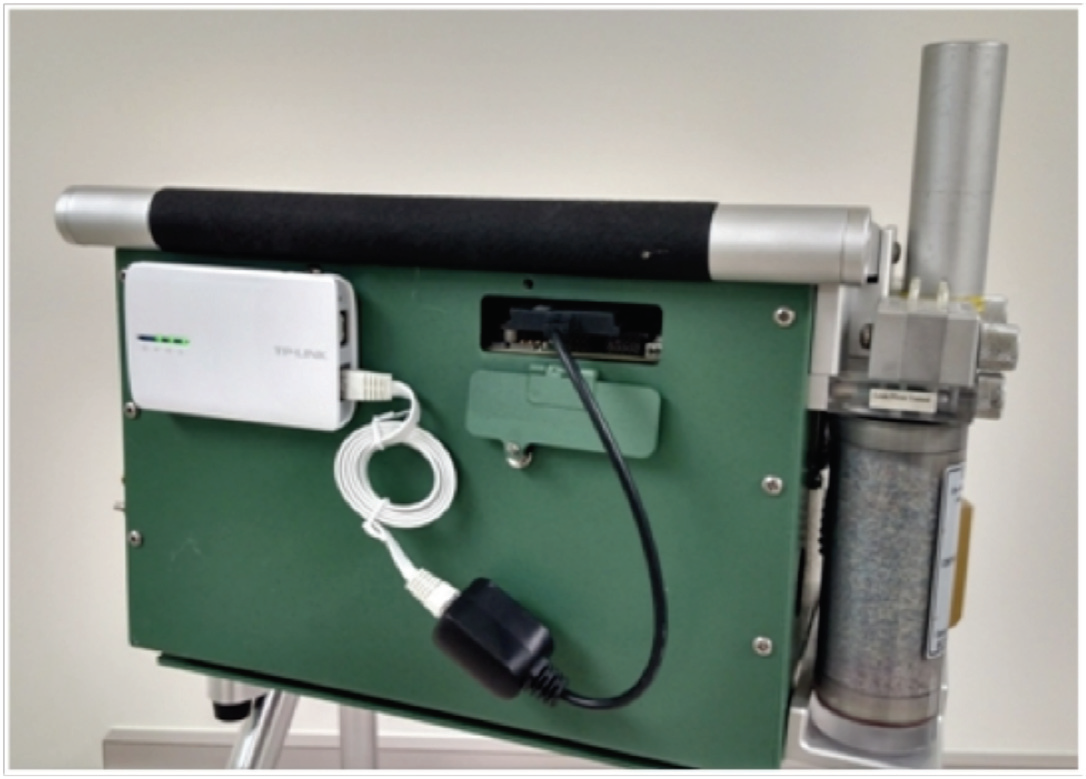
The simplest method for using the TP-Link is to use it to generate its own stand-alone wireless network that you can use to connect to the LI-6400XT. To do that, ensure (again) that the switch on the router’s side is on the “3G/4G” setting. In this configuration, the TP-Link’s Ethernet jack acts as a LAN and the router has no connection to the wider Internet (assuming no 3G/4G USB modem was installed). To access the LI-6400XT, you need to first install the Ethernet adapter that is supplied with the instrument into the console’s Ethernet adapter slot and then plug that Ethernet adapter into the back of the TP-Link using an Ethernet cable. For convenience, you may want to attach the TP-Link router to the back of the LI-6400XT using Velcro or double-sided tape (Figure 4). Turn on the TP-Link and then turn on the LI-6400XT. The instrument should be able to obtain an IP address from the TP-Link; you can verify this by going to the main OPEN screen and pressing F5 to enter the Utility Menu. Then, expand the Communications node and select Network Status which should then provide the IP address that the LI-6400XT is using. This address should start with “192.168.0.X” where X is some number between 2 and 255.
Once you’ve verified that the LI-6400XT has an IP address from the router, you can connect a wireless device (such as an iPad or iPhone) to the TP-Link wireless network that you’ve previously named. First, make sure you’ve already downloaded and installed the LI-6400XT iPad application from the iTunes store. Then, you’ll need to select the network from the available networks in the device’s wireless setup menu, and type in the wireless network password when prompted. Once connected, you should be able to use the iPad application to see and control the LI-6400XT wirelessly. Note that you can also use a laptop’s wireless capability (or any wireless-enabled computer) to interface with the LI-6400XT as well via the Mac or Windows XTerm programs.