Printable PDF: Leaf Chamber Gasket Replacement
Tech tip for replacing the leaf chamber gaskets.
With use, all gaskets on the LI-6400/LI-6400XT will eventually need replacement. Care should be taken to protect the painted surfaces of the chamber when removing the old gaskets. Typically, the gaskets can be pulled gently off the chamber, but they leave an adhesive residue. The adhesive should be removed with a very mild adhesive remover (e.g. citrus-based Goo Gone®). Using chemicals such as ethanol or acetone will etch the paint, which will create leaks under the gaskets over time. Razor blades and similar sharp edges should not be used because damage to the paint will lead to leaks under the gasket.
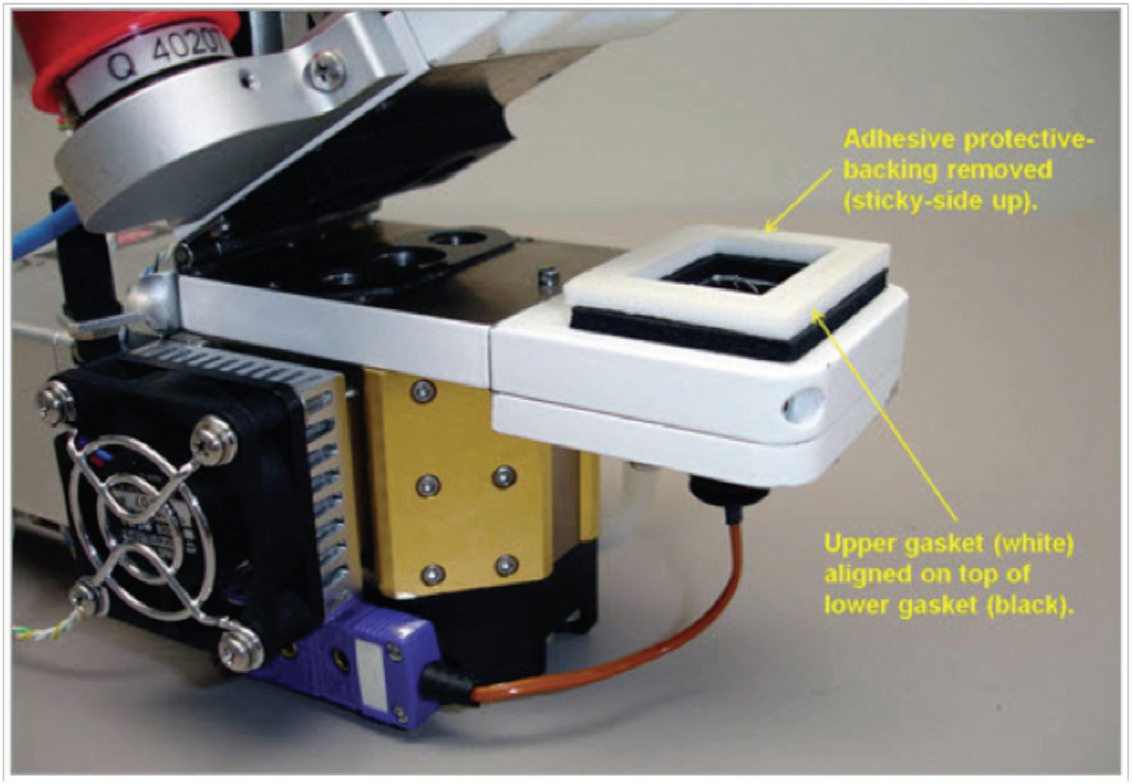
Alignment of the new gaskets is important to ensure proper sealing of the chamber. Avoiding offset is essential for leaf area measurements and to make certain there is uniform area for adaxial and abaxial leaf sides. Typically, the gasket on the bottom half of the chamber is more easily installed. Once centered on the chamber bottom half, this gasket can assist in positioning the upper gasket. With the chamber fully open, remove the adhesive protective-backing and lay the upper gasket adhesive-side up on the installed lower gasket. Close the handle. This will secure the upper gasket to the upper chamber half directly above the bottom gasket. Reopen the chamber and be sure the gaskets are seated by pressing on them with your finger.