Conifer sprig kit
Printable PDF: Conifer sprig kit
(6800_InstallGuide Sprig-Blocks-16841.pdf)
Download this content as a pdf that can be saved to your computer or printed.
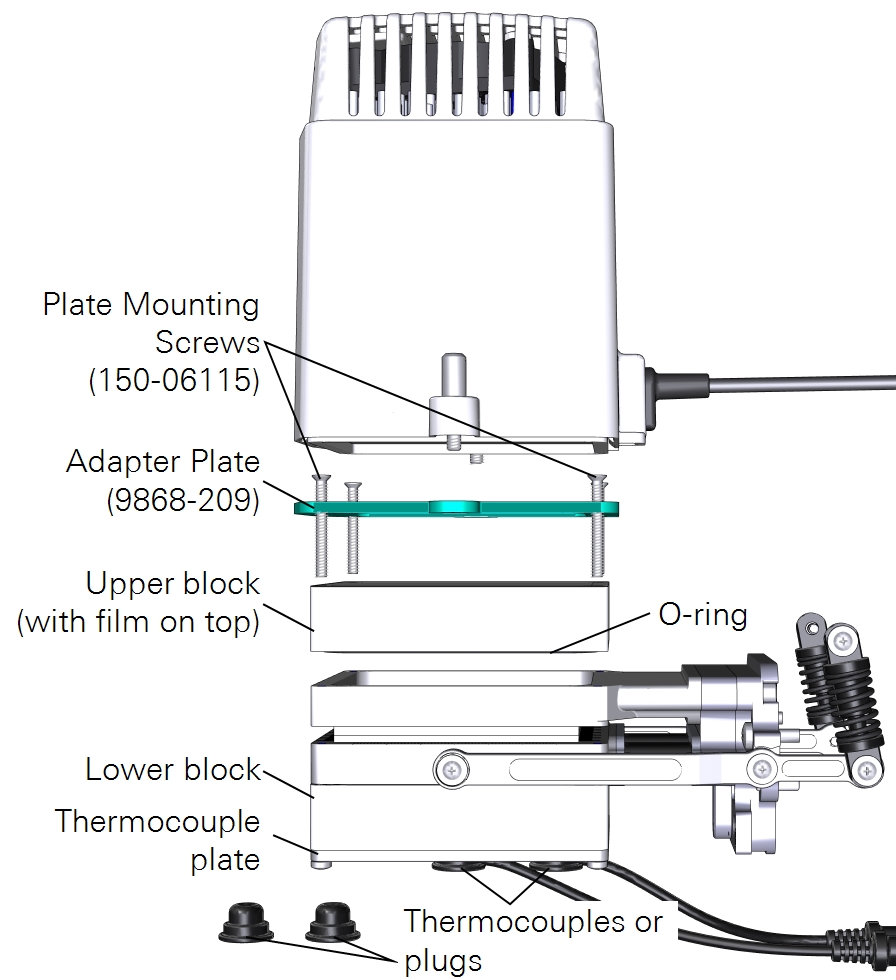
The conifer sprig kit (9968-271) mounts directly onto the large leaf chamber. When installed, the chamber can accommodate sprigs and shoots that have leaves in a spiral arrangement. The conifer sprig kit is included with the 6800-13L sales configuration, which includes the 6800-13 large leaf and needle chamber and 6800-03 light source. The blocks can be used in ambient lighting conditions and with one or two large light sources. Be sure to use the white advanced polymer (AP) gaskets with the conifer sprig kit.
The blocks can be installed on the large leaf chamber while it is attached to the head, but you may find that it is easier to install the blocks while the chamber is removed from the head.
Preparing the chamber
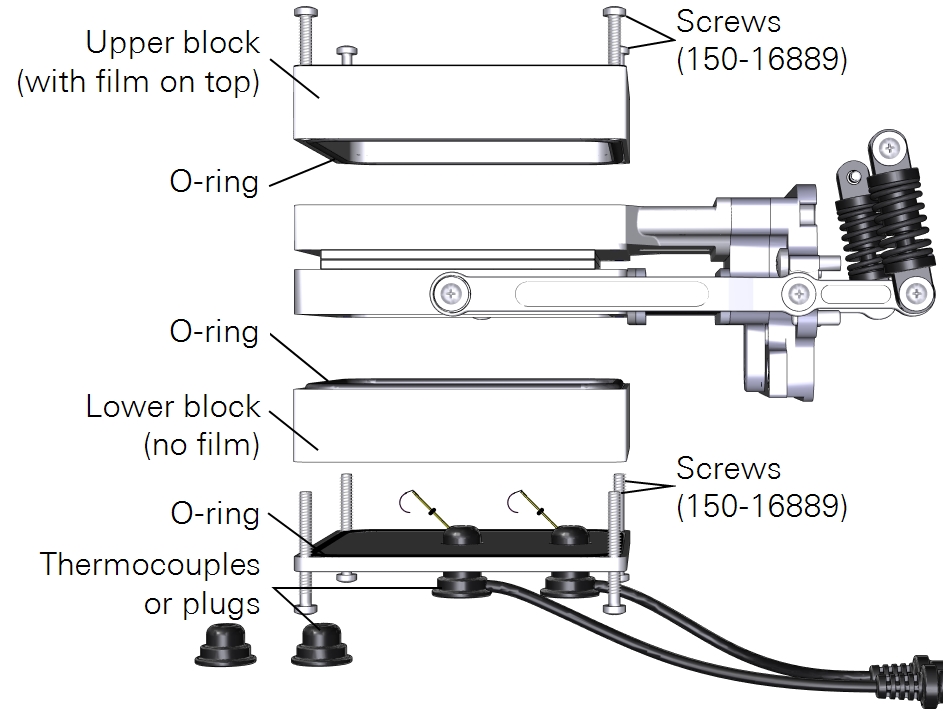
- Remove the Propafilm from the upper part of the 6×6 cm leaf chamber (not the sprig block).
- Puncture the film and pull it free of the top chamber. Pull carefully so that you remove as much adhesive as possible. Use rubbing alcohol to soften any remaining adhesive residue on the chamber and remove it so that the upper surface is clean. There is extra Propafilm in the chamber spares kit so you can replace the cover when you aren't using the adapter blocks.
- Remove the thermocouple plate from the bottom of the lower chamber.
- Keep the screws, plate, and thermocouples close by for re-installation.
Configuring the instrument
The sprig blocks will add volume to the chamber so under Start Up > Chamber Setup > Chamber Info, edit the volume to 418.7 cm3. The volume is used for sample cell control (CO2_s, H2O_s, RH_air, SD_air, and VPD_leaf).
If using a light source with the conifer sprig adapter blocks, under Environment > Light > Head Light Source and/or Console Light Source, clear the Source is attached to... box and change the transmittance to 0.7. A transmittance factor of 0.7 will ensure an accurate Qin at the plane of the gaskets.
Measurements with ambient light on one side
One option is to make measurements with one side of the leaf exposed to ambient light. With this measurement, the thermocouples are available to measure leaf temperature but it is unlikely that they will make contact with the sample due to the depth of the blocks. Therefore, we recommend that you use energy balance to compute leaf temperature. To install the blocks:
- Attach the block with film on top to the upper chamber using four panhead screws (150-16889).
- Install the thermocouples or thermocouple plugs in the thermocouple plate.
Measurements with ambient light on both sides
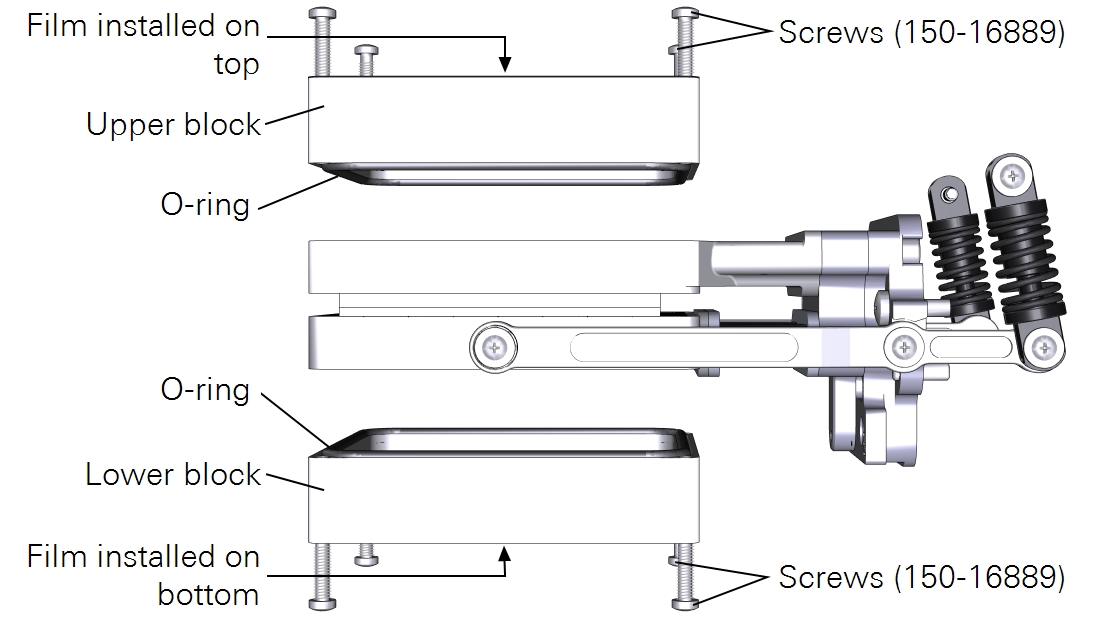
Another option is to perform measurements with ambient light on both sides of a leaf surface. For this measurement, you must remove the thermocouple mounting plate from the lower chamber and install Propafilm on the lower block. There is no leaf thermocouple available so the LI-6800 will automatically switch to energy balance to compute leaf temperature.
Measurements with a light source on one side
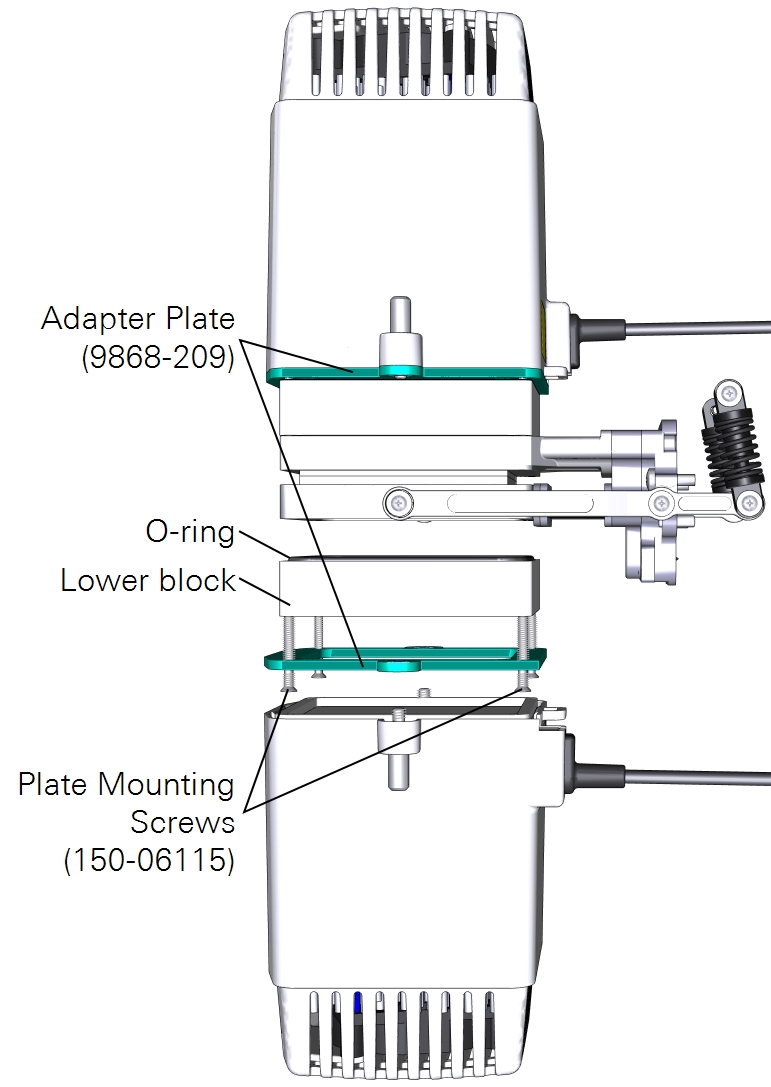
A third option is to use the large light source to illuminate one side of the leaf. Here again you can use the leaf temperature thermocouples to measure leaf temperature, but you may have better results with energy balance instead. The light source adapter plate is required to connect the light source. To install the light source:
- Attach the plate to the chamber using four countersunk plate mounting screws (150-06115).
- Pay careful attention to the orientation of the plate. The countersunk side will be in contact with the light source.
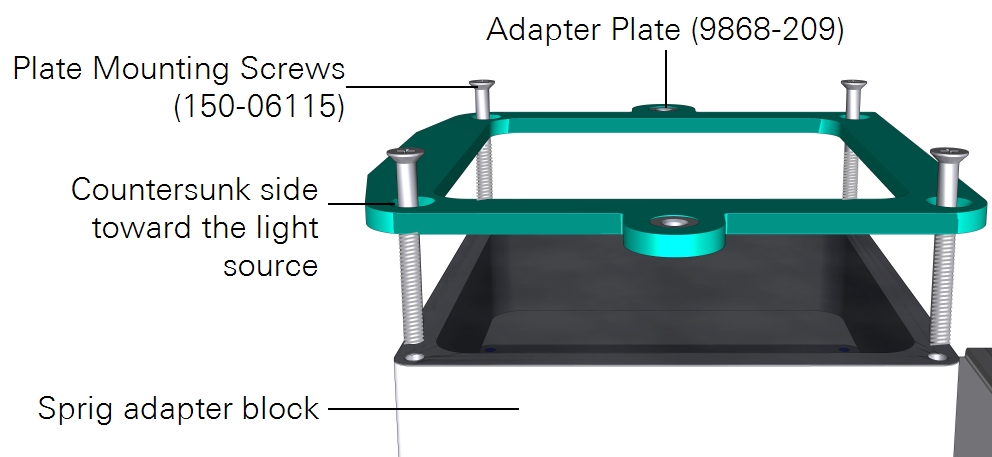
- Mount the light source to the plate with both knurled thumb screws.
- Install the thermocouples or thermocouple plugs in the thermocouple plate.
- Connect the light source cable to the LS connector on the head.
Measurements with light sources on both sides
Finally, you can illuminate both sides of the sample with two light sources. In this arrangement, you'll use the light source extension cable (9968-243) to connect one of the light sources to the console Accessory connector. The other light source cable will connect to the head LS connector. There is no leaf thermocouple available so the LI-6800 will automatically switch to energy balance to compute leaf temperature.
To install two light sources on the conifer sprig kit:
- Install the upper light source, as described in Measurements with a light source on one side.
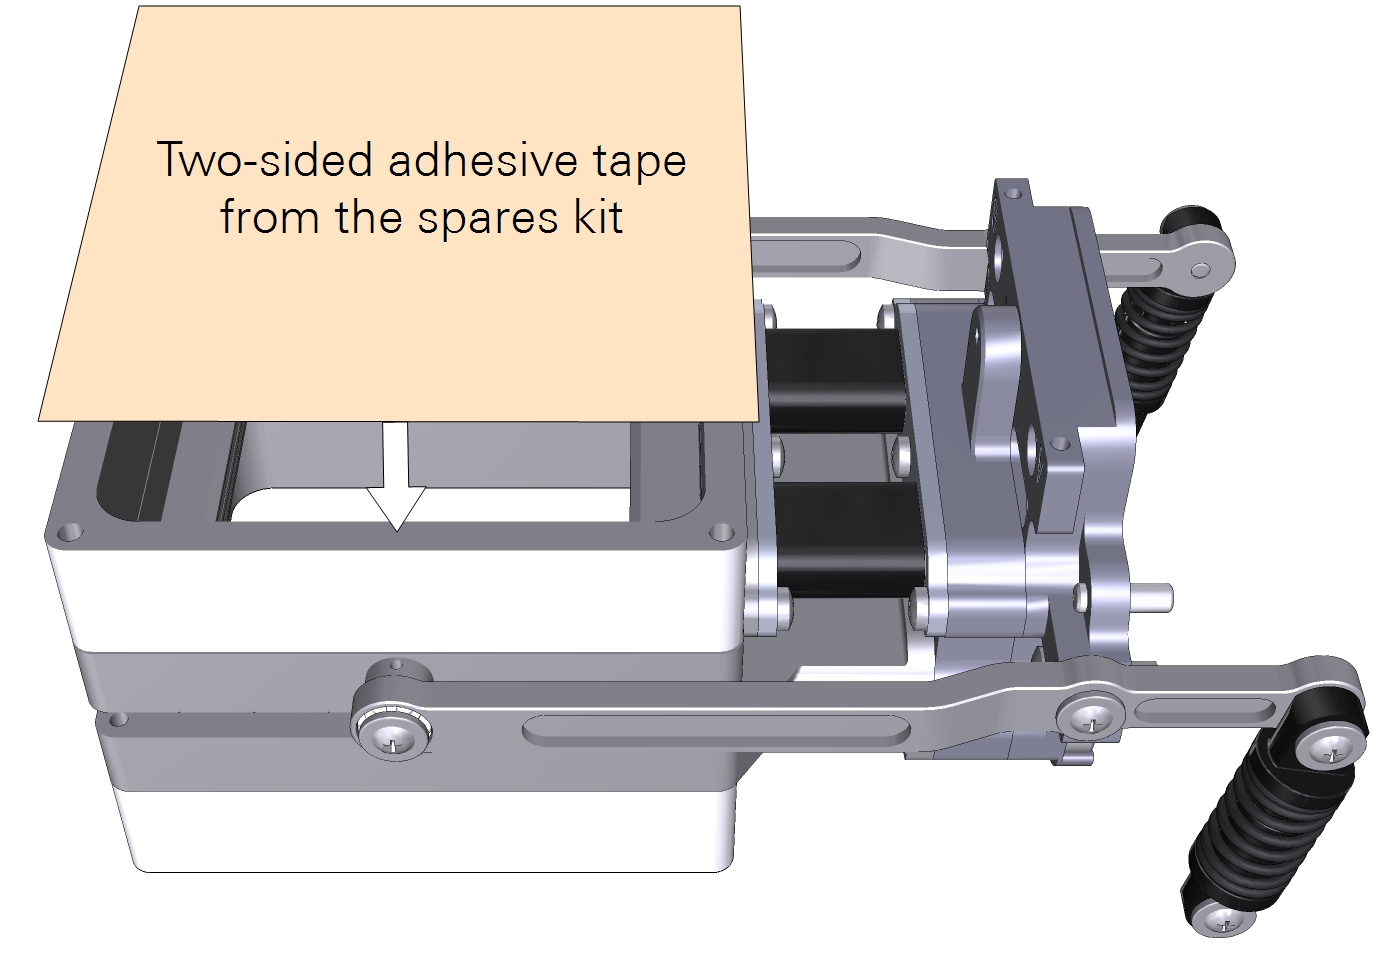
- Install Propafilm on the bottom of the lower block.
-
- Carefully clean the surface that is accepting the film.
- Be sure that there is no film or adhesive residue remaining on the chamber. Use rubbing alcohol to soften the adhesive, if needed.
- Cut a piece of double-stick adhesive film.
- Make it about 9×9 cm for the large chamber. Separate one side of the film from the wrapper, exposing the adhesive surface.
- Press the exposed adhesive onto the chamber opening.
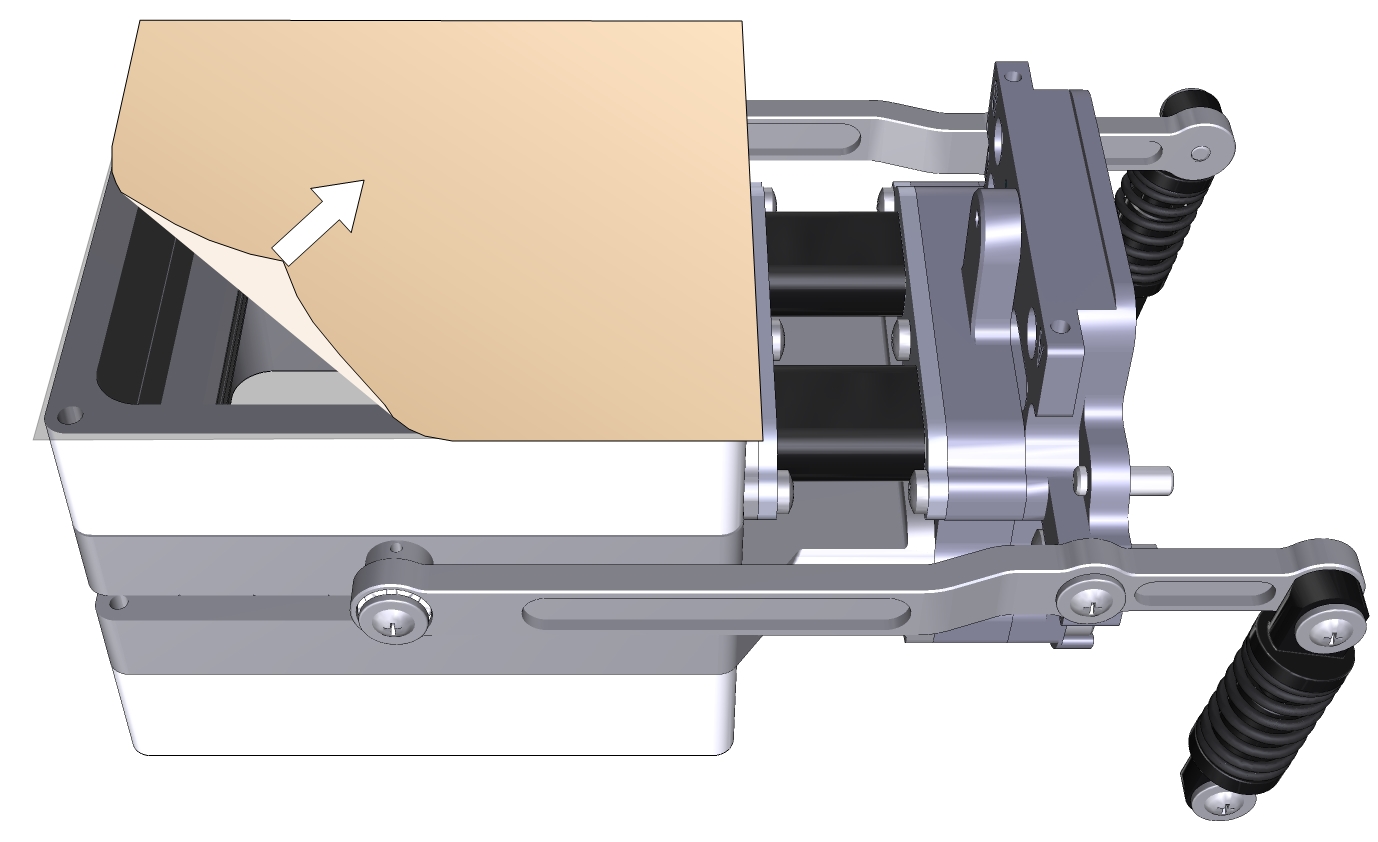
- Remove the other side of the wrapper, exposing the second side of the adhesive.
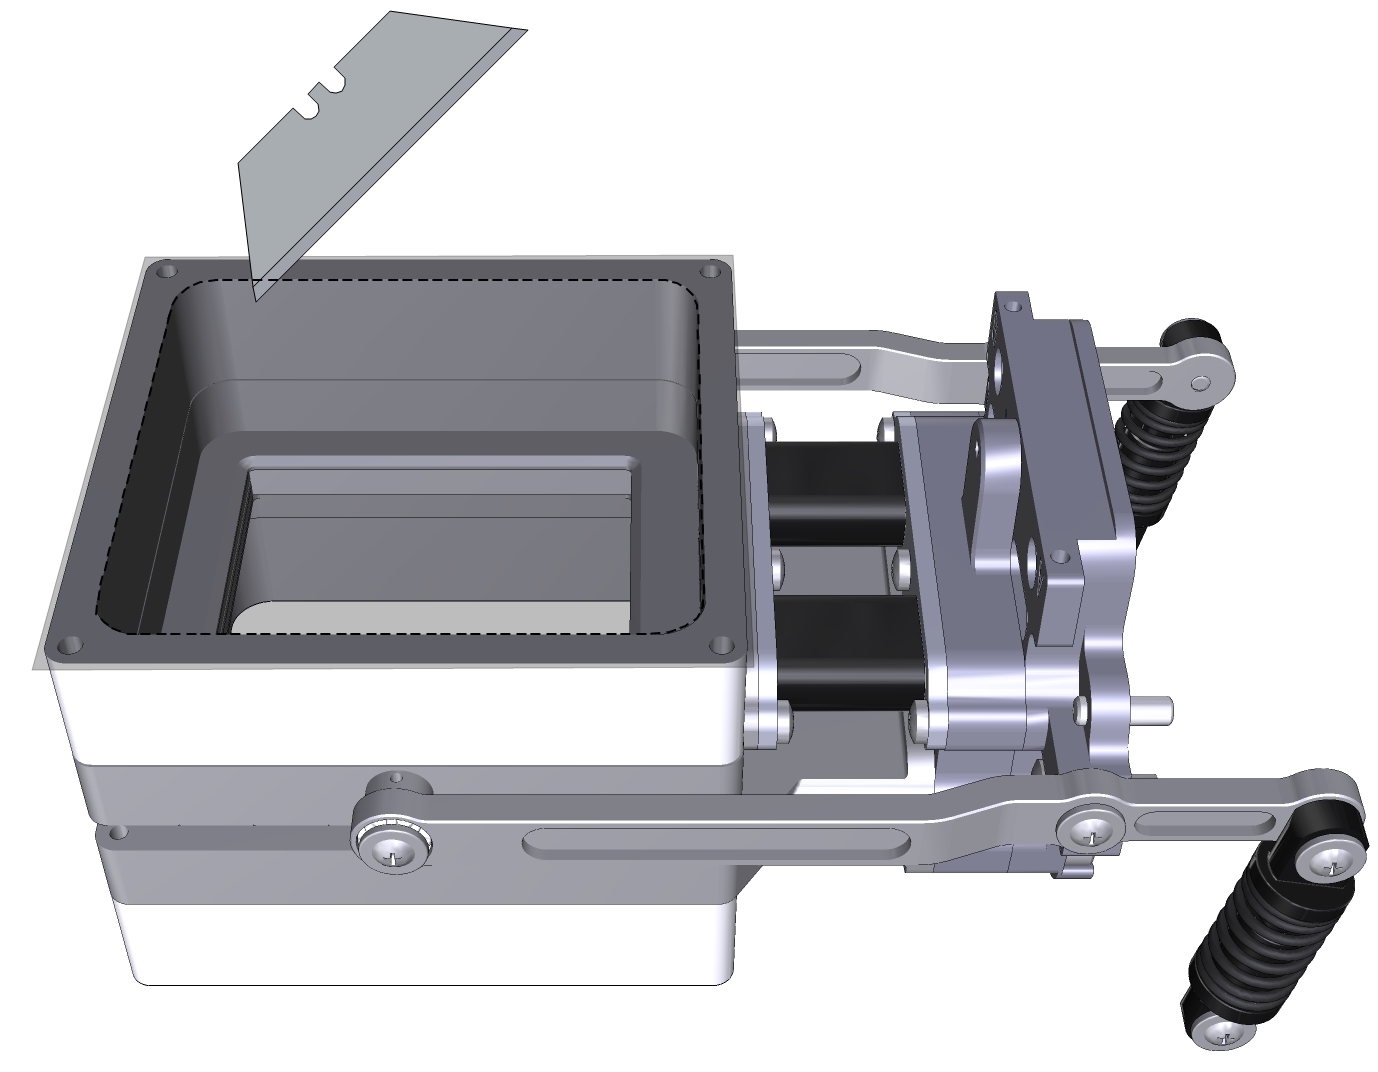
- Trim the adhesive tape from the inside of the chamber using a razor blade or a sharp knife.
- Prepare a piece of Propafilm.
- Cut it to about 9×9 cm for the large chamber.
- Attach the Propafilm.
- Align one edge of the Propafilm with one edge of the adhesive. While holding the Propafilm tight, press the Propafilm onto the adhesive. Smooth any bubbles or channels between the film and adhesive.
- Trim the Propafilm from around the outside of the chamber and cut the film out of the screw holes.
- Install the chamber on the LI-6800 head and run the leak test under Start Up > System Tests > Chamber Leak.
- Attach the plate to the lower chamber using four plate mounting screws (150-06115).
- Mount the light source to the plate by turning both knurled thumb screws.
- Connect one light source cable to the LS connector on the head.
- Connect the second light source cable to the console Accessory connector using the light source extension cable.
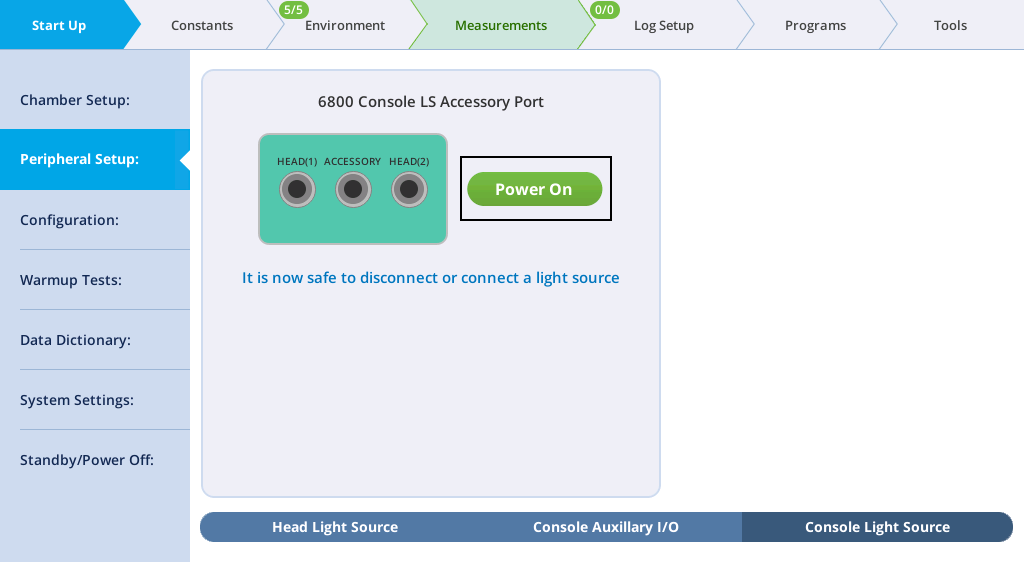
The second light source has the same options as the first light source. It is configured under the Start Up > Peripheral Setup Console Light Source.