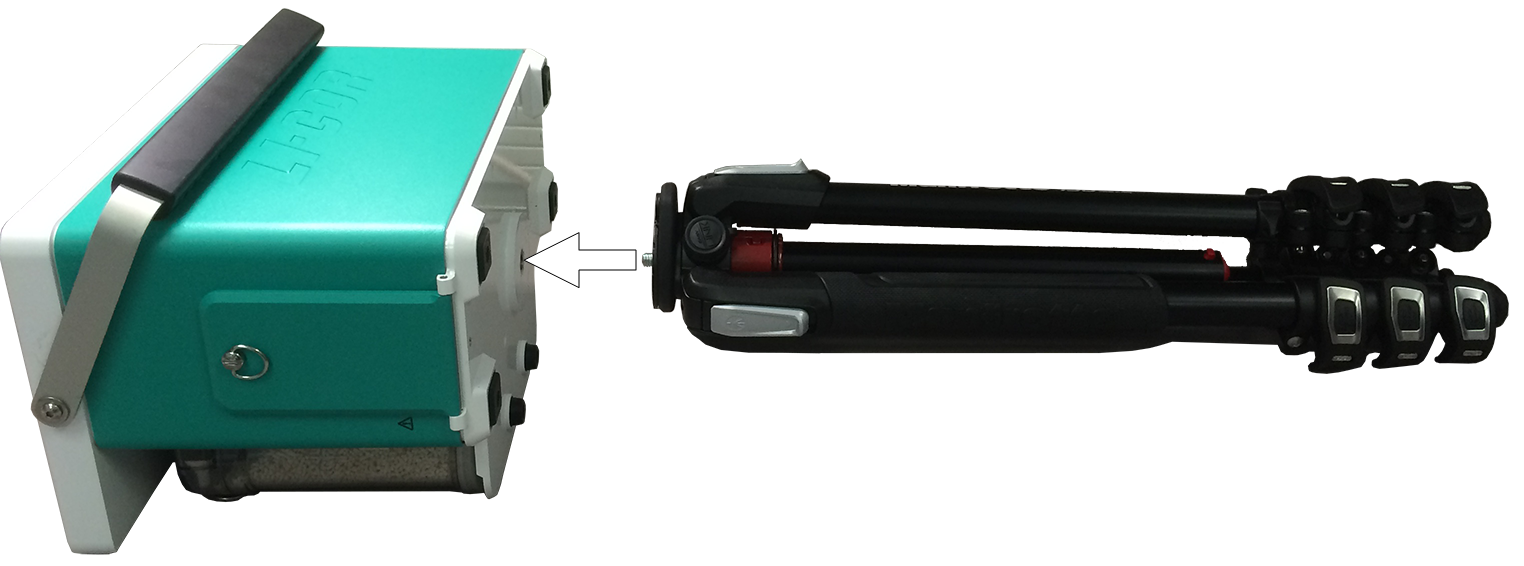
The tripod, monopod, panhead and harness available from LI-COR are durable and suitable for field work. But, you can mount the head and console on nearly any camera tripod or monopod (3/8-16 threads). We recommend using a sturdy tripod that has a broad stance.
LI-6800 tripod
The LI-6800 may include a tripod (part number 609-15790), depending upon the configuration ordered. The tripod screws to the bottom of the console or head.
Caution: Take some time to get acquainted with the tripod. Read all of the manufacturer's instructions that are provided with it. Take extra care to set it up securely, as an out-of-balance load may topple over, which would be bad for your instrument and bad for your day.
- Remove the threaded cap from the top of the tripod.
- With the tripod legs collapsed, screw it into the bottom of the console. Or, attach the panhead to the tripod for the head.
- Extend the legs.
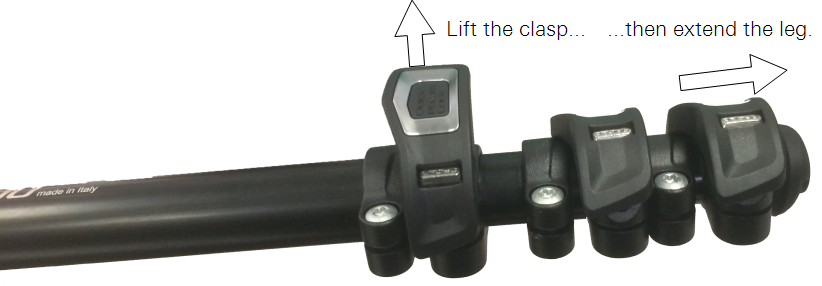
- Each leg has three clasps. To extend a leg, open a clasp, pull the leg to the desired length, and then close the clasp to lock the leg in position.
-
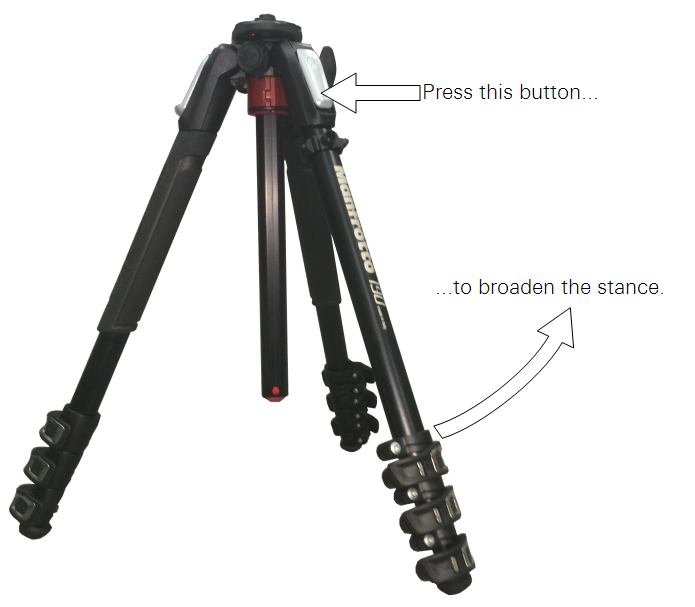
- Expand the stance.
- The stance can be expanded to the first stop without pressing the button. Press it to expand the stance further. A broad stance is more stable than a narrow one. So, extend the legs as far as practical and expand the stance.
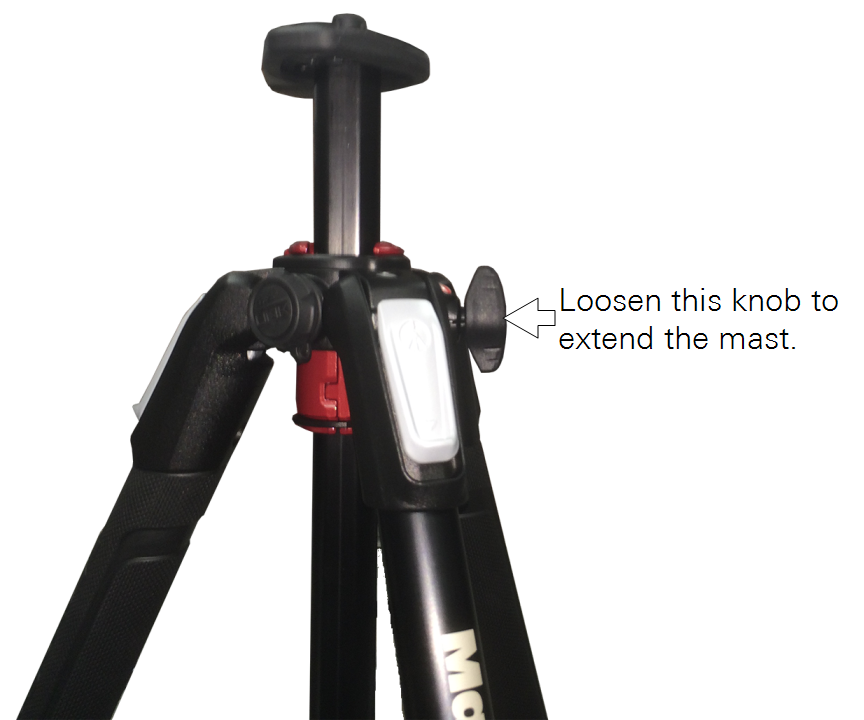
- Extend the mast.
- The mast can extend vertically or horizontally. To move the mast into a horizontal position, extend the mast fully in the vertical direction. Press the button on the bottom of the mast while pulling to extend it further so that the mast can rotate to a horizontal position. Important: Be sure that the tripod is stable! Do not let it fall over. Read the instructions provided with the tripod.
Panhead
The panhead gives the ability to adjust the position of the sensor head to nearly any orientation. The panhead (optional; part number 609-15791) includes a detailed instruction sheet.
Caution: Read all of the manufacturer's instructions that are provided with the panhead. Failure to follow the instructions can lead to improper use of the panhead.
When you use the panhead:
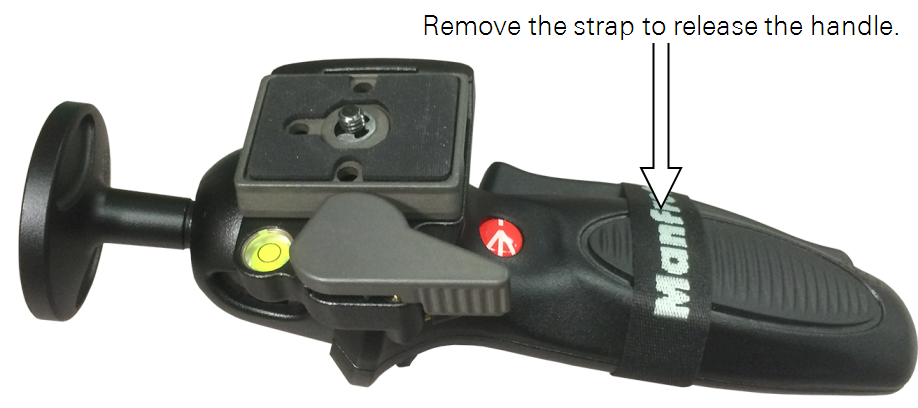
- Remove the fabric strap that is around the handle.
- Squeeze the handle, then remove the strap.
- Detach the mounting plate.
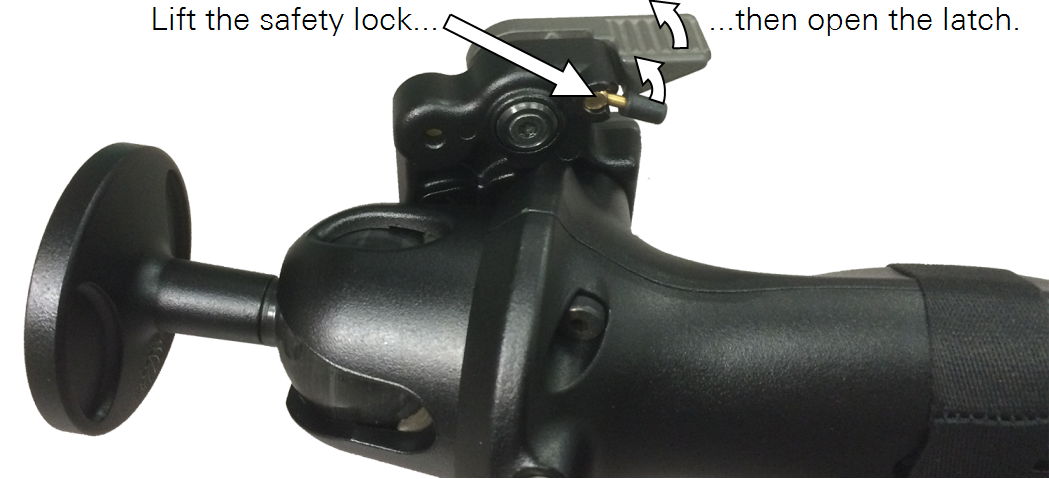
- Hold the safety latch away from the panhead, then rotate the latch about 90° until the mounting plate is loose. The latch will lock in the open position.
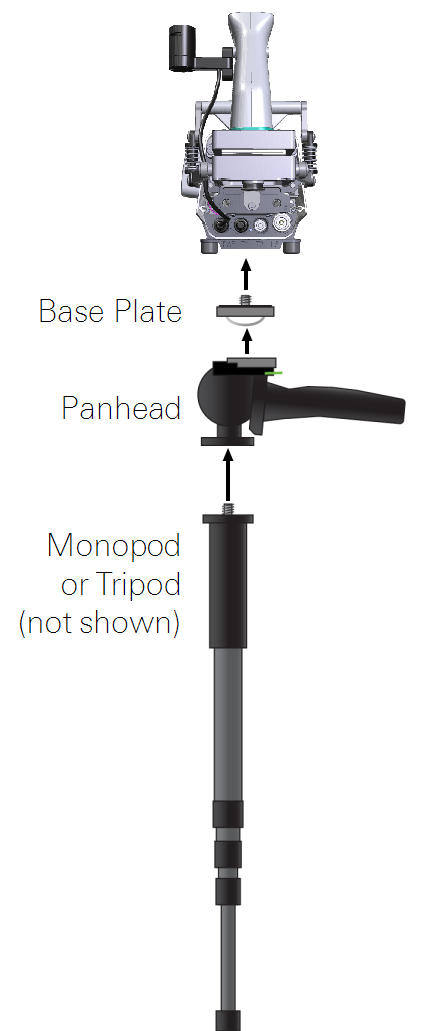
- Attach the mounting plate to the head.
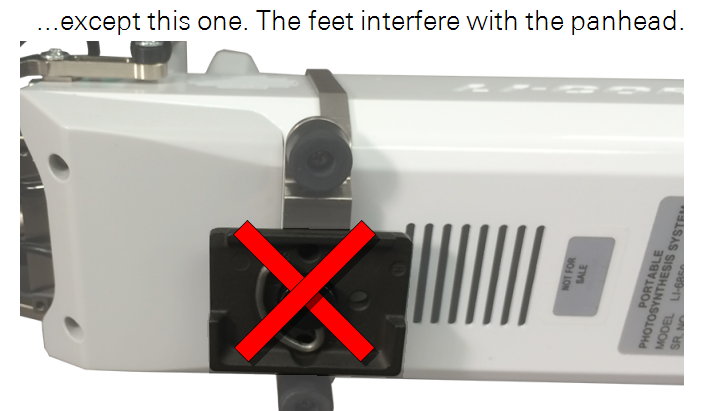
- Caution: Do not remove the feet from the head. They are required to reduce shock.
- Press the base plate into place on the panhead. The latch will snap closed.
- Carefully check to be sure the head is firmly attached.
Monopod
Your instrument may also include a monopod (part number 609-19238). The monopod is a one-footed platform used to support the head during a measurement1.
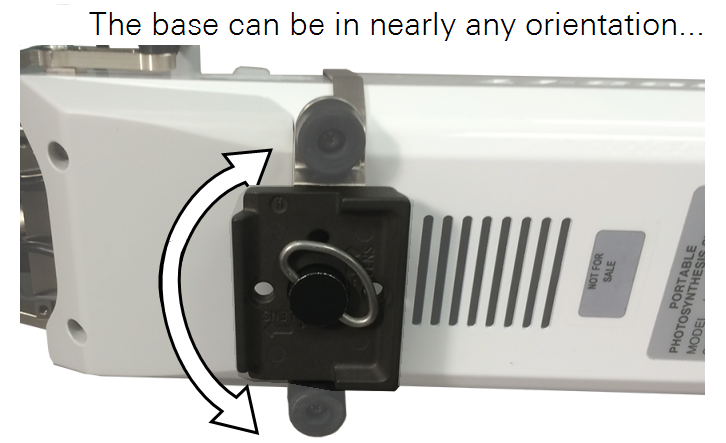
The panhead mounts to the head to provide full rotation of the head on the horizontal and vertical axes. This enables you to easily position the head at nearly any angle during measurements. It can be installed on either the monopod or tripod. Refer to the manufacturer's instructions for details.
Harness
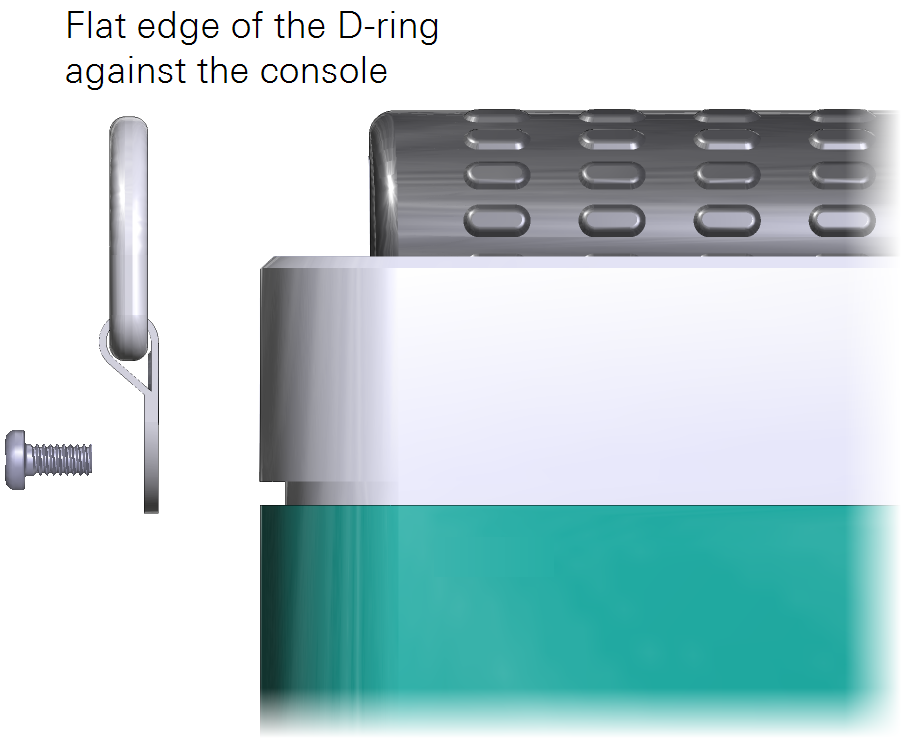
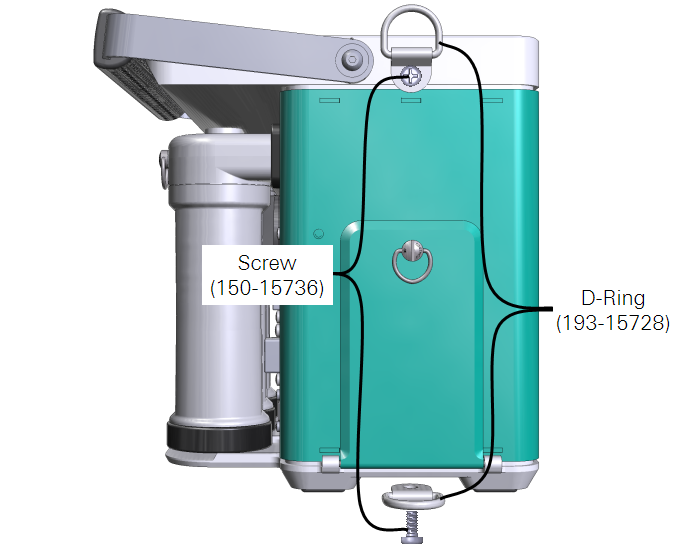
The optional harness (part number 9968-221) positions for comfortable carrying and easy access to controls. The screws provided with the instrument have a thread locking compound applied. If you provide your own screw, apply a thread lock to it. The shoulder straps attach to the upper D-rings; the waist strap attaches to the lower D-rings.