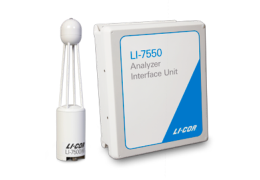
Software reference
This section describes the connection options for configuring the instrument, followed by a description of the software features. The LI-7500A/RS can be configured from a computer that is running Windows 7 or newer.
Connection options

Launch the software to open the Connect window, where you set the parameters for communication between the instrument and your computer.
Connect over Ethernet
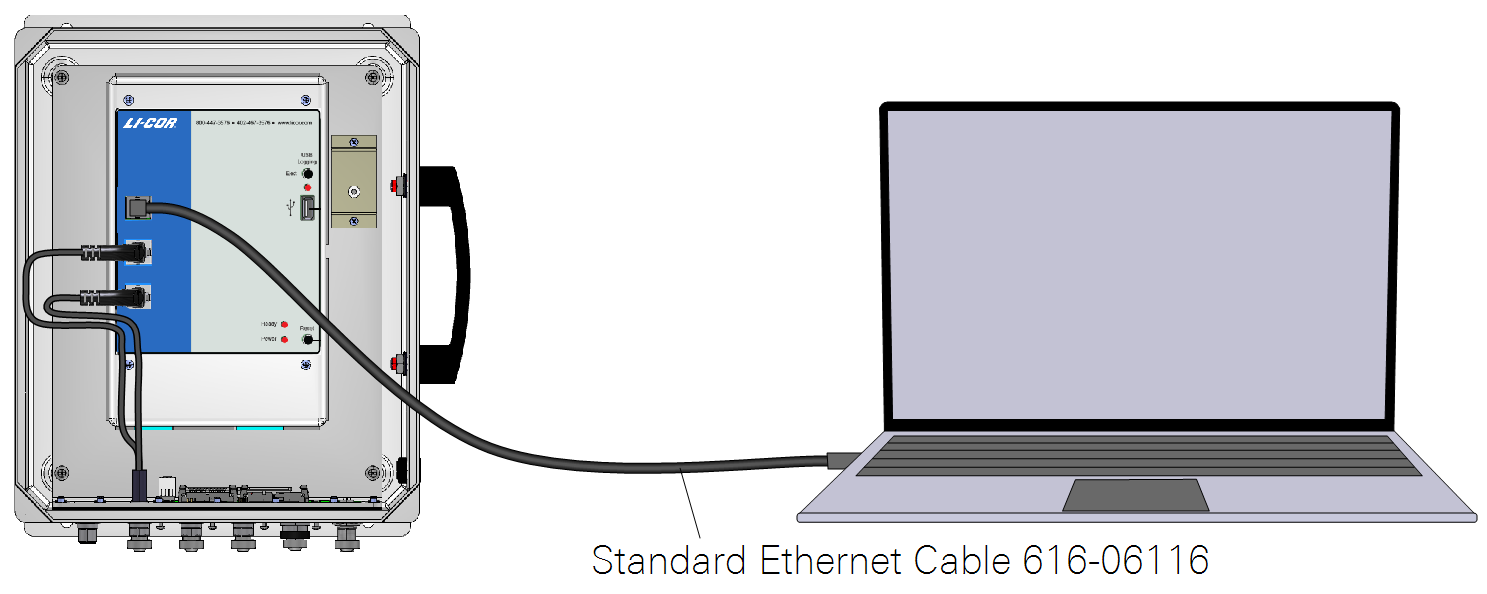
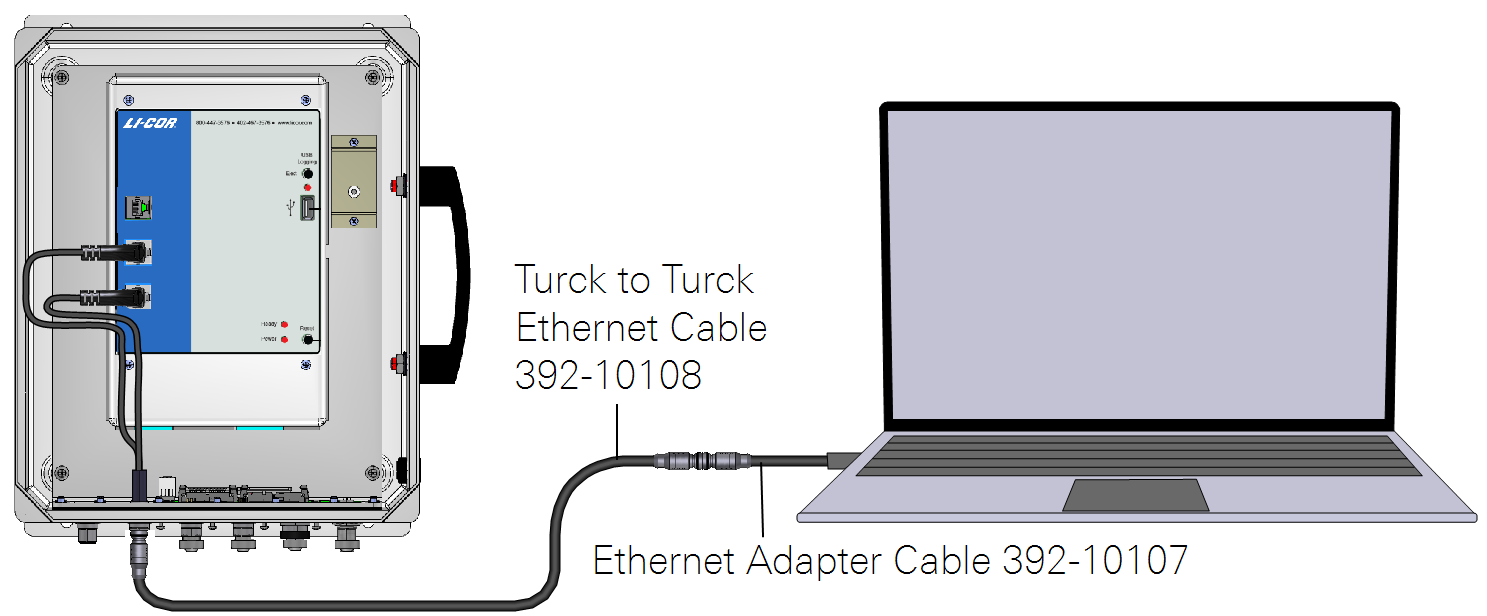
If the instrument is powered on and connected to an Ethernet port on the same subnet as your computer, its name will be displayed in the software. The default instrument name is the serial number of the Analyzer Interface Unit.
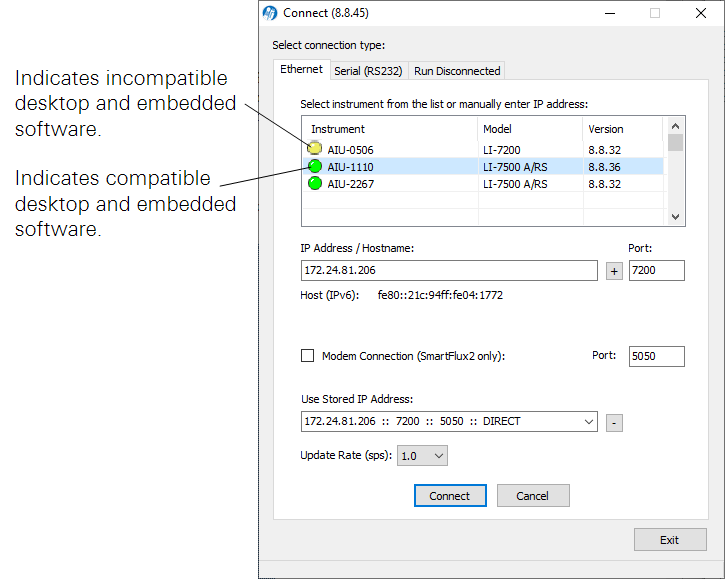
- Yellow indicators (
 ) show that the instrument embedded software is incompatible with the PC software. You can still connect, but there may be issues. Update the firmware at the first available opportunity.
 - Green indicators (
 ) show that the instrument embedded software is compatible with the PC software.
Note: We recommend that you always use the most up-to-date software and that your PC software and the instrument embedded firmware are compatible. Go to www.licor.com/support to get the latest instrument software.
The Update Rate is the communication frequency between the instrument and the computer. Select from 0.1, 0.2, 0.5, 1, 2, 5, 10, or 20 Hz.
Note: When connecting over satellite or cellular networks that have data limits, connect at a lower update rate (such as 0.1 Hz) to limit the amount of data used.
Click on the Connect button to establish communications with the instrument. If something is wrong, it will time out after about 15 seconds. If this happens, make sure you selected the correct instrument and retry.
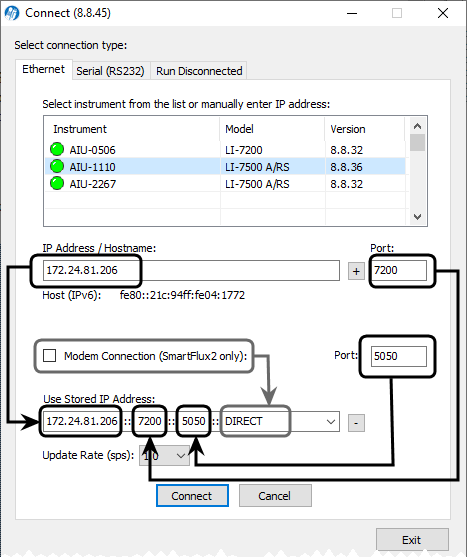
The connection window can save up to 20 instrument connections in a list.
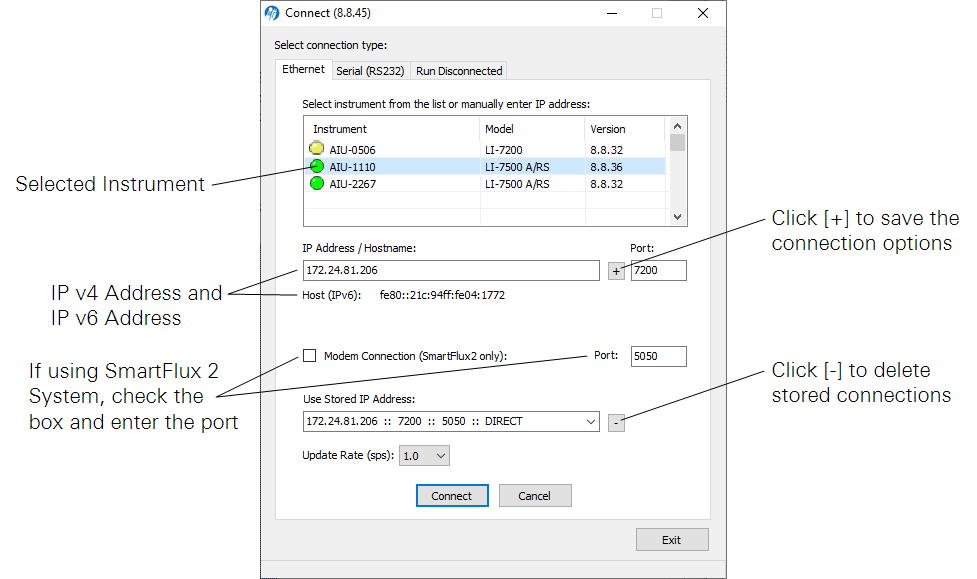
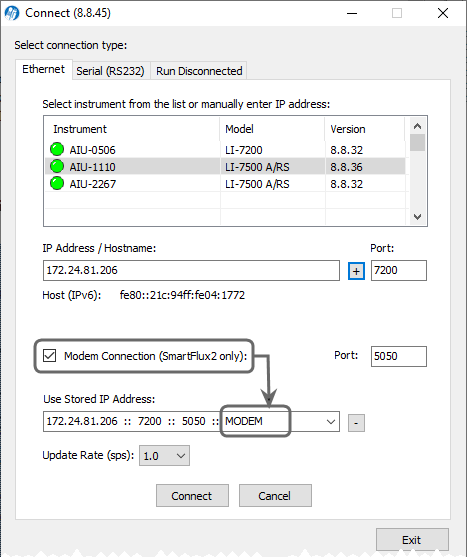
Click the plus button [+] to save a connection and the settings. Select a stored item and click [-] to remove it from the list. Keep the Modem Connection checkbox clear unless the system is behind a modem. Otherwise, check the Modem Connection box to notify the application that system is behind a modem.
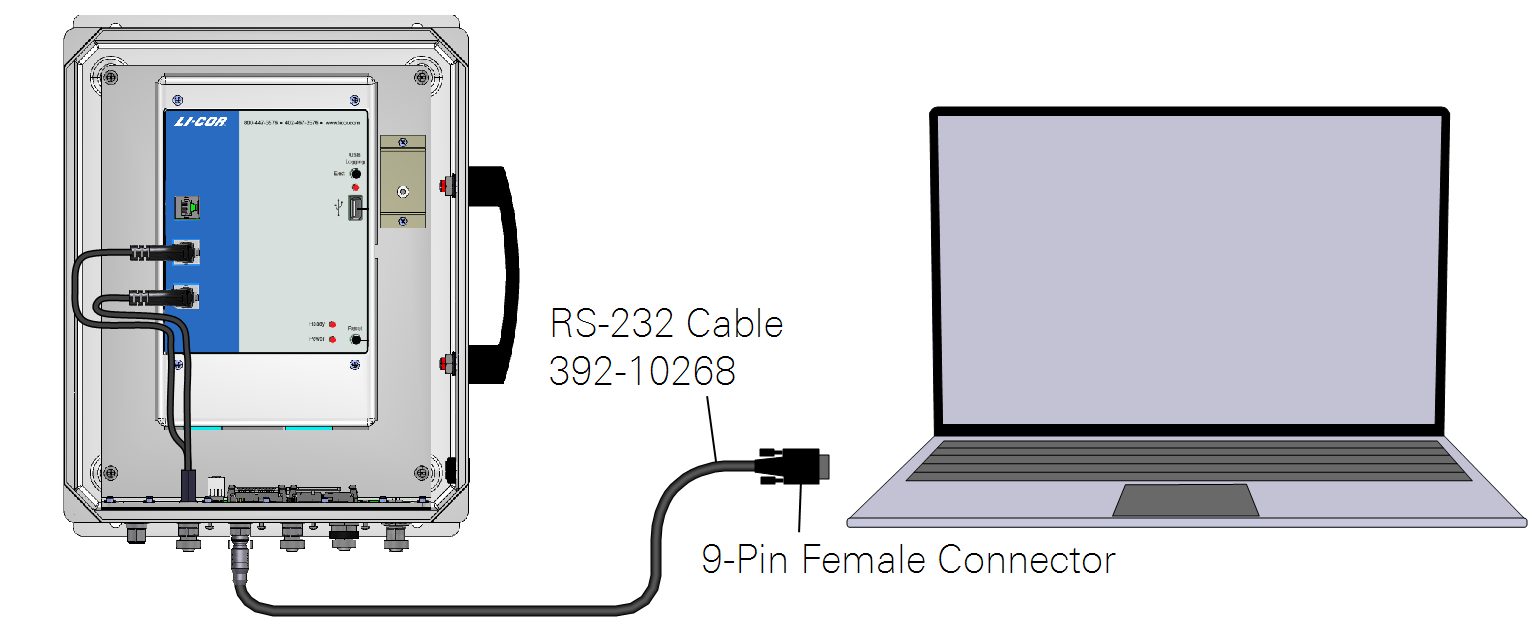
Connect over RS-232 serial
The LI-7550 RS‑232 port is configured as Data Terminal Equipment (DTE) with no hardware handshaking. It is bi-directional, meaning information can be transferred both into and out of the instrument.
Note: You may need a USB to RS-232 adapter to use the serial connection. LI-COR part 6400-27 is a suitable adapter.
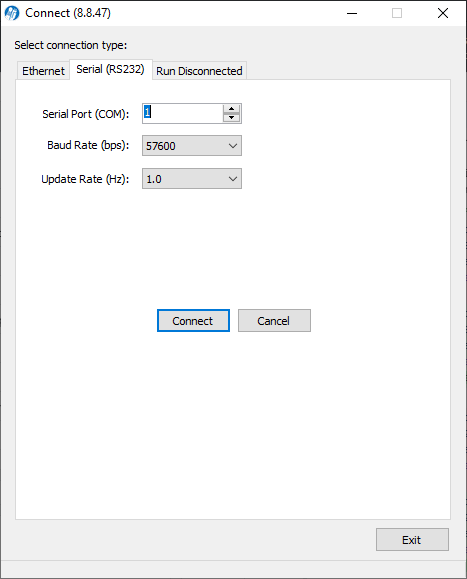
Select the communication baud rate for the serial port. The maximum update rate is dependent upon the rate available with your computer's serial port and the Update Rate used while the program communicates with the instrument. Select from 9600, 19200, 38400, 57600, or 115200.
The Update Rate is the communication frequency between the instrument and the computer. Select from 0.1, 0.2, 0.5, 1, 2, 5, 10, or 20 Hz. Note that at 9600 baud, the maximum update frequency is 2 Hz; at 19200 baud, 5 Hz; at 38400 baud, 10 Hz; at 57600 baud, 15 Hz; and at 115200 baud, 20 Hz. Click the Connect button to establish communications with the instrument.
Run disconnected
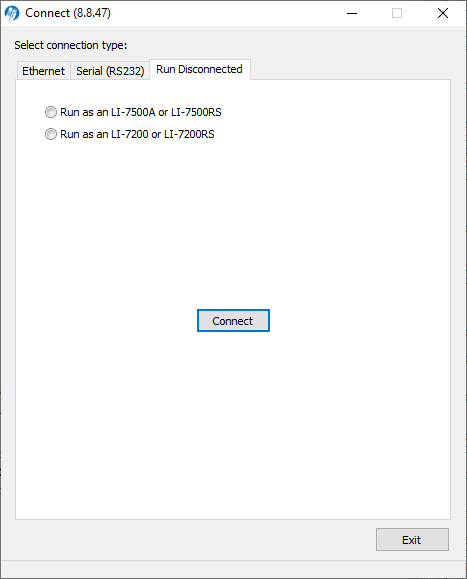
The PC software can be used independently of an instrument by clicking on the Run Disconnected tab and selecting the instrument. This can be useful for training purposes, or for creating a configuration file that can then be saved and transferred to instruments in the field. Much of the functionality of the software is disabled in this mode (e.g., data will not appear, so charting is unavailable), but features that do not require an active connection are fully functional.
Note: See Configuration files for more information on creating a configuration file for later use.