
(8100sync2.0.zip)
Synchronizes the LI-8100A clock with the gas analyzer clock when the LI-8100A is used with third-party analyzers that run the Windows operating system.
8100Sync is an application that manipulates the clock on an LI-8100A (embedded software 4.0 or above) and provides some basic file management functionality. 8100Sync is used to synchronize clocks between a third-party trace gas analyzer, the LI-8100A, and the host computer, thereby allowing time-series data collected on the analyzer to be merged with the .81x files from the LI-8100A in post processing. 8100Sync has been tested on Windows Vista, 7, and 10, and may be compatible other versions of Windows. It is intended to be run from the Windows Task Scheduler at a regular interval.
The application consists of two separate executable files, 8100Sync2.0.exe and comscript.exe, and a simple configuration file. 8100Sync2.0.exe provides a graphical interface for comscript.exe with real-time status updates and an editor for the configuration file. Comscript.exe handles communication with the LI-8100A and can be run independently from 8100Sync2.0.exe. When run independently, comscript.exe provides no user feedback, but will trigger a save-only version of the configuration editor if problems are found with the configuration file. 8100Sync2.0.exe is dependent on comscript.exe and the application will automatically exit when comscript.exe is done executing; this allows either application to be used in the Task Scheduler. When the configuration editor is opened from either application, comscript.exe stops and will restart when the editor is closed.
Operation
- Ensure the LI-8100A is running embedded software 4.0 or above.
- Communication settings are different in the older embedded software versions and 8100Sync will not be able to communicate with instruments using an older embedded version. Update the embedded firmware to a new version, if necessary. The latest firmware is available at licor.com/support/LI-8100A/software.html.
- Install the LI-8100A Windows interface software on the computer.
- The latest interface software is available at licor.com/support/LI-8100A/software.html.
- Extract 8100Sync2.0.zip and place the resulting folder somewhere accessible on the computer.
- In the examples shown here, the folder is saved to the desktop. Note that the .exe files look for each other and the configuration file in the same directory they are in.
- Connect the LI-8100A’s serial cable between a serial port on the computer (or a USB-to-serial adapter) and the LI-8100A.
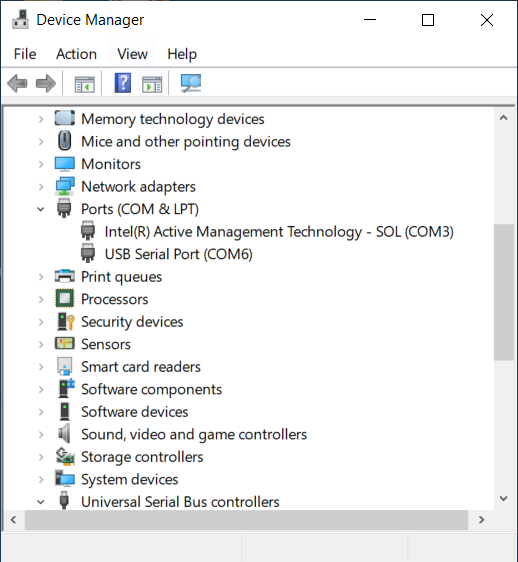
- If using a USB-to-serial adapter launch Window’s Device Manager and expand Ports (COM & LPT) to find out what port number the adapter has been assigned.
- Launch the LI-8100A Windows interface software and click connect.
- Choose serial and select the COM port to use.
- Once connected to the LI-8100A, configure the IP address if 8100Sync will be using an Ethernet connection. You can skip this step if 8100Sync will be using a serial connection.
- 8100Sync supports both serial and Ethernet connections to the LI-8100A. If you will use Ethernet to connect from 8100Sync, go to 8100 > Networking and assign appropriate network settings to the LI-8100A. For the Ethernet connection to work the LI-8100A and computer must be configured on the same network. Note that the LI-8100A only supports static networking using IPv4. Below is an example network configuration for a direct connection between the LI-8100A and the computer (i.e., an Ethernet cable connected directly between the instrument and computer LAN ports):
- Go to 8100 > Networking in the LI-8100A interface software and assign an IP address of 192.168.1.101 and a subnet mask of 255.255.255.0. The gateway can be left blank.

- Click Set, and then restart the LI-8100A to implement the changes.
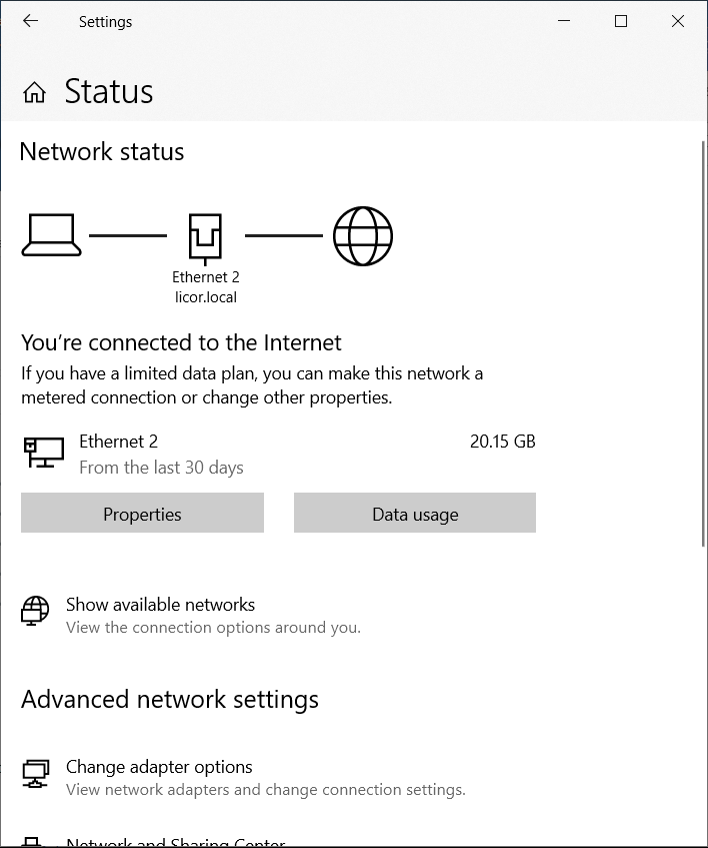
- On the computer, navigate to Network Connections or Network Status and click Change Adapter Options.
- Right-click the Ethernet connection and select Properties.
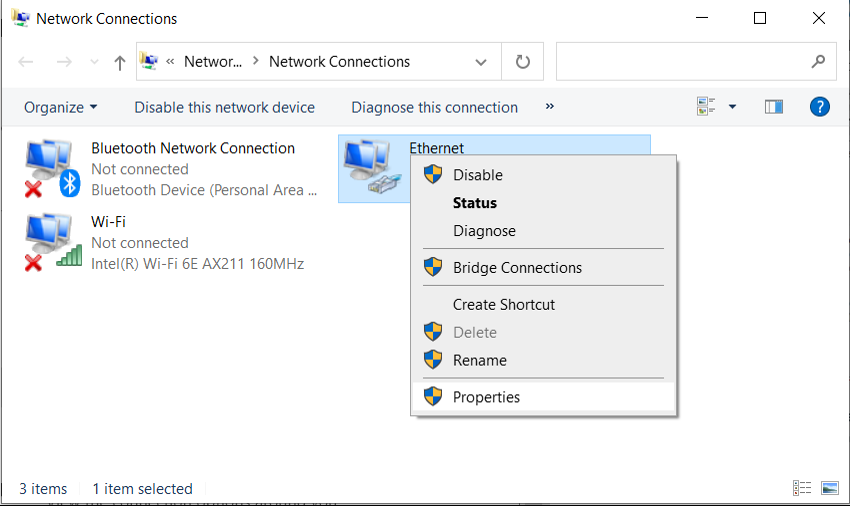
- In the Properties window, select Internet Protocol Version 4 (TCP/IPv4) and click Properties.
- On the General tab in the Internet Protocol Version 4(TCP/IPv4) Properties window, choose Use the following IP address: and enter 192.168.1.100 for the IP address and 255.255.255.0 for the Subnet mask. You can leave the default gateway blank.
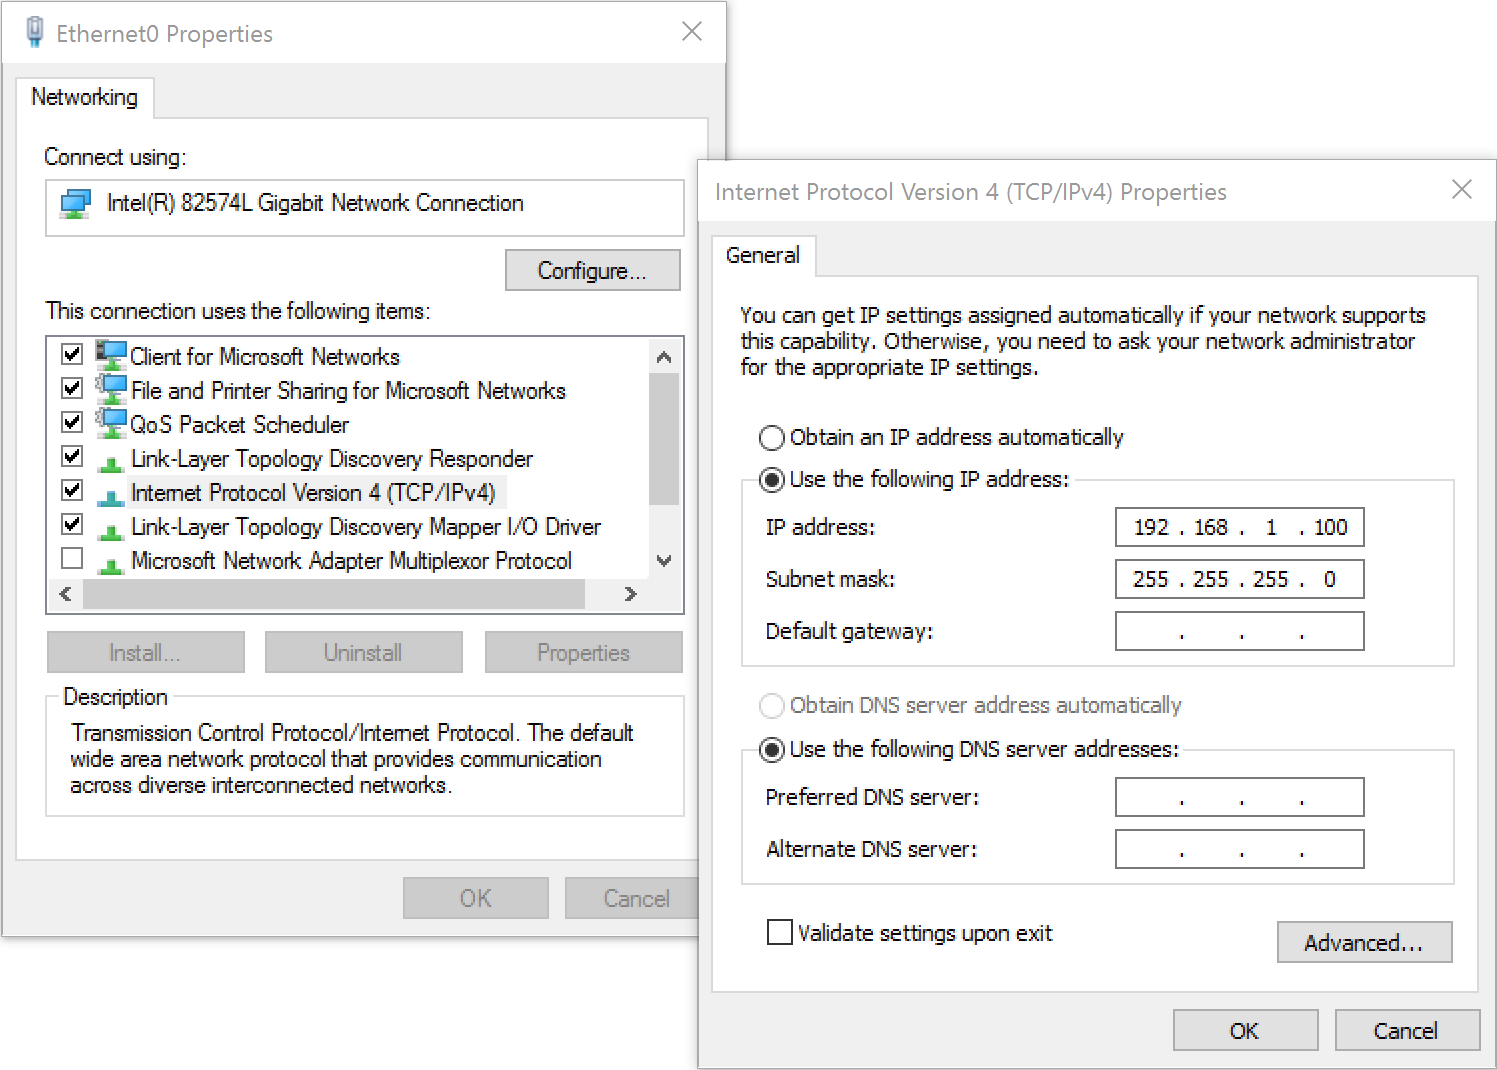
- Click OK. Then click Close. The computer's network settings are now applied and saved.
- Reconnect to the LI-8100A using its IP address now, just to make sure the configuration worked.

- In the LI-8100A Windows interface software, configure the file settings.
- 8100Sync needs to stop the measurement sequence to be able to set the LI-8100A clock. It will restart measurements after the clock is set one of two ways; data can be appended to an existing file on the LI-8100A (managed by the LI-8100A) or a new file can be created by 8100Sync (managed by 8100Sync). If the LI-8100A will manage the files, go to Setup > Chamber Measurement > Start Measurement and configure the file settings as desired. In this mode Append to existing file must be selected.
- Disconnect the Windows interface software from the LI-8100A.
- Navigate to the directory where 8100Sync2.0.exe is and launch the application.
- When the application starts, updates will start appearing in the Status… window, and if this is the first time the application has run, the configuration editor will launch. If the configuration editor does not launch because a configuration file already exists, go to Options > Edit config.
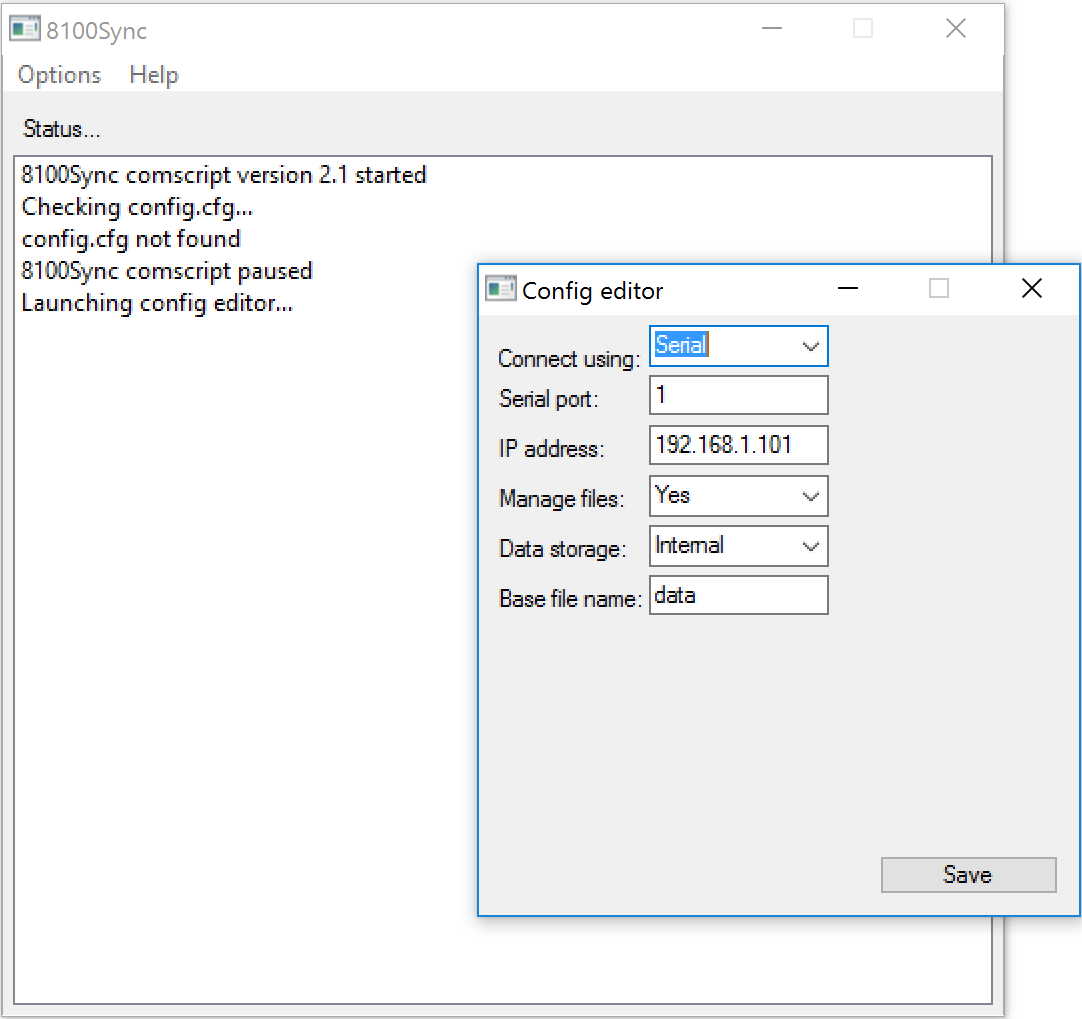
- Edit the configuration as desired:
- Select the desired method to connect to the LI-8100A from Connect using. Options are Serial or Ethernet.
- If using serial, set Serial port to the port number used in step 5 above. Valid ports are 1 through 30.
- If using Ethernet set IP address to the IP address of the LI-8100A.
- Choose whether 8100Sync or the LI-8100A will handle file management. If 8100Sync will do it, select Yes for Manage files:. If the LI-8100A will do it, select No.
- If 8100Sync will manage the files, select where the files will be stored on the LI-8100A under Data storage. Choose Internal for the LI-8100A’s internal memory, or choose External to store the file on the Compact Flash card. Note that the LI-8100A only has 10 MB of internal memory.
- If 8100Sync will manage the files, enter the base name to be used for files under Base file name. Files are named using the following format:
basenameYYYYMMDDhhmm.81x - Click Save (or Save changes) and the configuration editor will close, and comscript.exe will restart.
- Watch the status window for any error messages.
- You should see a series of messages indicating that a state is being checked or changed on the instrument and whether these checks or changes are successful. Comscript.exe will continue through the whole sequence even if a step in the process fails. When a step fails an error message and time stamp are logged as tab delimited text in error.txt.
- Once comsync.exe completes updating the instrument clock and restarting the measurement, 8100Sync will close automatically.
- At this point a measurement will now be active on the LI-8100A.
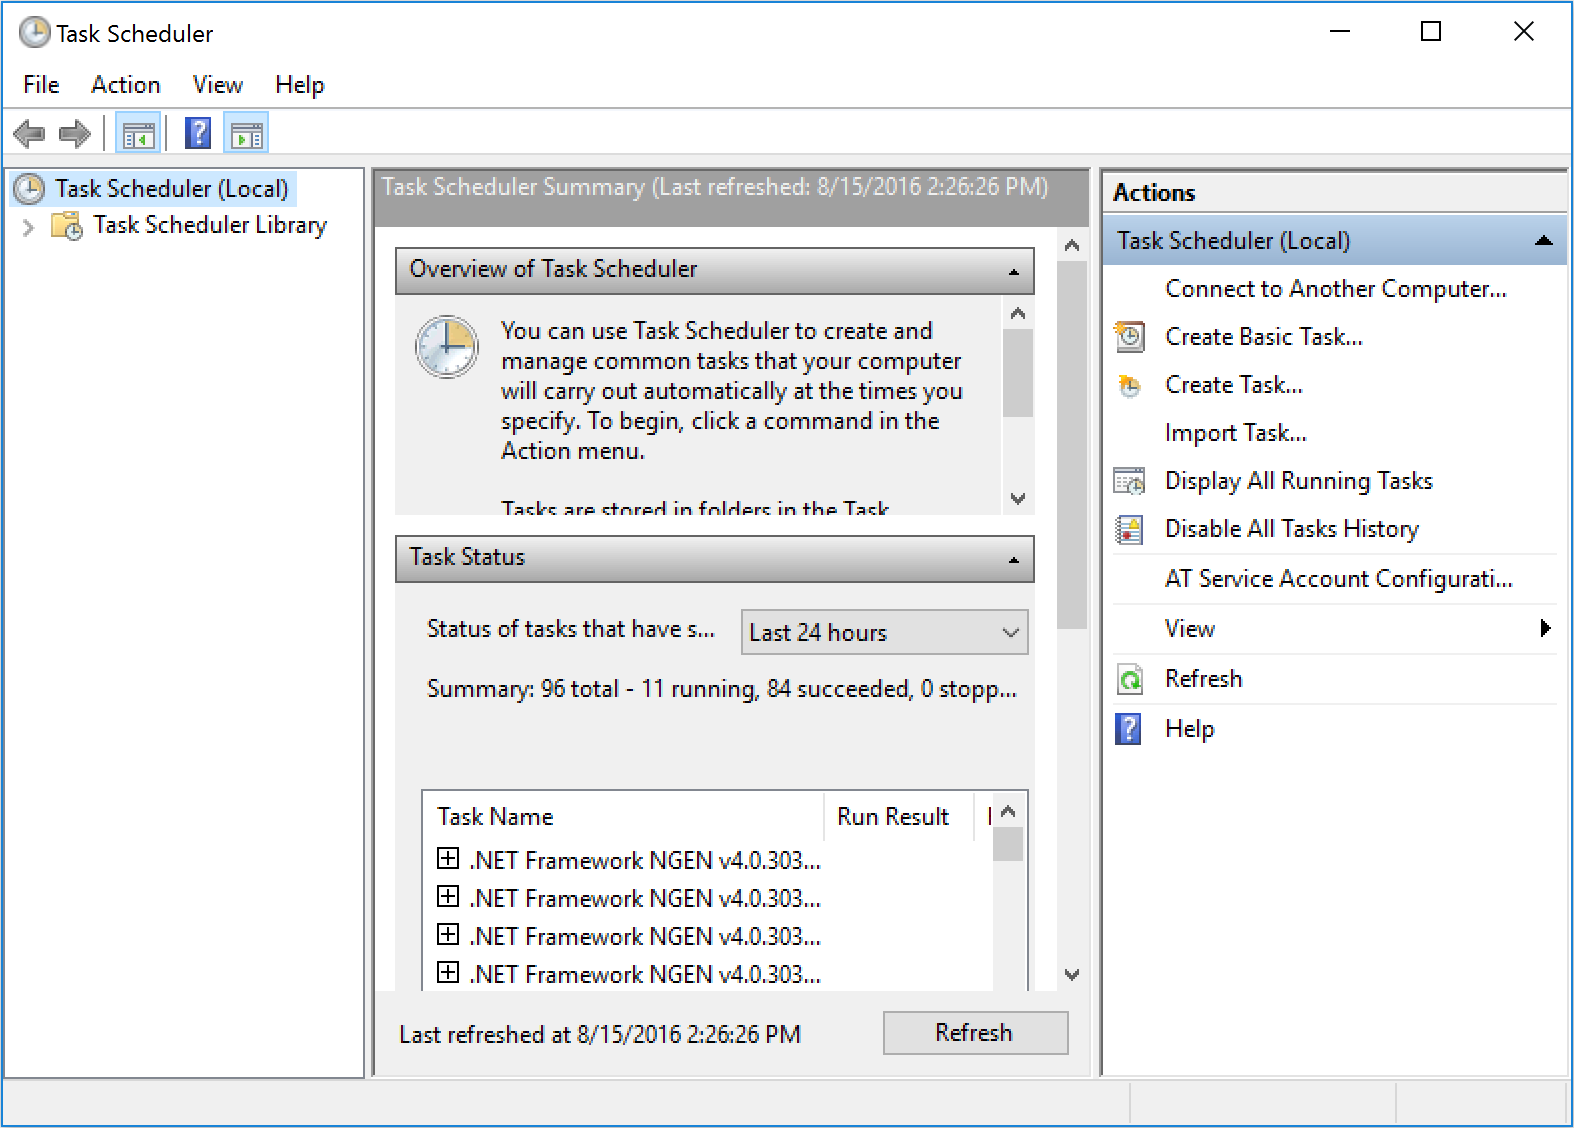
- Next create a scheduled task for the application so the Windows computer can do the synchronization automatically.
- To do this launch Windows Task Scheduler and click Create Task… under Actions.
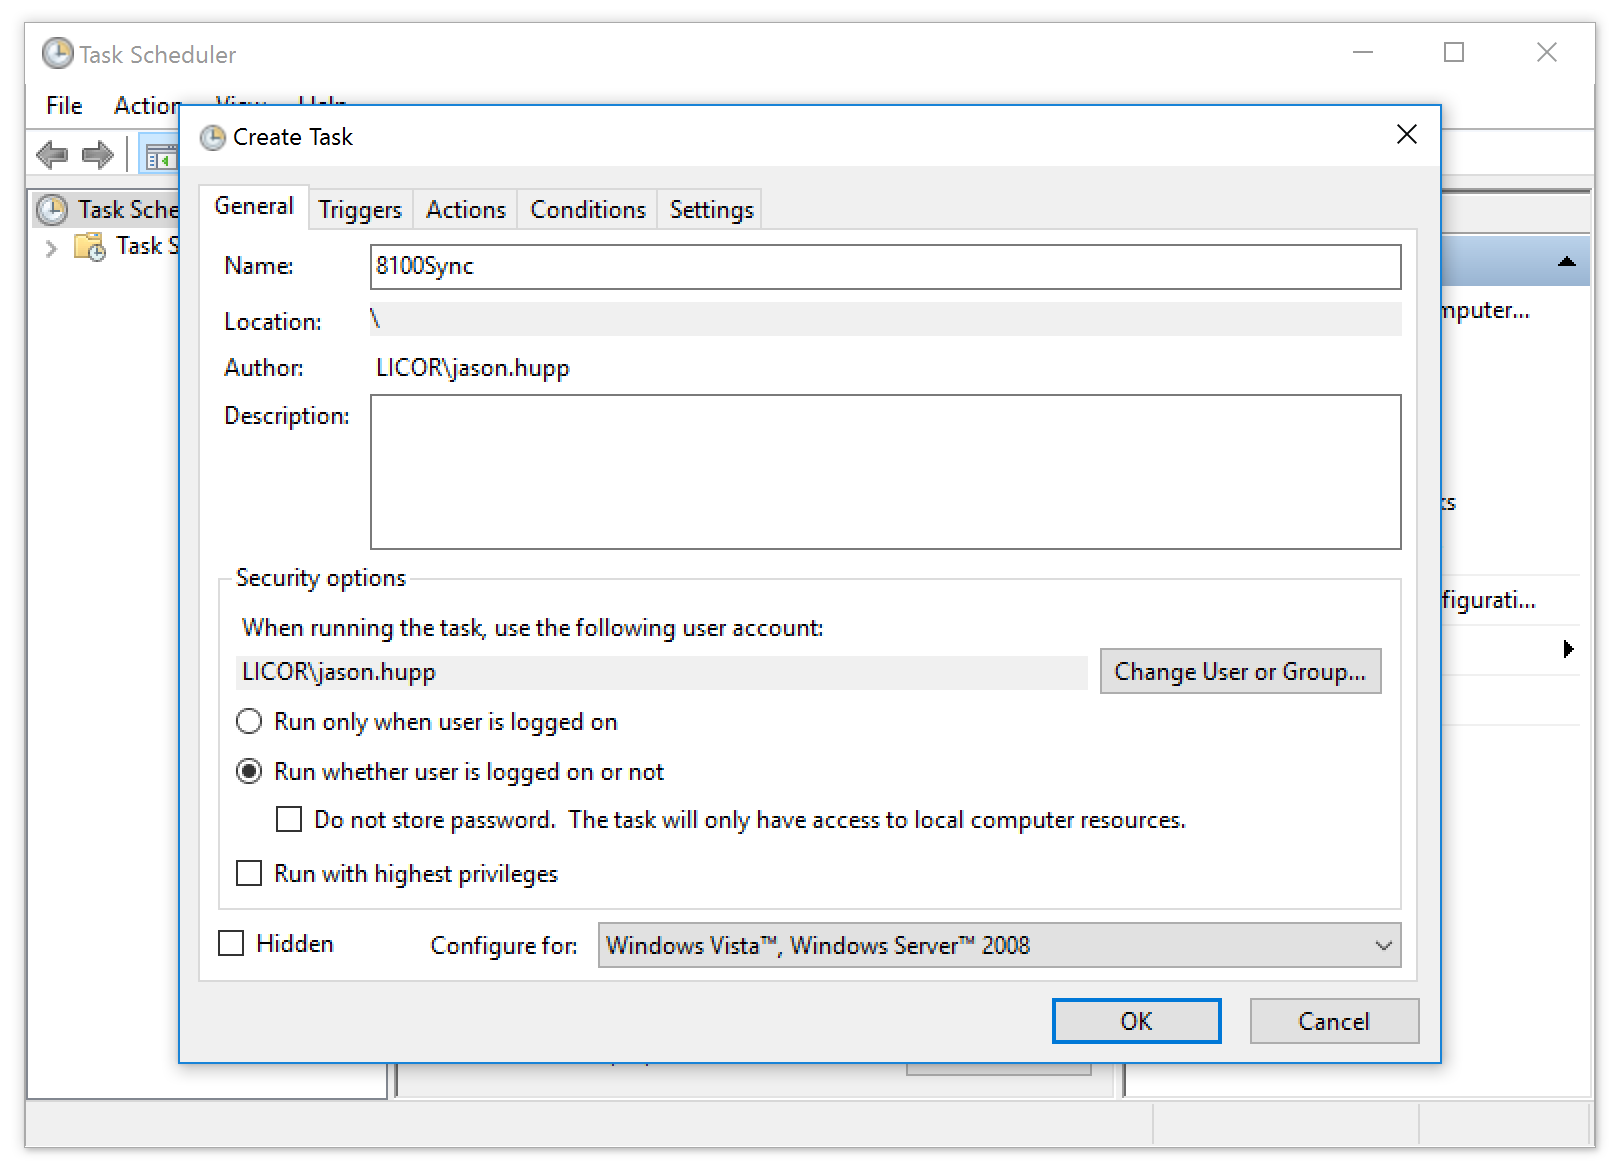
- On the General tab enter a name for the task under Name: and select Run whether user is logged on or not.
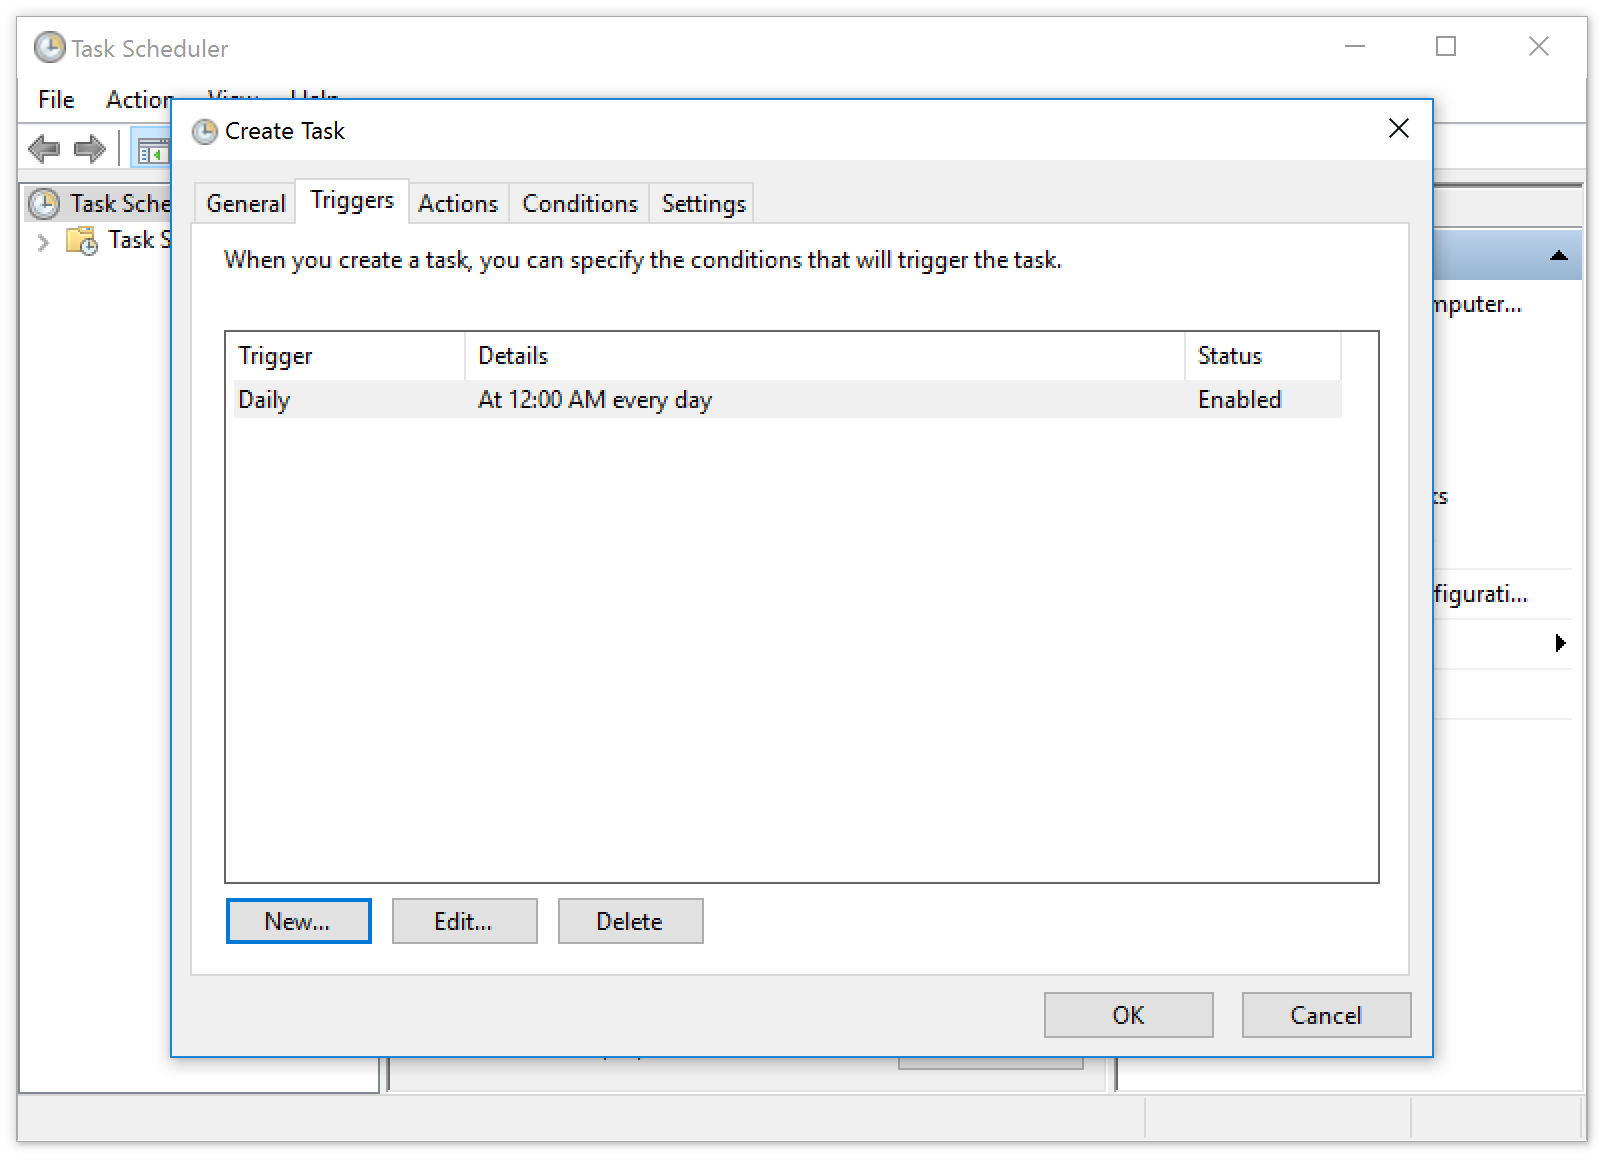
- Go to the Triggers tab and click New….
- When the New Trigger window opens, choose On a schedule under Begin the task: and configure Settings to run the task at the desired interval. In this case 8100Sync will run and synchronize the instrument clock at midnight each day.
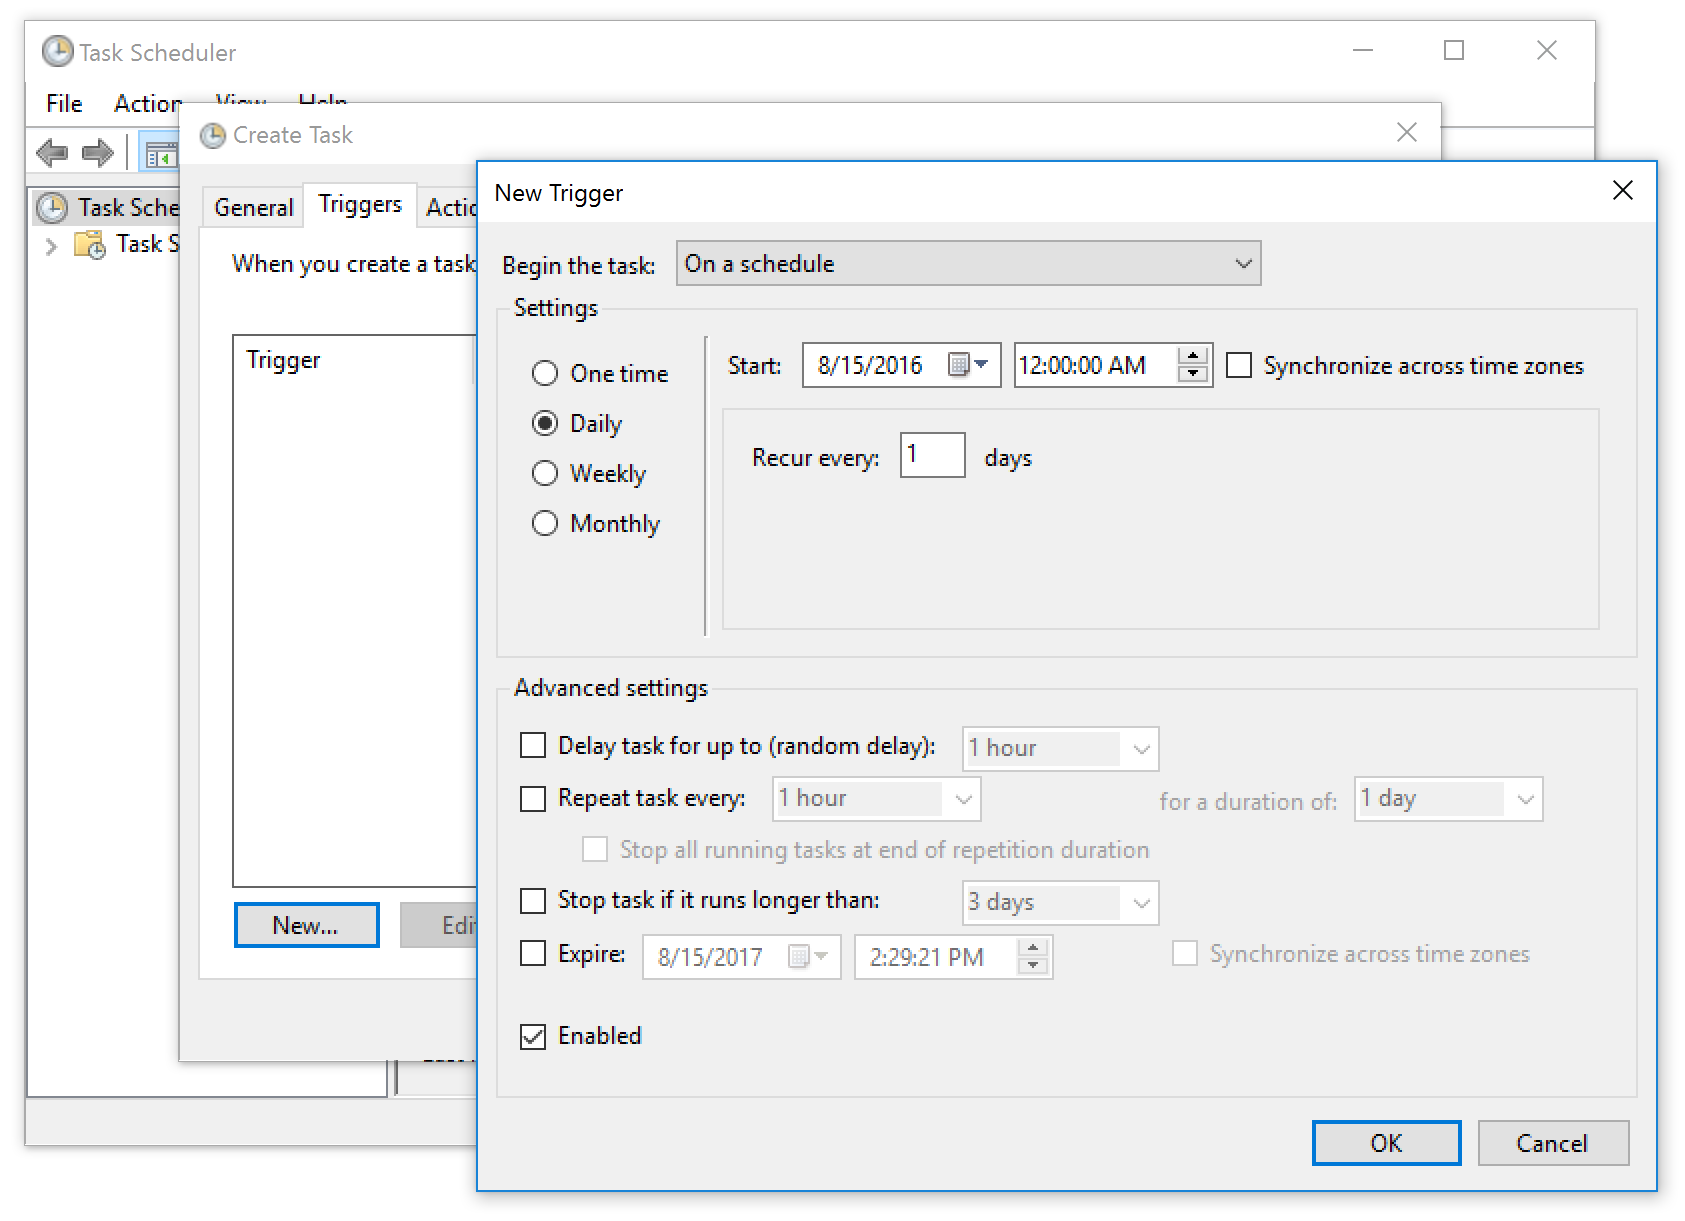
- Click OK. There should now be a trigger for the task listed in the window.
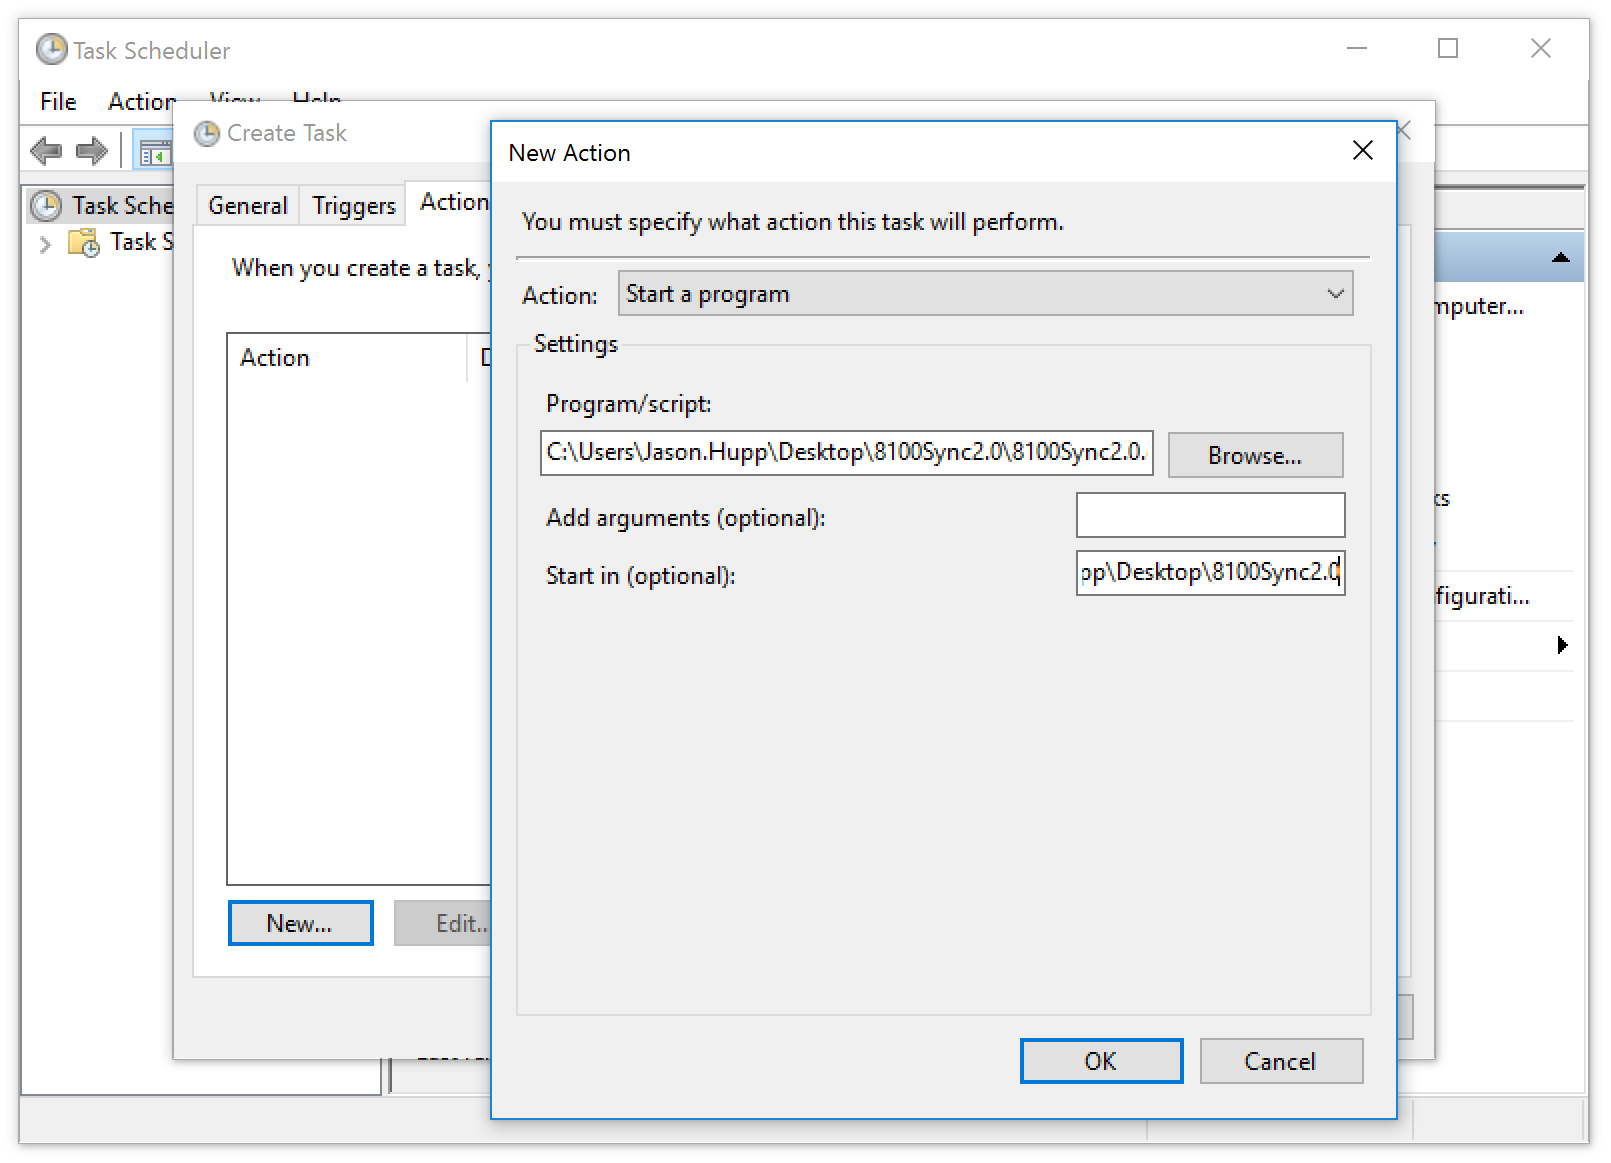
- Go to the Actions tab and click New….
- When the New Action window opens choose Start a program under Action:, click Browse, navigate to 8100Sync2.0.exe and then click Open. Copy the path to the directory containing 8100Sync2.0.exe next to Browse and paste it into Start in (optional):. The application will not run from the Task Scheduler if the parent directory for the application is not specified here.
- Click OK.
- There should now be an action for the task listed in the window.
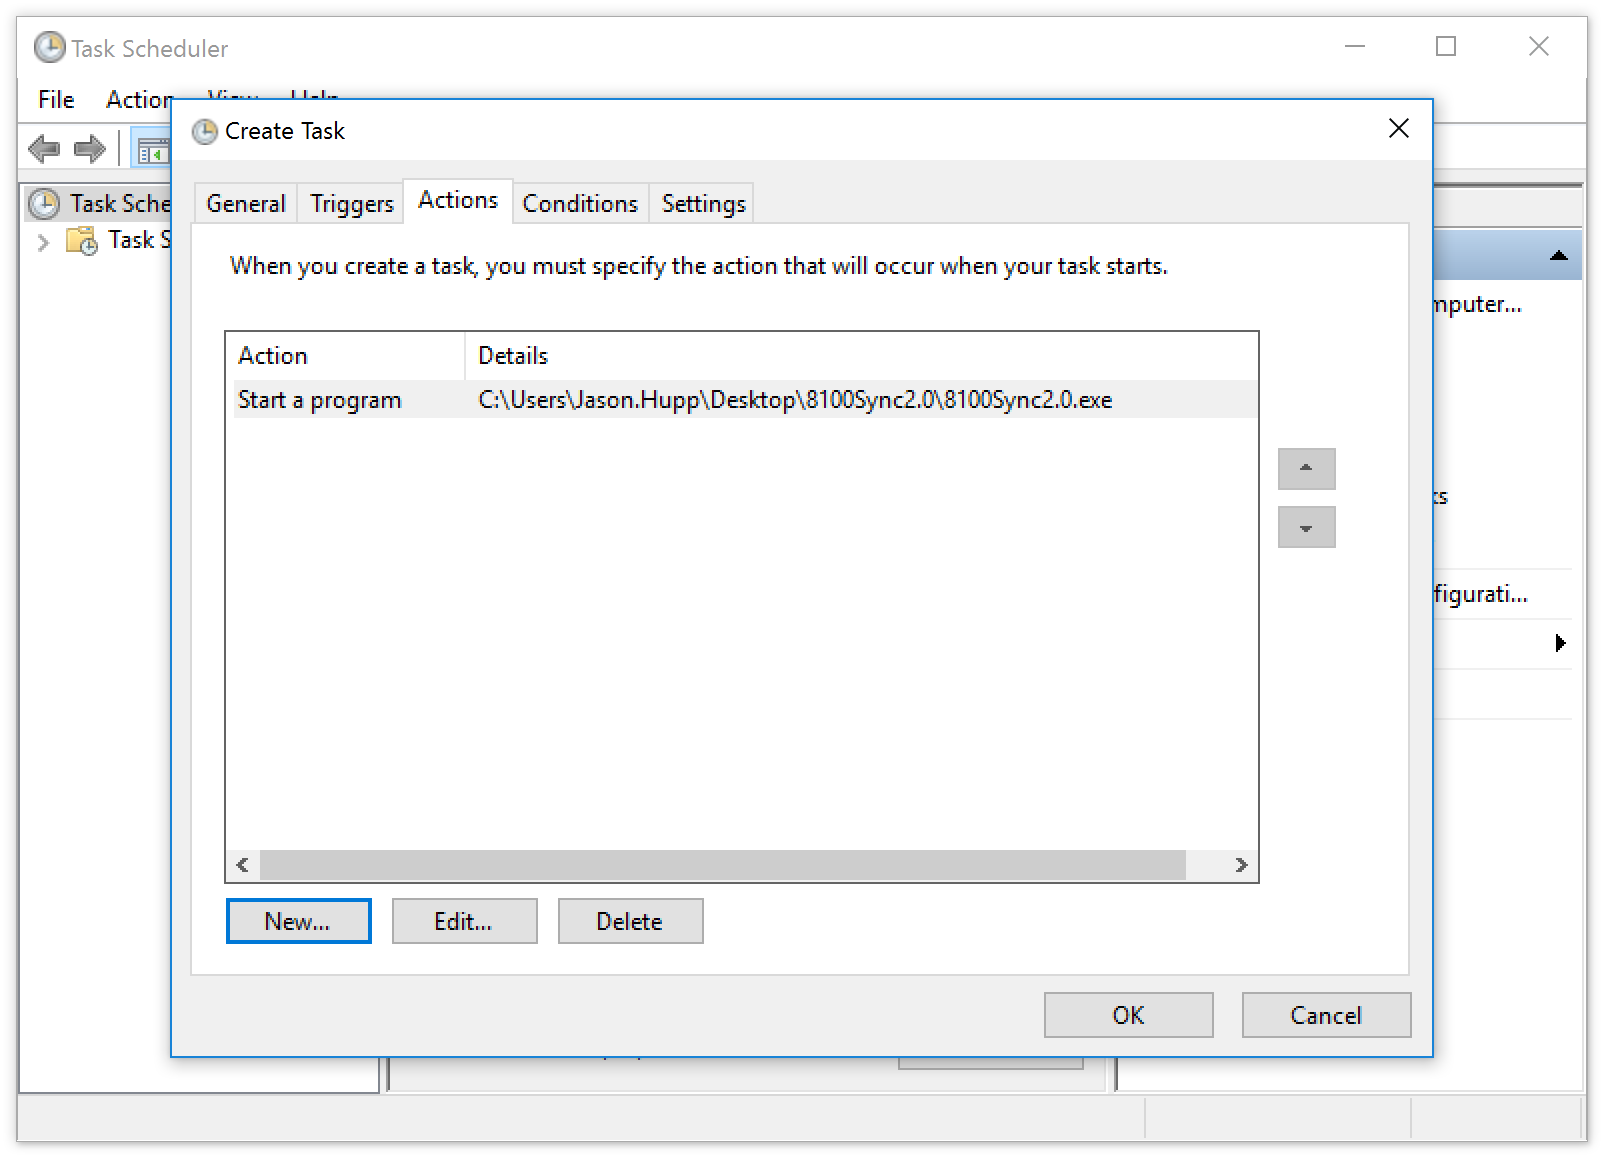
- Click OK and the task will be saved and added to the schedule.