Printable PDF: Chamber Bowl Assembly Instructions
(8100A_InstallGuide_Clear_Bowl_Replacement_ACU119.pdf)
Instructions for replacing the chamber bowl.
The 8100-104 Long-Term Chamber’s opaque “bowl” can be swapped out with the clear bowl from the 8100-104C Long-Term Chamber, and vice versa. Upgrade packages (9981-078 and 9981-160) are also available from LI-COR that contain all of the hardware required to upgrade either chamber. The upgrade(s) require only a 3/8" combination wrench and an 11/32" combination wrench or nut driver. Follow these instructions to change the chamber bowl on the 8100-104 or 8100-104C:
- Make sure that the chamber drive column is in the “Park” position before starting. If the chamber is not parked, press the OPEN/CLOSE button twice to park.
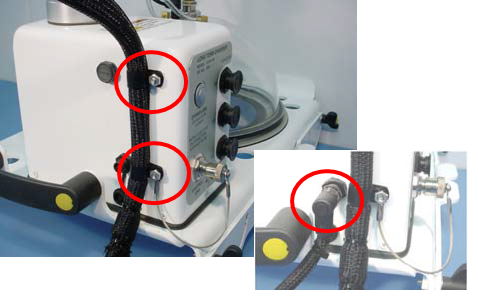
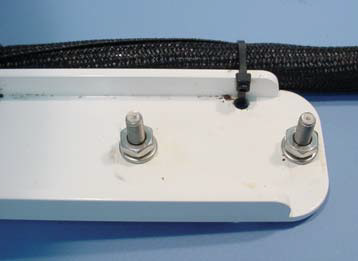
- Use the 11/32" wrench or nut driver to remove the two hex nuts that secure the cable/tubing assembly to the side of the motor housing. Unscrew the nut and disconnect the thermistor cable.
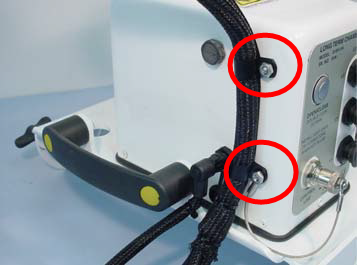
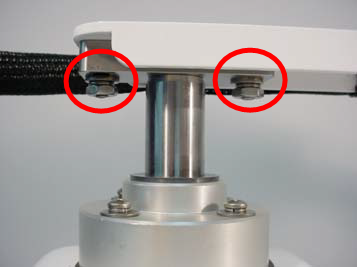
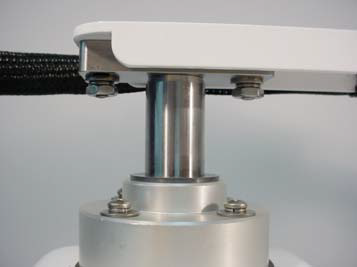
- Use the 3/8" wrench to remove the arm mounting nuts and washers. Remove the arm assembly.
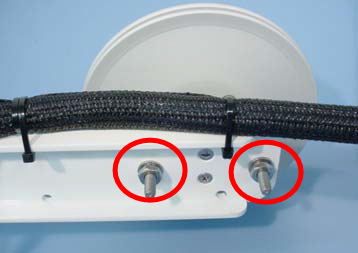
- For storage, reinstall the flat washer, split washer, and hex nut on each of the PEM studs on the underside of the arm assembly you removed in Step 3.
- Remove the mounting hardware from the underside of the new arm assembly.
- Place the arm assembly into position on the mounting flange and install the flat washer, split washer, and hex nut finger tight. The nuts should be tight enough to hold the arm flat against the mounting flange, but should still allow some lateral movement.
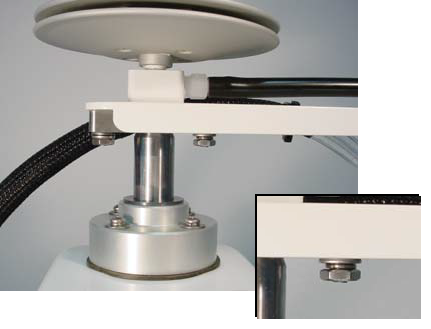
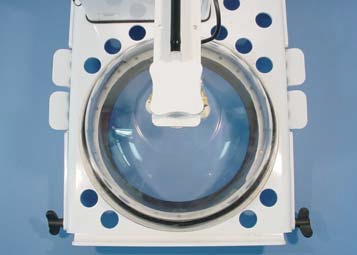
- Adjust the position of the arm assembly so that the bowl is centered over the gasket. When centered, tighten the mounting nuts.
- Use the cable clamps provided to attach the cable/ tubing assembly to the motor housing. Note that Control Unit dust cap connector is placed under the lower cable clamp. Plug in the thermistor cable and tighten the nut.