
You're probably eager to get started with some measurements or test the system. In this section, we'll go over the basic operations and critical first steps to get you ready to collect some actual field data.
First Things First
This section has some basic steps that will get you started with the system. Do this the first time you power up the system.
1. Install the computer software
Download the latest LI-8100A software from the LI-COR web site: licor.com/support/home.html. Install the software on your computer.
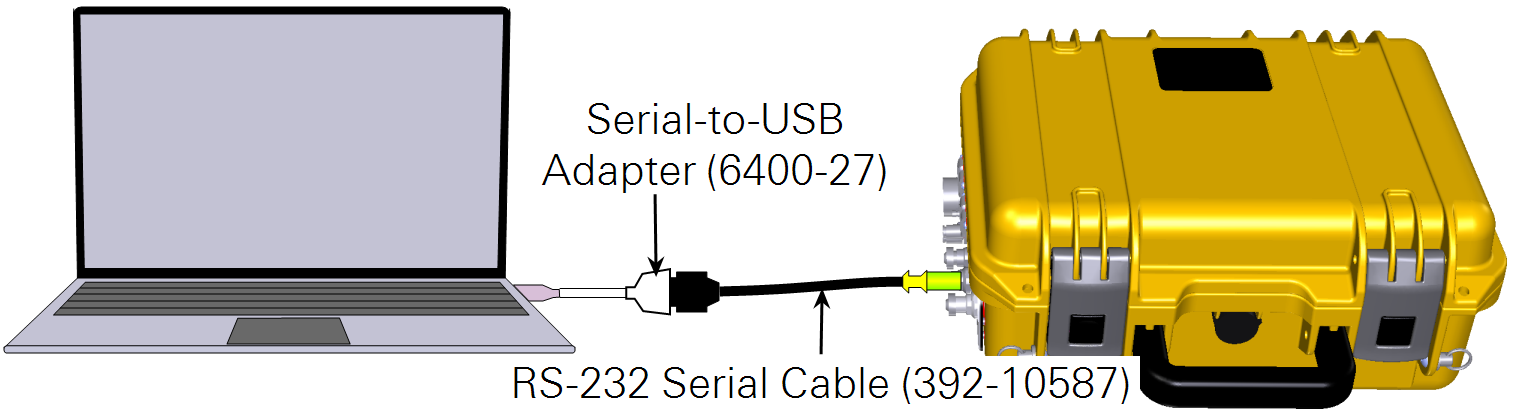
The first time you power up the device, you'll need to communicate with it using a PC and the RS-232 serial connection. Use the Serial-to-USB adapter for this1.
After some initial configuration, you'll be able to configure it with the Ethernet connection or wirelessly (if enabled) for subsequent connections.
Grab a freshly-charged battery and plug it into either one of the connectors in the analyzer control unit. The batteries are charged prior to delivery, but if they have been sitting for a long time, it is a good idea to charge them up before you start.
4. Connect a chamber
Attach the tubes and cable connector for a chamber. See Connecting a survey chamber or Connecting a long-term chamber for details.
5. Power on the instrument
Press the ON/OFF button inside the analyzer control unit.
6. Connect to the LI-8100A
Launch the LI-8100A PC software, click the Connect button ( ), select the serial port, and then click Connect.
To find the serial port number, open the Device Manager (press the Windows key  , type Device Manager, then press Enter). Click Ports (COM & LPT). Look for USB Serial Port (COM#). The serial port numbers are shown beside the ports.
Any time the LI-8100A powers on, the pump will begin running immediately. This is a good thing if your system is making autonomous measurements in the field, but if you're sitting in the lab, the pump might be annoying. To turn it off, click Utilities > Manual Controls > Flow, then click 8100 Flow Off.
8. Check the instrument's date and time
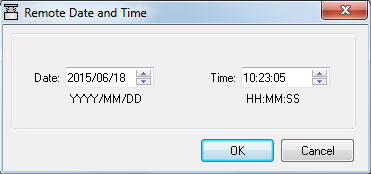
Under 8100 > Date and Time, set the date and time. The date and time are logged in your data files.