
The leak test
Given the large amount of tubing and junctions in the multiplexer, there is a chance that the system will develop leaks from time to time, especially as the system ages1. Fortunately, it is relatively easy to perform a leak test and identify the offending connection or tube and correct the leak2.
During the leak test, the bellows pump in the LI-8100A draws a vacuum on the system. The pressure is monitored to determine the leak rate of the system. Upon completion of the leak check on each port, the system is purged to allow the next port to be evacuated.
The leak test requires that; a) each multiplexer port is sealed to form a closed loop, and b) one port is left open to allow the system to purge itself.
The closed loop is made by disconnecting the chamber and connecting the male and female connectors to each other or with the leak test shunt.
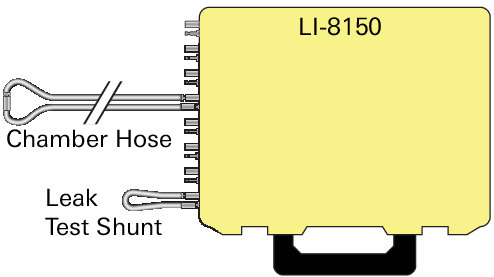
The leak test shunt (part number 9981-142) is a short piece of tubing with male and female connectors. It is used to close the loop between the air input and output ports (Figure 5‑4) when you are not testing the chamber tubing.
- For each port to be tested, close the tubing loop.
-
- Join the male and female connectors on the chamber tube, or
- Connect the leak test shunt (part number 9981-142) between the air inlet and air outlet port for a chamber.
- Make sure that at least one port is left open; you can disconnect the tubing at the chamber end, without joining the connectors, or simply disconnect at the multiplexer. Thus, the greatest number of ports that can be checked at one time is 7 with an 8-port system, or 15 with a 16-port system. The open port will need to be checked for leaks after testing the other ports.
- Start the Leak Test.
![]()
In the PC Software:
Go to Utilities > Manual Controls and select the Leak Test tab.
Check the boxes next to the ports to test. Check 8100 to Mux to check the lines between the two.
Click Run Test. Results are:

![]()
In the App:
Go to Utilities > Manual Controls and tap Leak Test.
Tap Port Sequence and select the ports to test. Choose whether to test LI‑8100 to Multiplexer Lines.
Tap Send Update to initiate the test. Results are:
- p = pass
- f = fail
- x = canceled
- o = in queue
- ‑ = not tested