Using the LI-190R with an 8200-104/C Long-Term Chamber
Printable PDF: Using the LI-190R with an 8200-104/C Long-Term Chamber
(8250_InstallGuide_LI-190R_19048.pdf)
Download this content as a pdf that can be saved to your computer or printed.
Helpful tools
-
#1 Phillips-head screwdriver
-
Hex wrench: 5/32 in or 4 mm
-
Hammer or mallet (optional)
-
Scrap block of wood (optional)
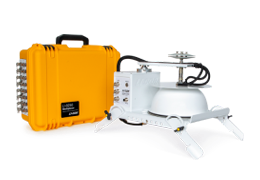
The quantum sensor package (part number 190R-8200) includes a mounting plate and leveling stake used to mount and level the sensor.
To use the LI-190R Quantum Sensor, you'll need to install it to the 8200-104/C Long-Term Chamber and enter its calibration information into the LI-8250 Multiplexer user interface.
Caution: Remove the protective red cap from the light sensor before using it. The cap should NOT be in place during measurements. It is to protect the sensor during shipping and storage. 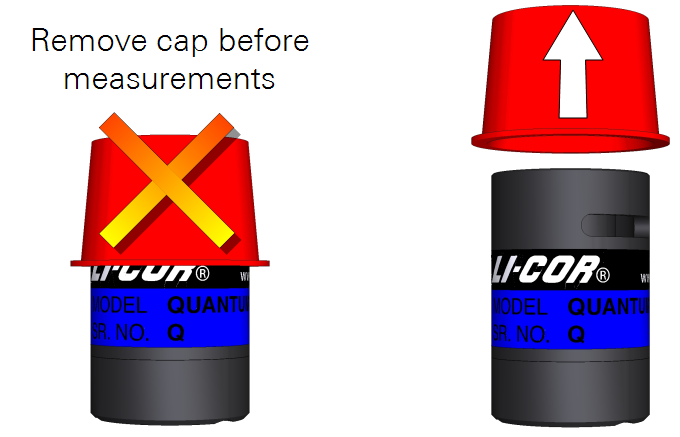
Installing the sensor
Installing the sensor takes just a few steps.
-
Choose a position for the sensor.
The ideal position will not be shaded, from either the surrounding landscape or the chamber itself. Be sure the sensor and cable will not interfere with the chamber opening and closing.
-
Push the leveling stake into the soil keeping it as upright as possible.
Leave at least 5 cm of clearance between the soil and the bottom of the mounting plate to prevent the sensor from being submerged in heavy rain. If the soil is difficult to push the stake into, you can drive the stake into the soil. Set a scrap piece of wood into the opening between the arms and tap the wood using a hammer or mallet. Be careful not to bend the stake.
-
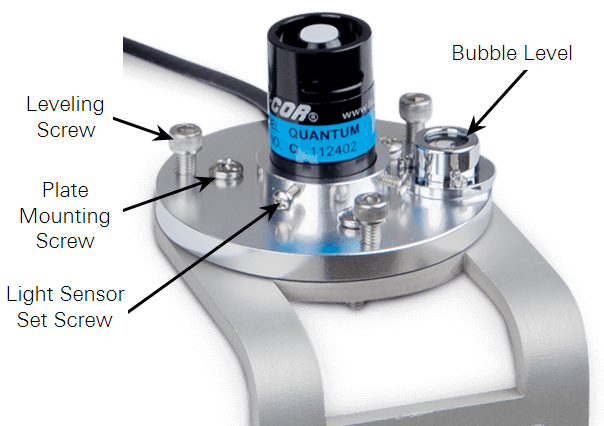
Attach the mounting plate to the leveling stake using the three Phillips-head screws.
Do not fully tighten the screws yet.
-
Mount the sensor in the fixture on the mounting plate by placing the sensor into the fixture and tightening the mounting screw against the sensor base.
-
Level the sensor by adjusting the three hex-head leveling screws until the bubble is centered in the bubble level.
-
Fully tighten the Phillips-head screws from step 3 to lock the mounting plate in place.
-
Connect the sensor cable to any port on the chamber.
Thread the connector until snug. The fittings are keyed, so be sure to align the key of the sensor fitting with the slot on the chamber fitting. The connection will not fit otherwise.
Configuring the sensor
LI-COR sensors require little configuration to work with the LI-8250 Multiplexer.
-
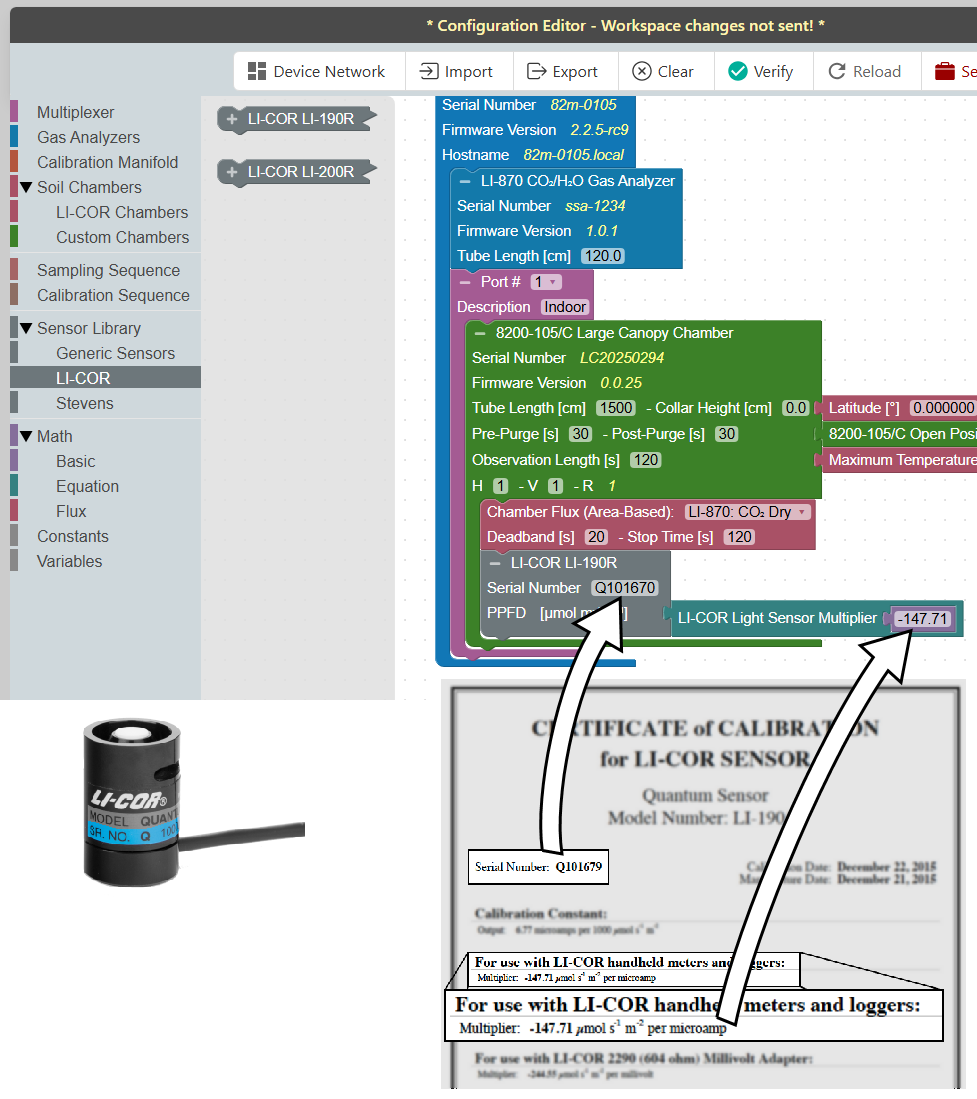
To add a sensor to a LI-COR chamber block, first navigate to Configuration in the LI-8250 Multiplexer user interface.
-
Expand the Sensor Library menu and select LI-COR.
-
Click and drag the LI-COR LI-190R under the chamber where it will be added.
-
You will then need to add the Serial Number and LI-COR Light Sensor Multiplier for your sensor.
Each LI-COR radiation sensor is shipped with a certificate of calibration. The certificate can also be found at licor.com/support/. Enter your sensor's serial number in the calibration search box at the bottom of the page. The calibration multiplier is listed on the certificate under For use with LI-COR handheld meters and loggers.
Maintaining the sensor
-
Keep the surface and vertical edge of the acrylic diffuser clean.
-
Clean the diffuser sensor with water, mild detergent, or vinegar dilute using a soft, lint-free cloth as needed.
-
Do not use alcohol, organic solvents, strong detergents, abrasive solvents, or abrasive cloth on the diffuser.
-
Return the sensor to LI-COR for factory recalibration every two years. Contact technical support for more information.