Cleaning the Optical Bench
The LI-840A optical bench can be removed and cleaned if necessary. If the optical path becomes dirty it may become difficult to span the analyzer. Excessive zero drift may also be observed if the optical path becomes dirty. Follow these steps to clean the optical bench:
- Turn the LI-840A off.
- Remove the six screws on the LI-840A top panel and remove the cover. Note that these screws are not molded into the case and may fall out.
- Unscrew the tube retaining nuts on the inner air port fittings.
- Remove the tubing from both air ports. Leave the tubing connected to the source and detector housings.
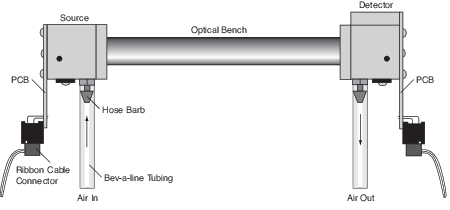
- There are ribbon cables connected to the circuit boards on the source and detector housings, as shown below. Pull straight out on the connector that is attached to each ribbon cable. The optical bench can now be removed from the foam casing.
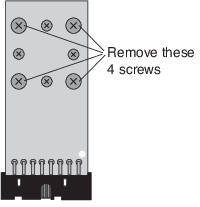
- There are four screws on the source and detector circuit boards that must be removed.
- Remove the four screws in the corners of the boards.
- Do not remove the four small screws.
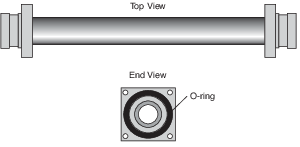
- The source and detector housings (with attached circuit boards) can now be removed. The bench will appear as shown below. It is a good practice to replace the O-rings when cleaning or replacing the optical path.
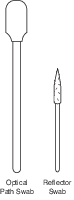
- There are a number of swabs in the spare parts kit. Dip one end of the swab into a 50:50 ethanol/water solution and carefully swab both ends of the optical bench, until there is no more visible residue. A mild solution of dish washing type soap and water will also work. Do not use abrasive cleansers, as they can irreparably damage the gold plating on the optical bench.
- Use a swab and carefully swab the gold-plated concave surface of the source housing, if necessary.
-
- If you need to clean out the hose barbs or replace the tubing connected to the source and detector housings, use a small pair of diagonal cutters to remove the tubing from the hose barbs. Use the cutters to pinch the tubing parallel to the hose barb axis, and then pivot the cutters over the hose barb tip; the tubing will pull off of the hose barb. Be very careful not to cut the tubing or scratch the hose barb with the cutters, as subsequent tubing connections may leak if the hose barb is damaged.
- Let the optical bench dry.
- Re-assemble the bench, making sure the O-rings are in place on both ends of the bench.
- Note that the orientation of the cylinder is not important; either end can be inserted into the source or detector housing.
- Re-assemble the LI-840A case.
- Make sure that the foam insulation on the inside top cover is positioned over the optical bench; it is required for thermal stability.
- Perform zero, span, and secondary span calibrations as described in User Calibration - Setting the Zero and Span.
Changing the Fuse
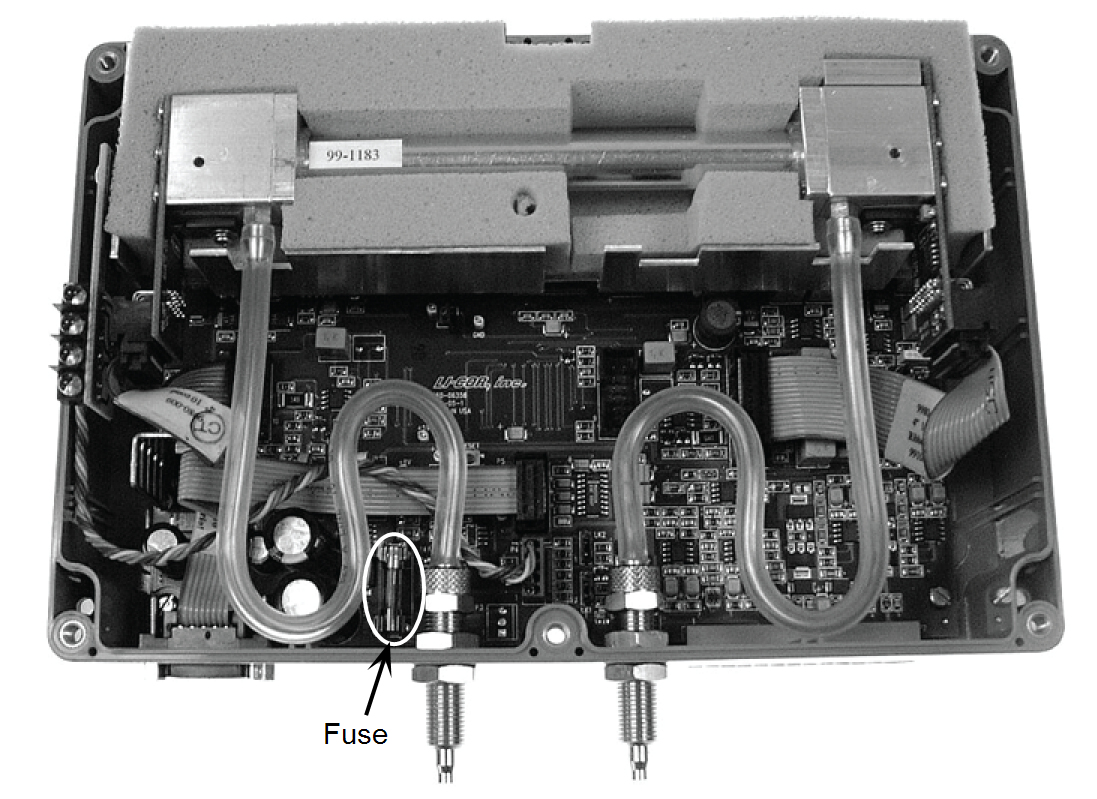
The LI-840A power supply is protected by a 2A 250V, 5 × 20 mm fast-blow type fuse located inside the case. If the battery fails to power the LI-840A, and will not light the Power LED on the top panel, check to see if the fuse has blown.
To check the fuse, remove the six screws on the top of the LI-840A. The fuse is located on the main circuit board, near the Flow In port, as shown below. Replacement fuses (part #439-03952, in the spares kit) plug into the fuse holder; no soldering is required. Replace the fuse and reassemble the LI-840A case.
Note on Infrared Source Replacement
The infrared source in the LI-840A is rated for more than 18,000 hours of life. Should the source fail, a replacement can be obtained from LI-COR Environmental. The source can be replaced in the field; however, it should be noted that changing a source has the potential of degrading the accuracy specification for CO2 to as much as 3% of reading. The H2O channel should remain within the published specification.
If the source fails, the instrument can be returned to LI-COR Environmental for replacement and factory recalibration. This will ensure that the accuracy stays within the factory specifications. Alternatively, if you have two span gasses, you can adjust the calibration yourself. See Two Point Span (Span 2 Tab).
Storing the LI-840A
The LI-840A can be stored in non-condensing conditions, but if it is exposed to high humidity or moderate humidity for a long period of time while it is powered off, the humidity can temporarily affect measurements. You can identify this issue by observing unexpected drift that stabilizes after several days of operation, an offset in measurements, or unresponsiveness. If your instrument exhibits these characteristics, verify the issue by comparing raw detector outputs in data that was collected before and after storage. If you don't have these data, contact LI-COR and we will provide the calibration data set for your instrument. In the PC interface software, click View > Diagnostics and observe the values for Raw CO2 Reference and Raw H2O Reference. If these values are lower than the original values, power on the instrument and let it run (with the heaters on) for several hours to several days. If the instrument has not fully recovered after several days, you may need to disassemble the optical bench and heat the detector in an oven at 65 °C (150 °F) for several hours. Reassemble the instrument and check the measurements.