
The Toolbox is where you select tools to work with data. Typically, you'll complete some or all of these basic steps for every project (evaluating the data quality, biomet gap filling, merging redundant variables, and averaging redundant measurements). Following the initial analysis, you can proceed with advanced steps, which will depend on your objectives. These may include flux gap filling, u* filtering, footprint analysis, and custom analyses.
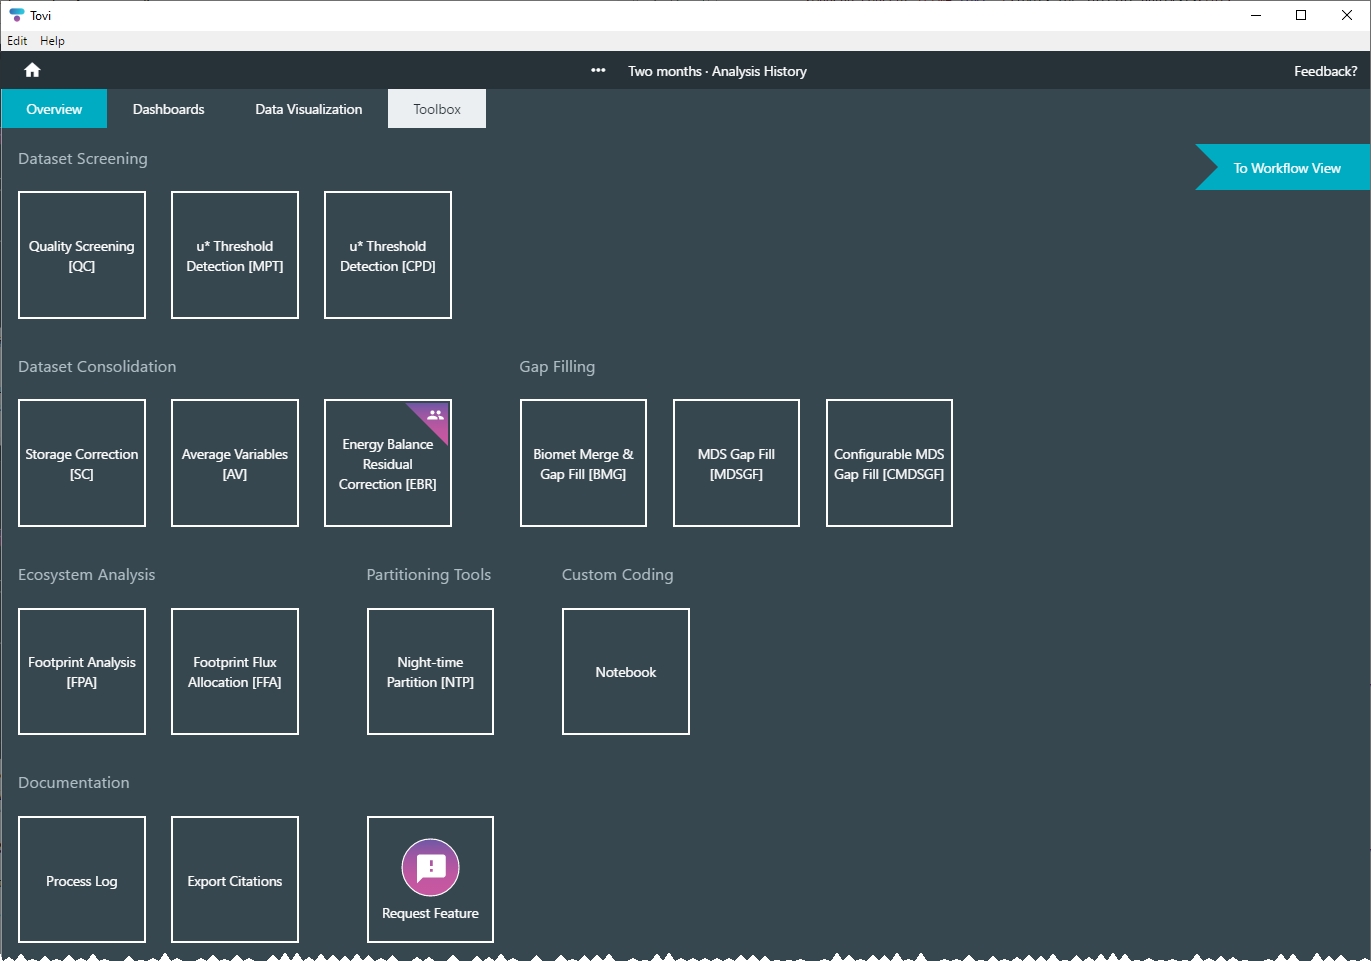
Two view options are available: Category View (default) and Workflow View. The Category View (Figure 5‑1) shows processing steps grouped by related categories. Select the view option that you prefer.
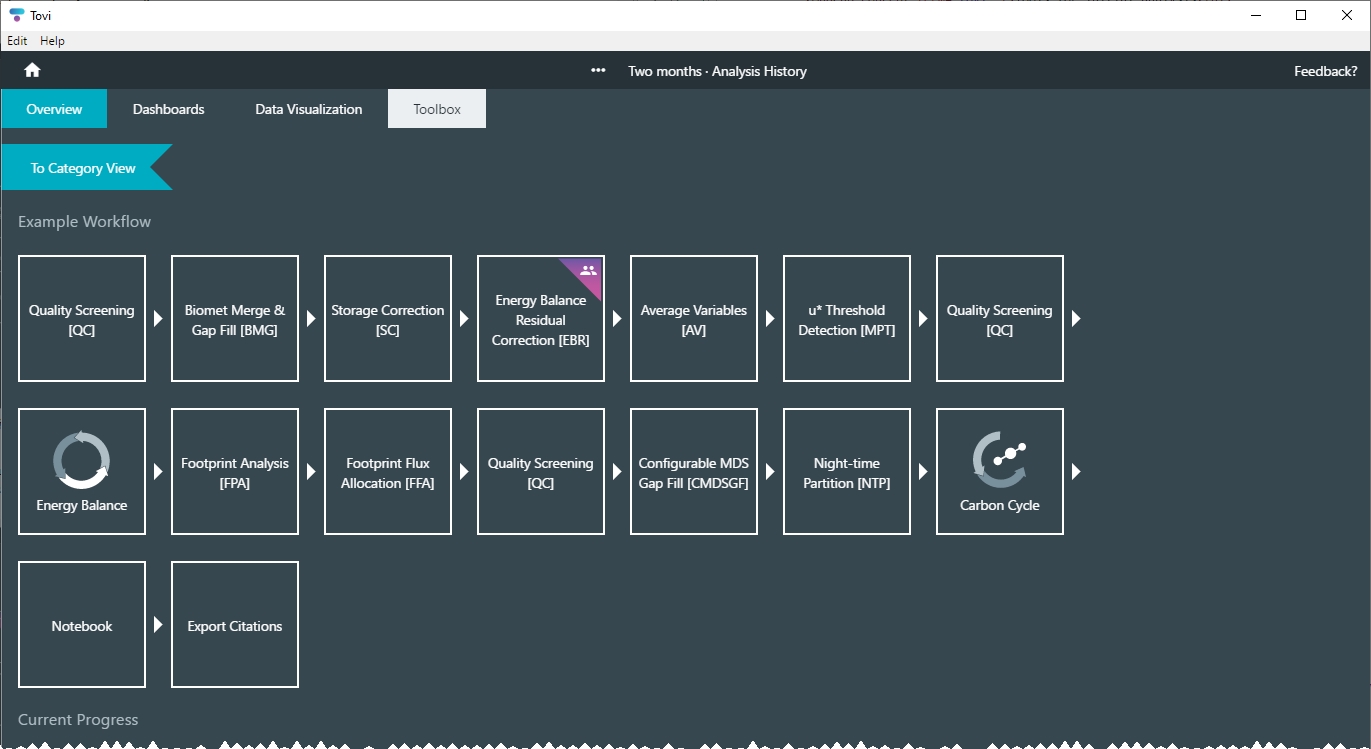
The Workflow View (Figure 5‑2) shows a potential data analysis path through Tovi, as well as progress nodes at the bottom. Quality screening is repeated in the Workflow View because you'll perform the quality screening multiple times in a typical analysis.
Overview of the analysis process
Select a tool from the Toolbox when you're ready to begin analyzing the data. Typically, you will start with quality screening.
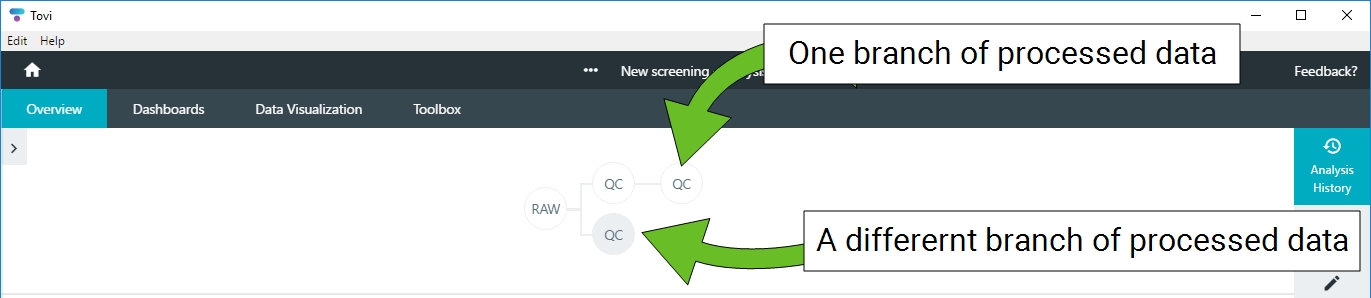
Creating a sequence of analysis steps
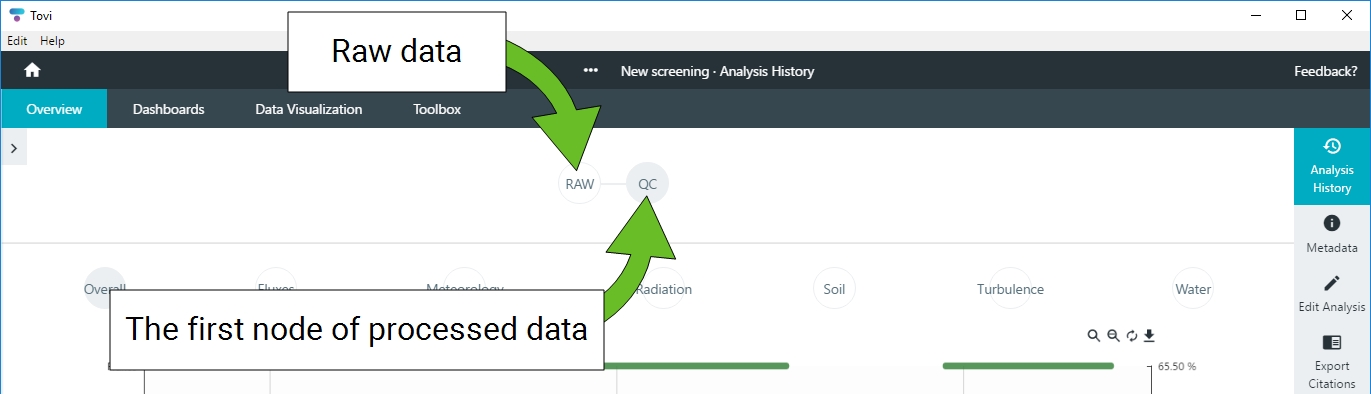
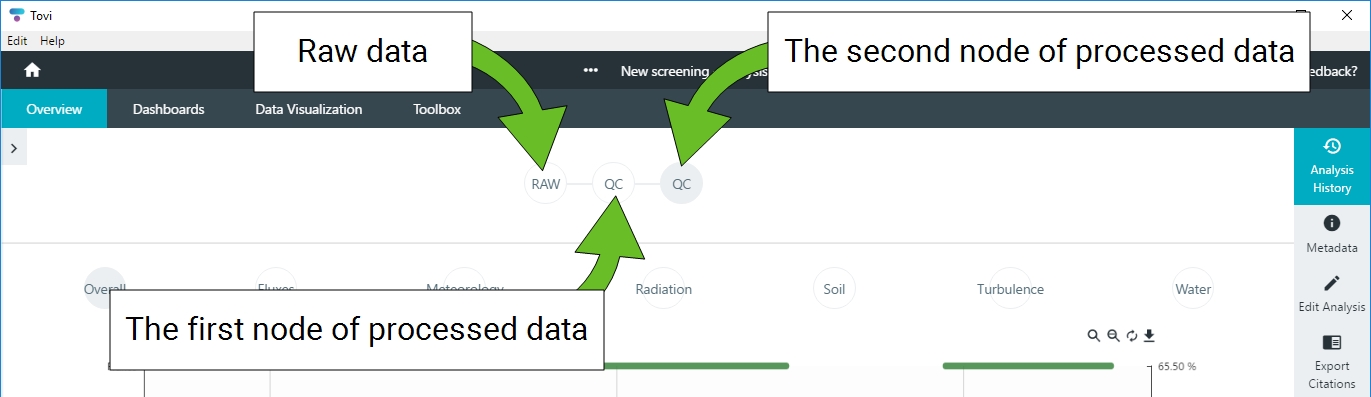
You will always start with the RAW node. The RAW node is the original data and other nodes represent data that has been processed in some way. When a node is selected, the data that is retrieved (and displayed) is the result of whatever has been done from the RAW node up until the selected node, while subsequent nodes do not affect that data. Effectively, moving through the nodes allows you to move through (and branch off) the history of the analysis.
Note: When you create a second step, the processing done in a prior step will become locked for that branch. If you need to make changes to a previous step, create a branch off the node prior to the node you want to modify and, if relevant, reapply all the processing steps that followed the node that you wanted to modify.
- With the RAW node selected, click Toolbox > Quality Screening (QC) or a different tool.
- Perform any combination of procedures available in the tool.
- Click Done and tag the analysis node.
- Tovi will process the data for a moment and then return to the Coverage view. You'll see a new node next to the previous node. Hover your mouse over the node to view the tag.
- With a node of processed data selected, click Toolbox and select another tool.
- Perform any combination of procedures available in the tool.
- Click Done and tag the analysis node.
Branching the analysis
If you have some processing steps that you'd like to keep, but you want to go back to a previous step a try other settings, you can branch the analysis. To create a branch:
- Select the node that you want the branch.
- You cannot branch off of the last node, so select any node except the last one. (Selecting the last node will add a new step at the end.)
- Click Toolbox > Quality Screening or a different tool.
- Perform any combination of procedures available in the tool.
- Click Done and tag the analysis node.
- The node will be added, representing a branch in the analysis.
Deleting an analysis node
You may find that you've created a node that is no longer needed. In this case, you can delete a single node.
- Deleting any node that is not at the end will also delete any subsequent nodes in that branch.
- Deleting a node cannot be undone. Tovi will ask you if you are sure.
To delete a node, select it and click Edit Analysis. Select Delete Current Step to permanently remove it.