Installing the 7800-113 reduced flow rate kit in LI-COR Trace Gas Analyzers
The reduced flow rate kit (part number 7800-113) is an accessory for LI-COR Trace Gas Analyzers that enables the devices to operate at a flow rate near 70 sccm rather than the standard flow rate of 250 sccm. This document describes part number 7800-113, which replaces the older kit (7800-112).
What's what
The kit includes the following pre-assembled components.
| Description | Part # |
|---|---|
| Quick connect union (2) | 300-03123 |
| Flow orifice; 0.006" (1) | 301-18700 |
| Bev-a-line tubing; 3.2 cm (2) | 222-01824 |
By installing the kit you will modify the internal flow routing of the instrument. After installing the kit, the instrument will start up in the suitable operating mode. The 7900-113 reduced flow rate is compatible with closed-loop applications. The old one (7900-112) is not because the inlet and outlet flow rate are different.
Installation
The reduced flow rate kit is supported by instrument firmware version 2.0.25 and newer. Firmware version 2.4.47 eliminating the need to select an option in the interface by automatically detecting the kit (go to www.licor.com/support/Trace-Gas-Analyzers/home.html, select an instrument, and then click Software Downloads). One firmware updater can be used to update all Trace Gas Analyzer models. To install the kit:
- Power off the instrument.
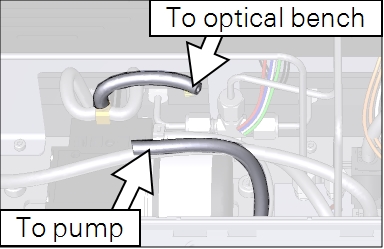
- Identify the tube that connects the pump to the optical bench.
-
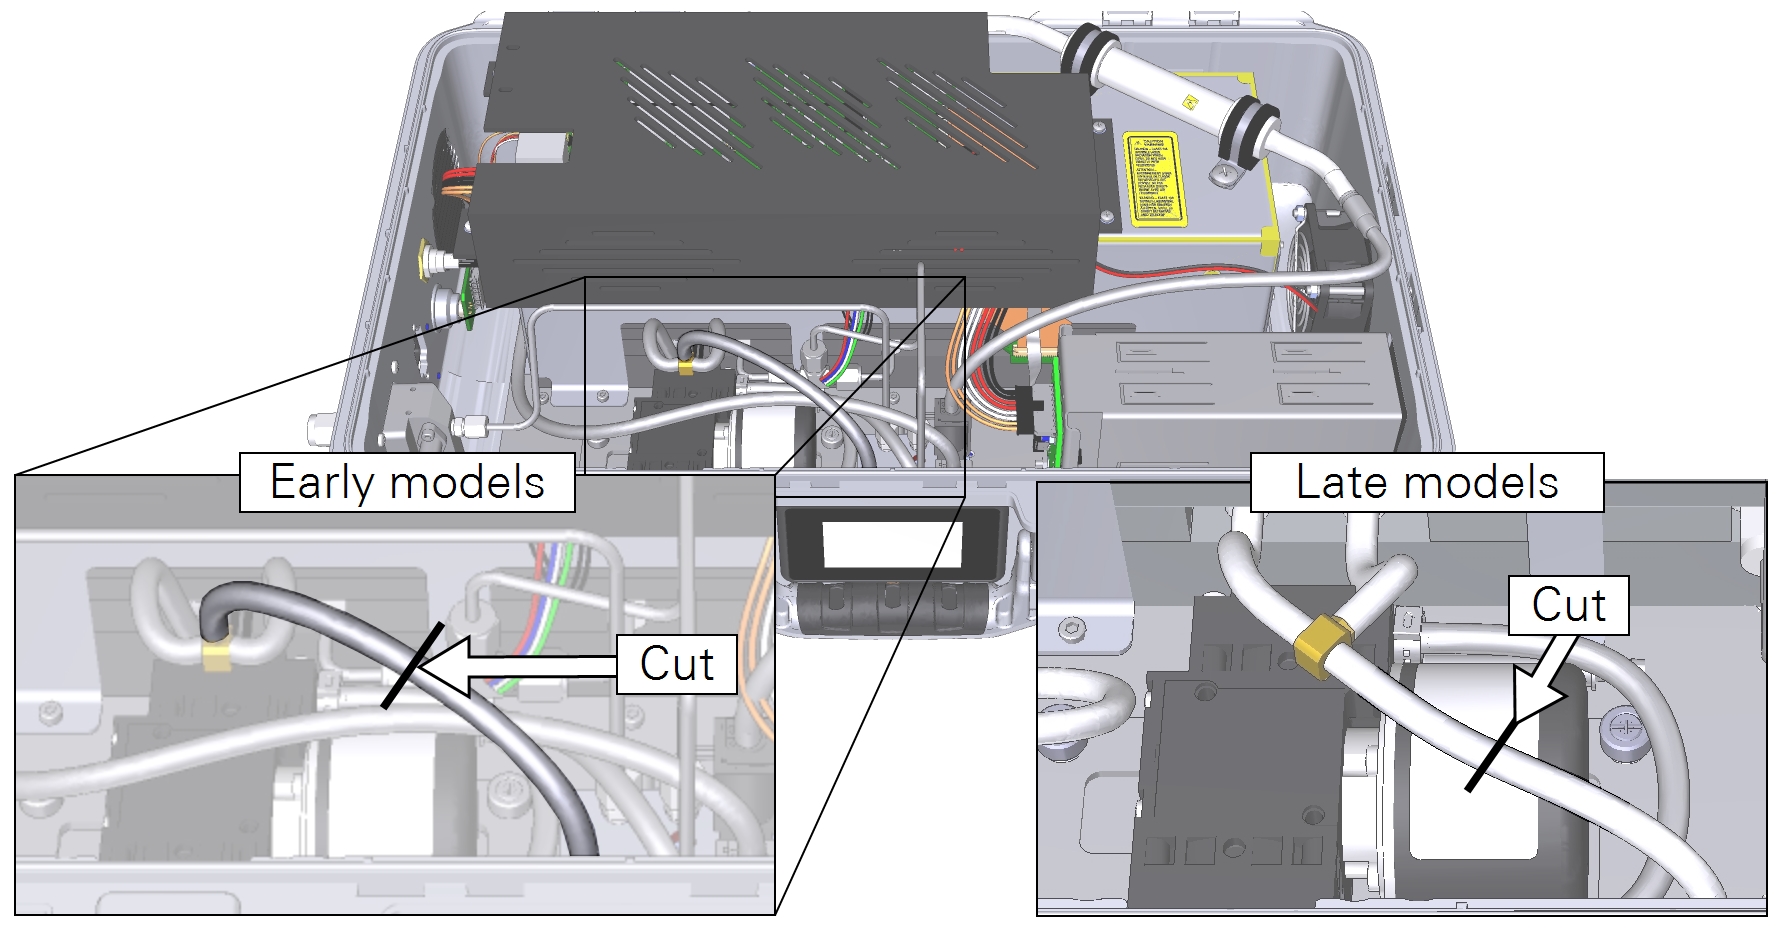
- Observe the orientation of the T-fitting. In early models, this tube comes off of the stem of the T. In later models, it comes off of the cross of the T. In either case, the tube connects the T-fitting to the pump.
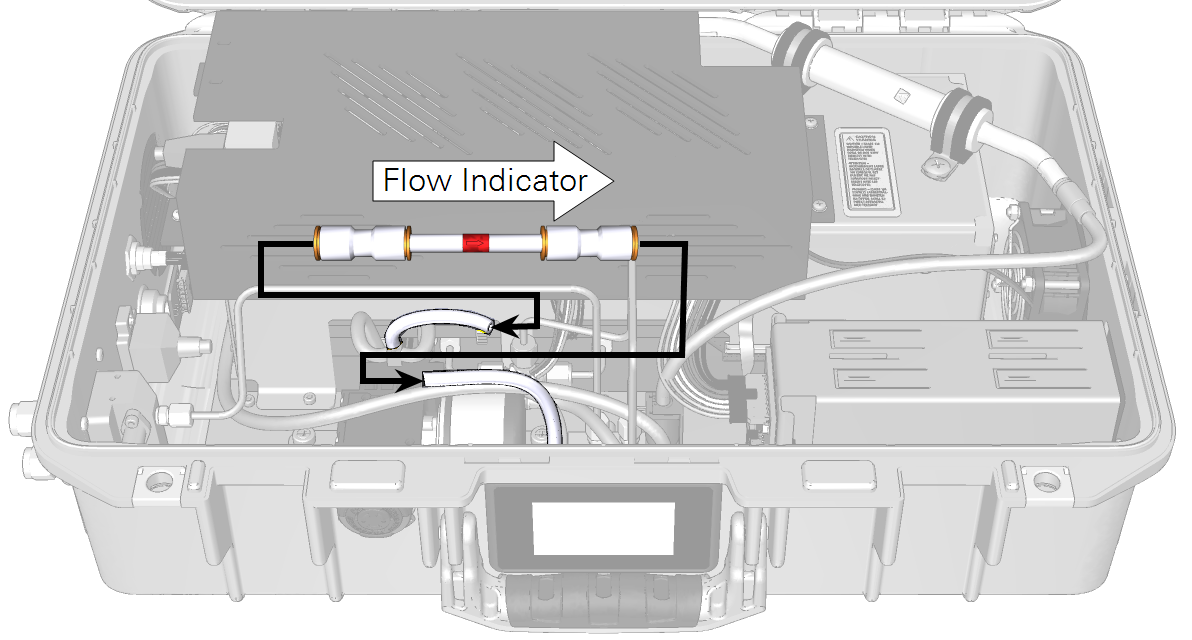
- Cut the tube where indicated.
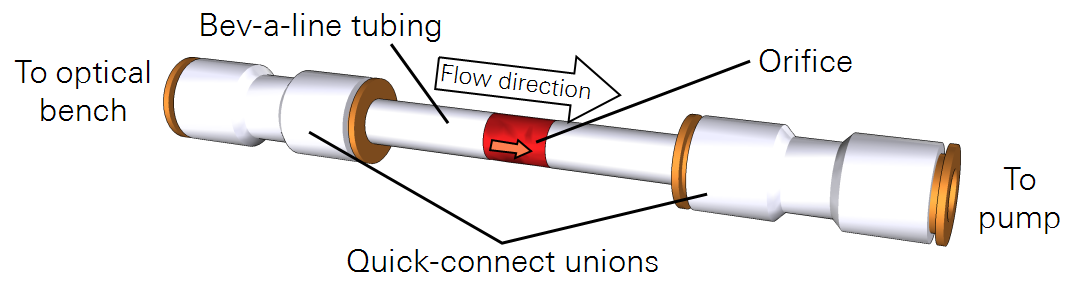
- Observe the flow direction indicator on the assembly and install it between the two cut ends with the arrow pointing from the optical bench to the pump.
- For each quick connect, insert the tube and push firmly until it stops.
-
Power on the instrument.
The instrument will start up and operate with a flow rate of approximately 70 sccm.
To restore the normal flow rate, remove the reduced flow rate kit, connect the cut tubes with quick-connect fitting from the kit, and restart the instrument.