Configuring the Water Node
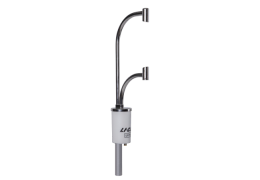
The Water Node – an LI-710 connected to LI-COR Cloud with an IoE Module – presents the simplest and most scalable way to use the LI-710. Here we describe how to use the LI-710 as a Water Node. After assembling the IoE Module and mounting the LI-710 on the mast, (see Assembling the IoE Module and Installing the LI-710), follow these steps to configure the Water Node.
Initial setup
Leave the LI-710 cable disconnected at this point. You'll connect the cable as part the configuration.
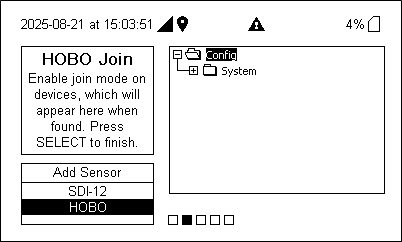
Adding a sensor
-
Power on the IoE Module.
Short-press the power button (
 ) and wait until the main screen is displayed.
 -
Set the time zone.
To apply an offset to the default UTC time, press left four times (
 ) and use the up and down buttons to choose an offset. Press Select (
 ) to apply the timezone and return to home. The IoE Module does not account for daylight saving time.
 -
Prepare to add sensors.
The IoE Module must have a strong cellular connection during configuration. Keep the sensors nearby but leave the cable disconnected for now.
-
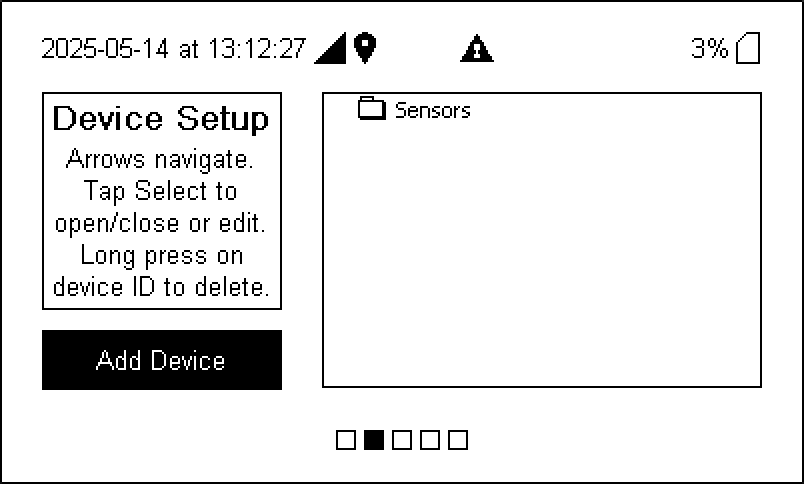
Navigate to the Device Setup screen.
From the home screen, press left three times (
) to access the Device Setup screen. -
While Add Device is highlighted press Select (
) to begin.Leave all device cables disconnected but nearby.
-
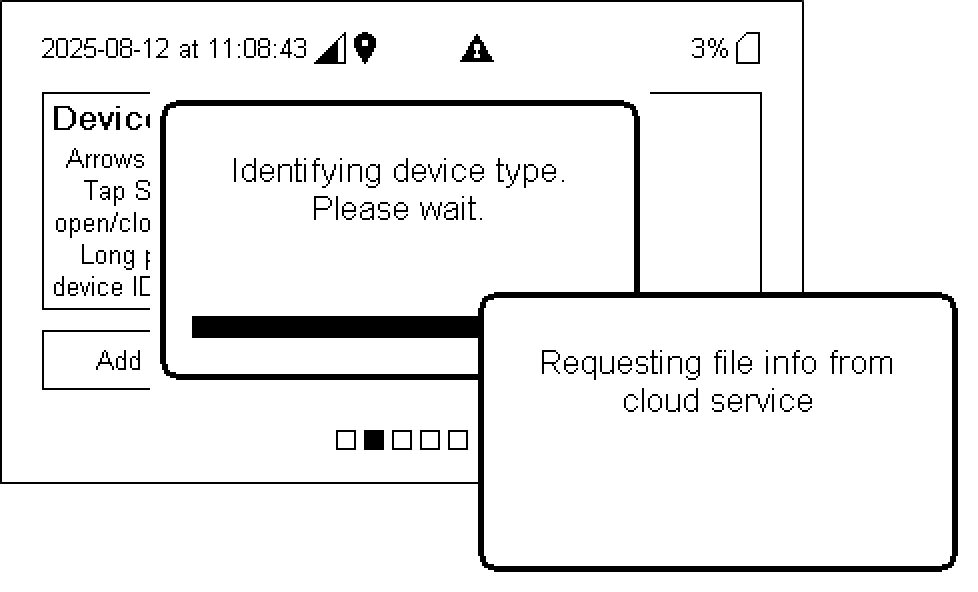
Connect LI-710 cable to the port labeled SENSOR and select YES to proceed.
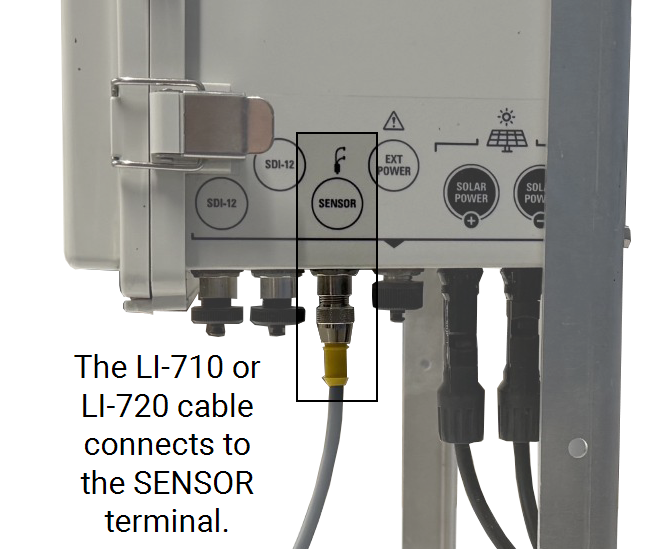
The IoE Module will recognize the device and request configuration information from LI-COR Cloud. Several messages will indicate the progress.
-
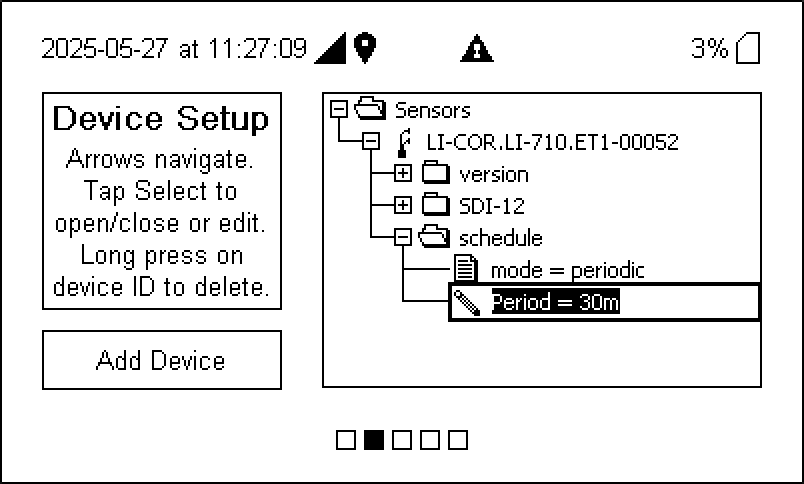
Preview the device information and make changes if desired.
Leave the period at 30 minutes to use cleaning and gap filling on LI-COR Cloud.
-
Save the configuration.
Press Right (
 ) and then Select () to save changes. You MUST save changes.
-
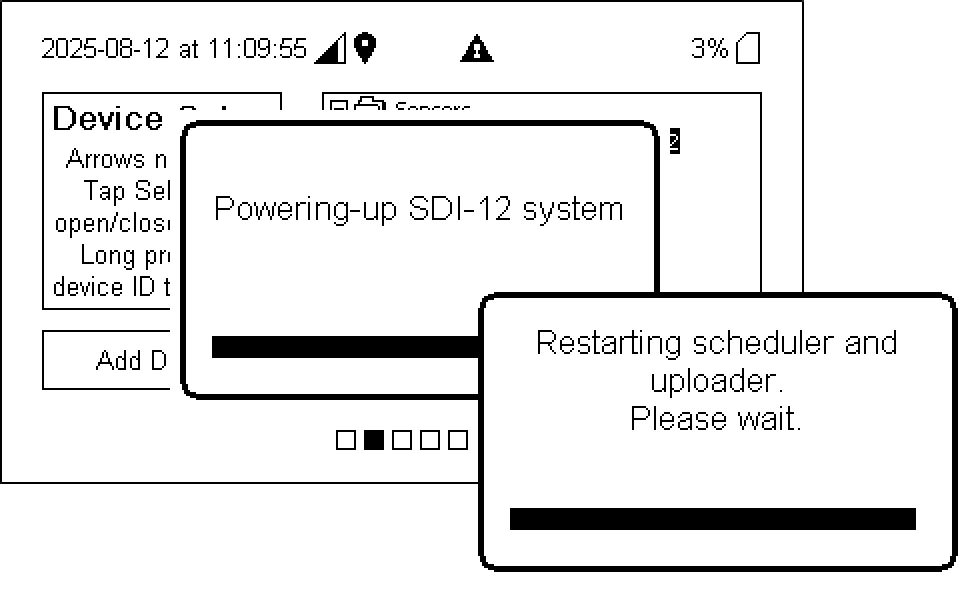
Watch as the IoE Module finishes the configuration.
-
If the IoE Module is partially configured but has no interactions for one hour, it will abort the configuration and return to the prior configuration and display the home screen.
-
The LI-710 does not support 10 Hz datalogging. Do not enable the feature with an LI-710.
-
Trouble registering a sensor? See IoE Module troubleshooting.
Deleting a sensor
If you have connected a device but want to delete it for some reason or another, follow these steps.
-
Enter Device Setup and select the device to remove.
-
Long-press Select (
) until prompted: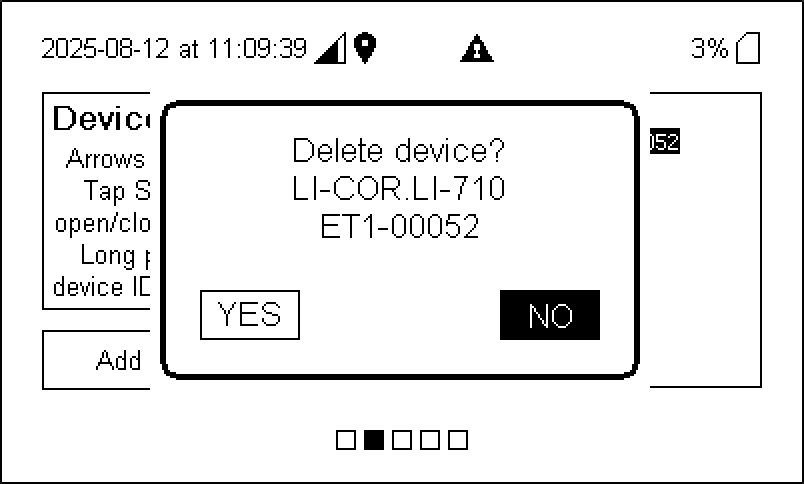
-
Select YES to remove the device and its configuration from the IoE Module.
-
Save the configuration.
Press Right (
) once to open the prompt, then select YES to save the changes and dismiss the prompt. You MUST save changes for the settings to be applied.
Watch as the interface returns to the home screen, indicating success.
Changing the reporting interval
The reporting interval can be set at the IoE module. The LI-710 and IoE Module report results every 30 minutes by default, but this can be changed to any interval between 15 and 60 minutes (5 minute resolution). The Stevens probe reports results every 10 minutes by default but it can be any interval between 10 and 60 minutes (5 minute resolution).
Note: Use a 30-minute averaging period if you want to use outlier detection and gap filling on LI-COR Cloud.
To change the reporting interval:
-
Go to the device setup screen and select a device.
-
Use the arrow keys to select the item to adjust - in this case, select Period to open options.
Follow the directions on the screen.
-
After making changes, use the arrow keys to navigate away from the Device Setup screen.
-
When prompted to save changes, select YES.
Caution: 10 Hz logging (under Device Setup> Config > System) is supported by the LI-720 only. Enabling 10 Hz logging with an LI-710 will cause unstable performance and the desired data will not be logged.
Adding a Node Link to the Water Node
Each Water Node and Carbon Node can host a Node Link, which supports up to 50 sensor nodes. The Node Link is supported by new IoE Modules (indicated by the HOBOnet label and cable connector) with firmware v1.2 or newer.
Each wireless device in a Node Link must have line-of-sight with other devices or the Node Link (<200 meters distance between sensors). Data can be transmitted through up to five sensors. Vegetation can block wireless signals, so be sure each transceiver is above the plant canopy, even as it grows
Installing the Node Link and adding sensors
Follow these steps if it is your first time setting up the Node Link. Keep the sensors close to the IoE Module for now so you can interact with both devices during the registration steps.
-
Power off the IoE Module.
-
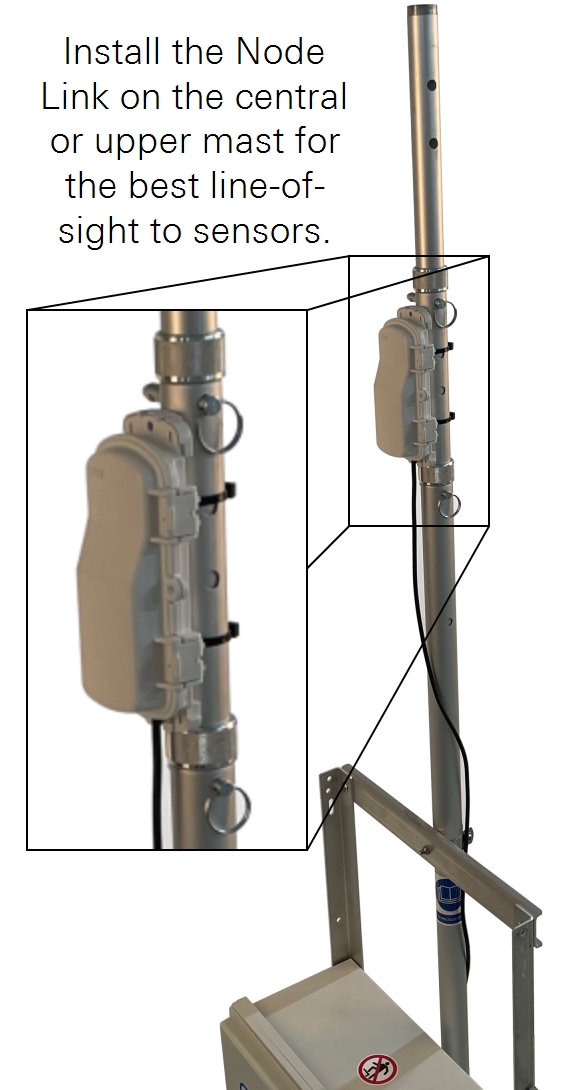
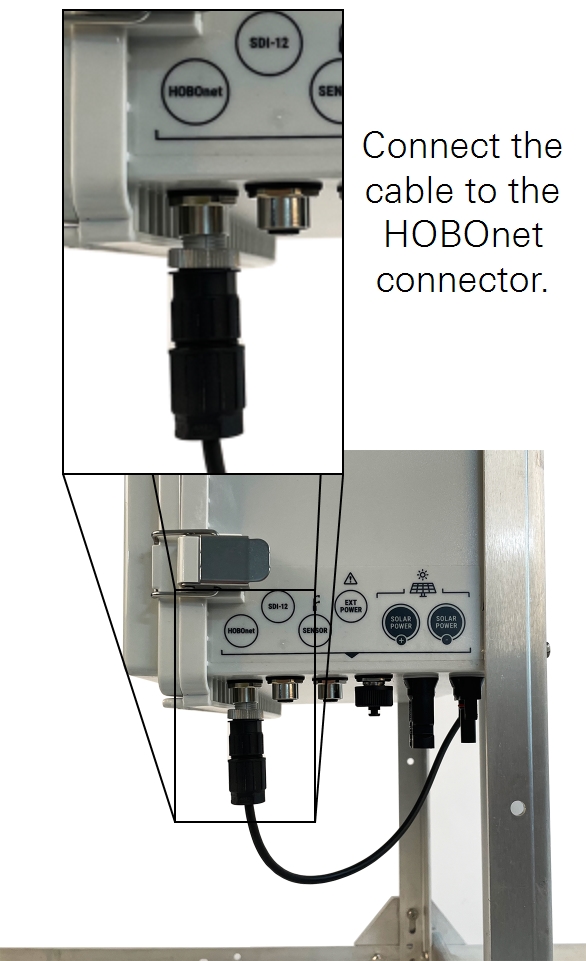
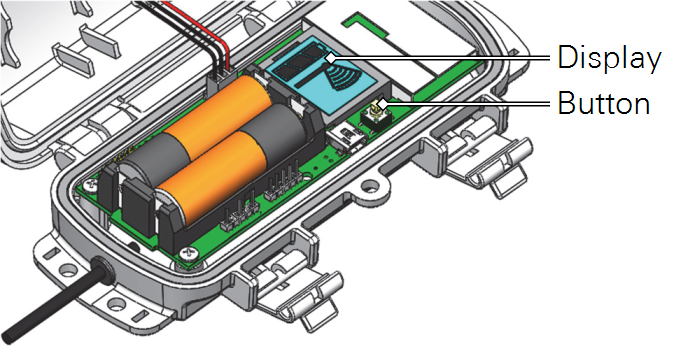
Install the Node Link and connect the cable to the IoE module.
Install the Node Link on the central or upper mast segment. Identify the top of the bracket and then attach it to the IoE module mast using two zip ties. Then install the Node Link in the bracket.
-
Power on the IoE Module.
-
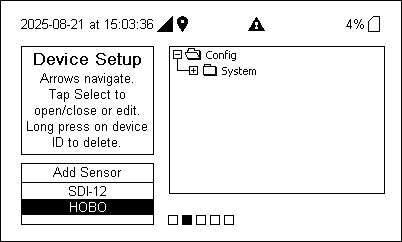
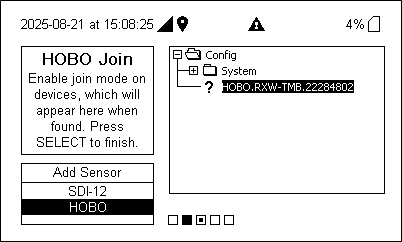
Press left three times (
) to enter Device Setup mode.Under Add Sensor, look for HOBO, which indicates that the Node Link cable is physically connected and Node Link is recognized by the IoE Module.
-
Select HOBO and then press Select (
) to add a device.Now the Node Link is ready to connect with individual sensors.
-
Prepare one sensor - follow the included instructions.
For some sensors, you may need to install batteries before the first use. Other sensors may need to be assembled before being powered on. Follow the directions included with each sensor before placing it in JOIN mode.
-
While the IoE Module is waiting, press and hold the button on the sensor for 3 seconds to enter JOIN mode.
Watch the display as the sensor joins the network.
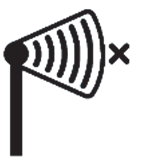
|
The signal strength icon blinks while searching for a network. |
|
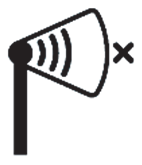
Once a network is found, the icon stops flashing and the bars cycle from left to right. The X icon blinks while the sensor completes the registration process. This may take up to five minutes. |

|
Once the sensor has finished joining the network, the X icon disappears. The sensor should be connected to the node link. |
-
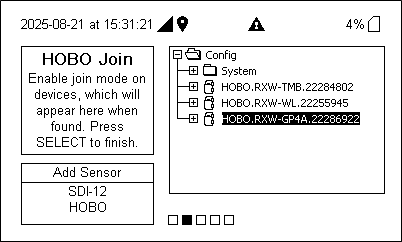
When recognized, the device will appear in the list on the IoE Module.
-
Press Select (
) to complete the registration for this sensor.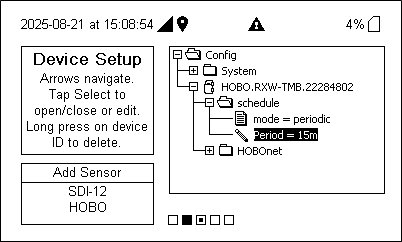
-
Repeat steps 5 to 9 with additional sensors.
A Node Link can support up to 50 wireless devices. To delete a sensor, select it and long-press Select.
-
Save changes when you're done.
Press right (
) until prompted to save changes. Accept the prompt and be sure the device returns to the home screen, indicating success.
Trouble registering a sensor? See Water node sensor network issues.
Installing sensors
Each sensor included with the Node Link includes a printed installation guide. Follow assembly and installation instructions on the guide. Additional information is available at onsetcomp.com/help-center.
Working with Node Link data
After registering the IoE Module with LI-COR Cloud (see Adding the LI-710 to LI-COR Cloud), data are uploaded and can be viewed and retrieved from LI-COR Cloud (see Working with Water Node data).