Installing the LCF
Hardware
The LI-6400 should be off (or in sleep mode) to do this procedure.
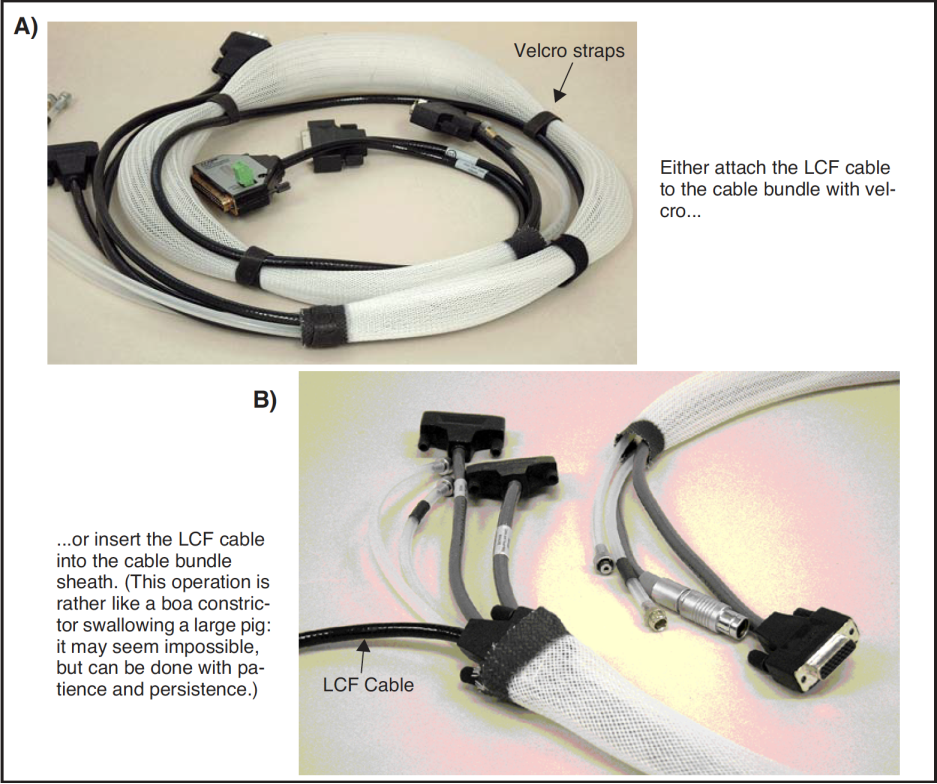
- Install cable in bundle
- You have a choice on how to do this. The easiest method is to lash the LCF cable to the LI-6400 cable bundle with the velcro ties found in the LCF spares kit (a in Figure 27‑6a). However, if you are going to be using the LCF more or less all the time, you may want to consider inserting the LCF cable into the bundle (b in Figure 27‑6). This latter approach takes a few minutes of work, but is more convenient in the long run.
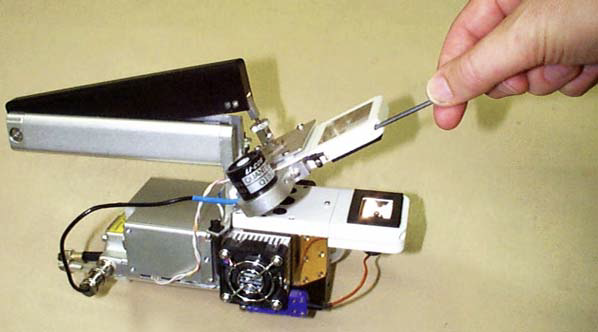
- Remove the upper and lower chambers from the sensor head Use 3/32 hex key provided in the spares kits (LI-6400 and the LCF) to remove the two long screws that hold the chamber top and the chamber bottom in place. Disconnect the chamber top light sensor, and the leaf thermocouple from the lower chamber (Figure 27‑7).
- Attach the lower part of the LCF
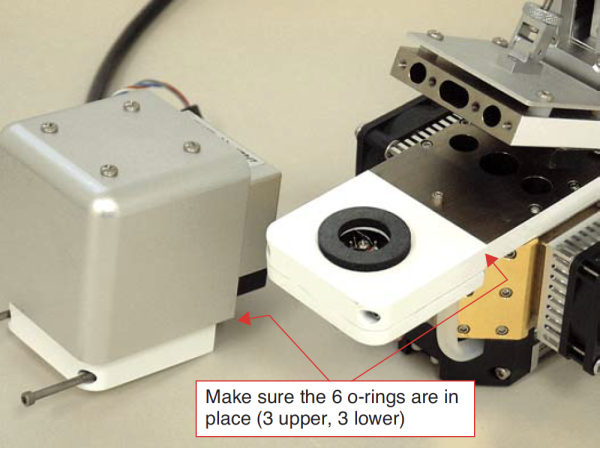
- Make sure the 3 o-rings are in place on the LCF bottom chamber, and attach it to the sensor head. Install the leaf thermocouple (Figure 27‑8)
- Attach upper part
- Make sure the o-rings are in place, and attach the LCF main body.
- Connect the cables
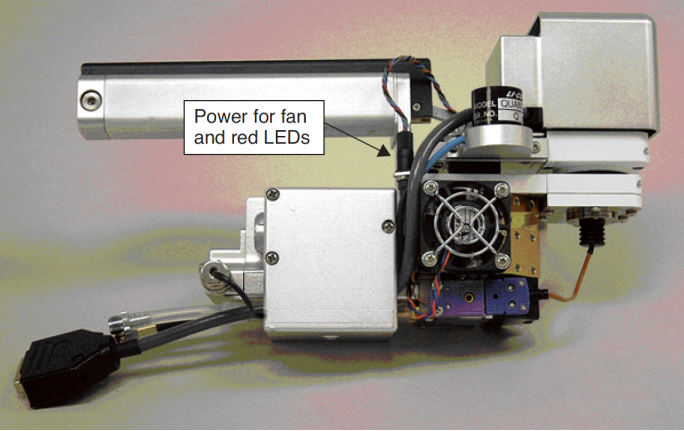
- Plug the small 4-pin connector into the sensor head, and connect the 15-pin LCF connector to its cable. The other end of this cable has a 37-pin connector, and that plugs into the LI-6400 console.
Software
It is necessary to create a fluorometer configuration for subsequent use, and also create an actinic light source calibration file.
To create a Leaf Chamber Fluorescence configuration
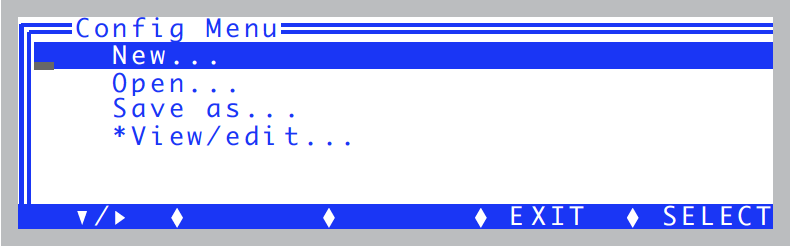
- Access New... in the Config Menu
- Press f2 from OPEN’s main screen to access the Config Menu. Highlight New..., and press enter (Figure 27‑10).
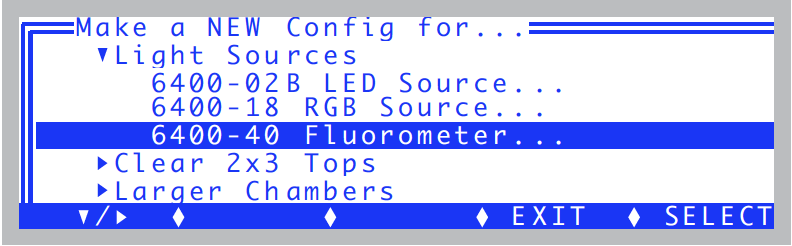
- Select 6400-40 LCF under Light Sources
- Highlight the Light Sources node and press f1 to expand it, then scroll down to the 6400-40 entry, and press enter (Figure 27‑11).
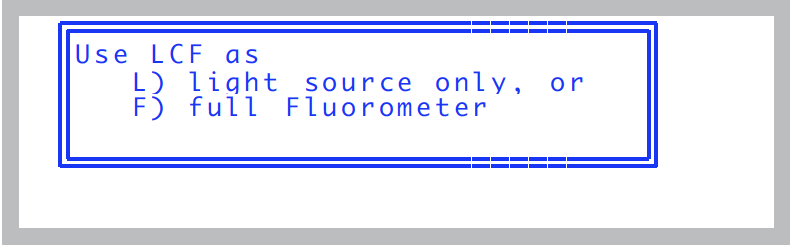
- How to use the LCF?
- Press L or F, depending on how you wish to use the LCF with this configuration (Figure 27‑12).
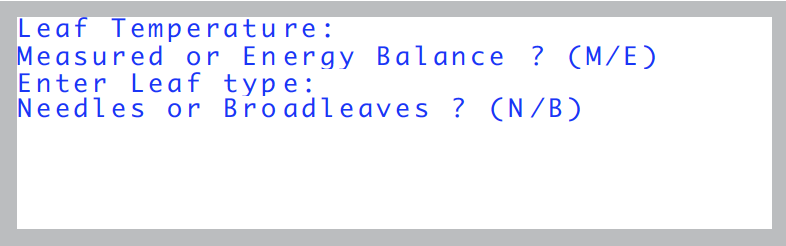
- Energy Balance and Leaf Type
- You’ll be asked about energy balance and leaf type for this configuration. If you are unsure, just press M (measuring leaf temp) then B (broadleaves) (Figure 27‑13).
- Make a new configuration file
- When the screen shown in Figure 27‑14, press N.
- Communication with the LCF
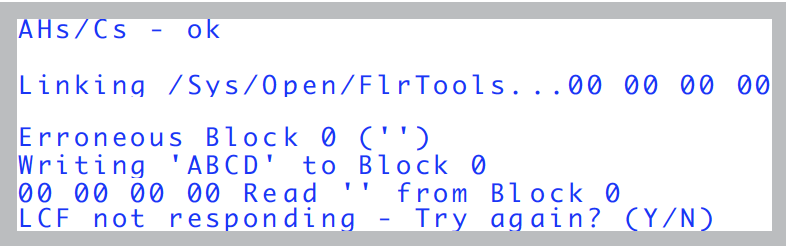
- At this point, the console will implement the configuration, and attempt to communicate with the LCF. If it has a problem doing this, you will see the error screen (Figure 27‑15).
- Make sure the cables are connected properly, and press Y. If it just won’t work, press N to finish the configuration, and deal with it later.
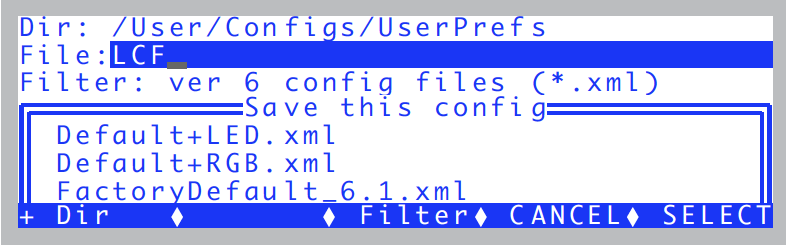
- Save the configuration file
- You’ll be prompted to save the file, and given a default suggested name (Figure 27‑16). Modify it as you wish, and press enter. Note that the file name will always have a .xml appended to it automatically, unless you add it yourself.
- Return to the Main Screen
- Escape back to OPEN’s main screen.
- Do an Actinic Calibration
- See Calibration Issues.