
Bryophyte chamber
Printable PDF: Bryophyte chamber
(6800_InstallGuide_Bryophyte_Chamber_16475.pdf}
Download this content as a pdf that can be saved to your computer or printed.
See Removing a chamber to detach a currently-installed chamber.
The Bryophyte Chamber (6800-24) is used to measure CO2 and H2O gas exchange from mosses, hornworts, liverworts, and lichens. The chamber holds sample material on wire mesh or in a shallow well during the measurement. It features a clear Propafilm™ top for measurements under ambient lighting conditions. It is compatible with the Large Light Source for measurements under controlled lighting with any combination of red, green, blue, and white light.
Installing the bryophyte chamber
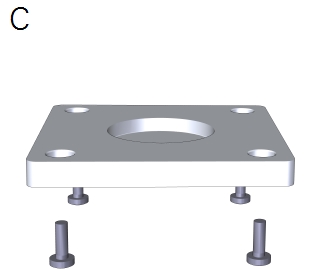
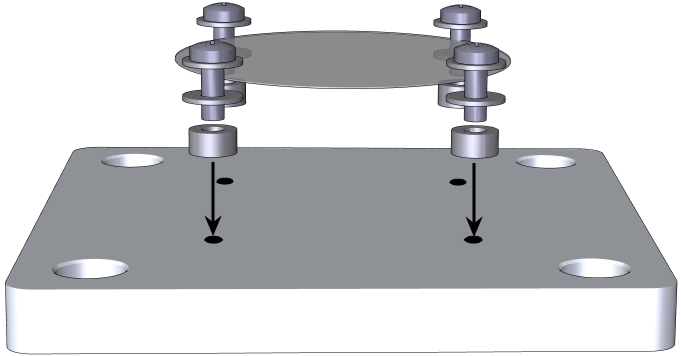
- Install the chamber adapter.
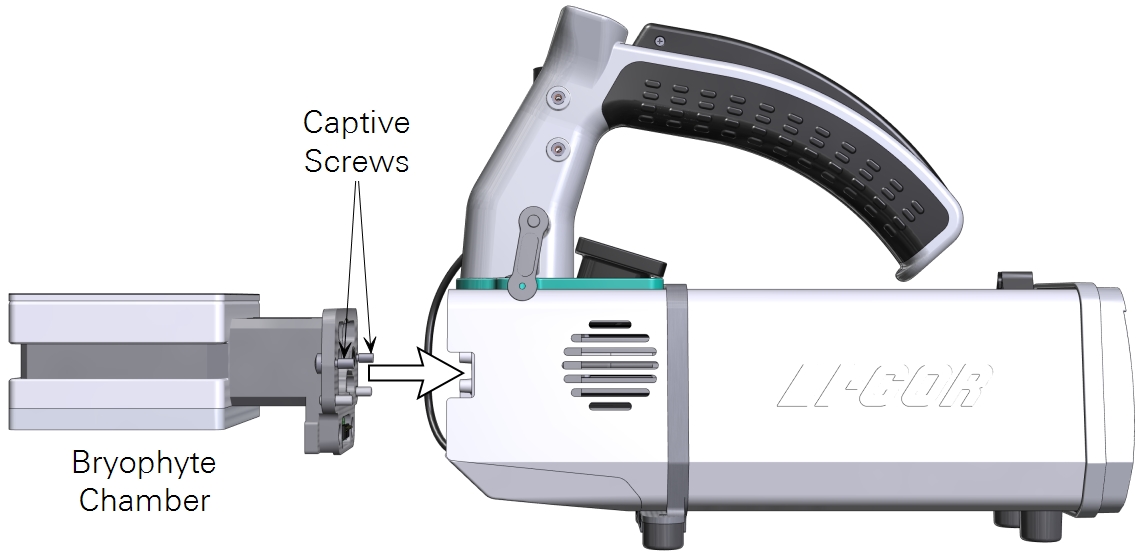
- Tighten the screws snugly—until they are tight and then just a little bit more. Reinstall the connector cover.
Preparing the sample chamber
- Remove the chamber top. It lifts off of the chamber.
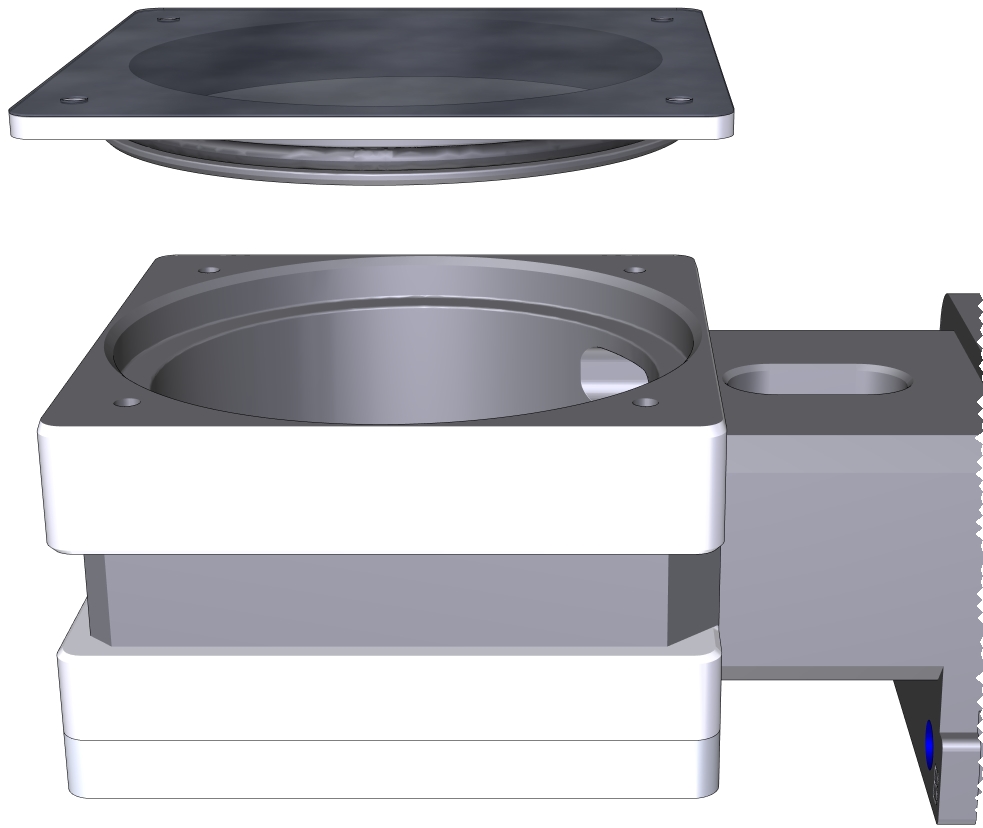
- Install the chamber bottom.
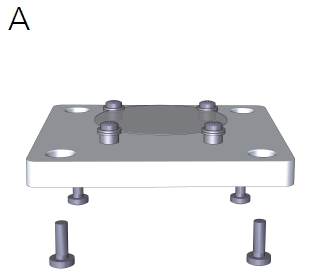
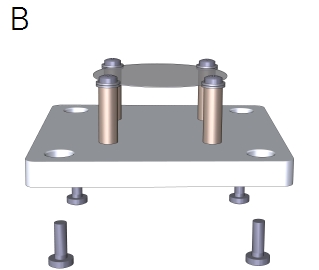
- There are three options for loading the sample: A) on the screen with short risers, B) on the screen with tall risers, or C) in a well. The well is on one side of the chamber bottom; the screens mount to the other side. Install the chamber bottom in the orientation that you prefer.
-
- Choose whether to compute Area-based fluxes or Mass-based fluxes.
- Run the leak test under Start Up > System Tests > Chamber Leak.
Loading a sample
Remove a sample from the substrate using a knife or cookie cutter. You can place a sample on the screen or in the well. If you're computing fluxes on the basis of mass, you'll need to weigh each sample and make a record of the mass. For area-based fluxes, you'll need to determine the sample area. After loading the sample, press the chamber top onto the chamber.
Making a basic measurement
Below we offer some basic settings that will work for a typical measurement.
- Set the Environment controls.
-
- Flow: Set Flow: On; Pump speed: Auto; Flow rate: 700 µmol s-1; Press Valve: 0.0 kPa
- H2O: Set H2O: On; RH_air: 50%
- CO2: Set CO2 injector: On; Soda Lime: Scrub Auto; Tap CO2_s and enter a setpoint of 400 µmol mol‑1
- Fan: Set Mixing fan: On; Fan Speed: 10,000 rpm
- Temperatures: Check the temperatures to see their current values
- Set the Constants.
- Under Constants > Gas Exchange, enter the Area or Mass.
- Configure Logging options.
- Configure the Match Options and Logging Options as desired. Check Prompt on (manual) log, which will open a prompt when you press the Log button, where you can enter the weight or area.
- Open a log file.
- Tap the Log button to record a measurement.