This section describes the maintenance of LI-6800 chambers.
Foam gasket care
It is important to take care of the foam gaskets on the leaf chambers. Never latch the chamber closed when it is not in use, as the gaskets will stay compressed if you leave the chamber closed for several hours. Black neoprene will recover after several hours, but the white foam gaskets recover more slowly (if ever). Advanced polymer gaskets are more resilient.
Gasket replacement
The two gaskets on the leaf chamber should be replaced if there is visible damage that interferes with sealing. It is important that you peel off the old gaskets correctly—there is a thin film below the gasket called the carrier that holds the adhesive. With a fingernail or the flat edge of a knife, pry up a corner of the carrier. If you only pry up the gasket and adhesive, the carrier will remain on the chamber, and is difficult to scrape off. If you get underneath the carrier, the whole gasket will come off quite readily.
Frequently there is residual adhesive material on the chamber after the gaskets are removed. This can be cleaned up with Goo Gone®, acetone or another solvent if the surface is painted metal. Never use solvents on the plastic chamber parts.
The replacement gaskets are installed by removing the paper backing over the adhesive. Watch for channels where the adhesive sticks to itself when you remove the backing. If you stretch the gasket slightly, the channels disappear. If you apply the gasket to the chamber with channels, you'll have leaks.
For best results, use advanced polymer gaskets on both the upper and lower chambers. If you use foam gaskets, use white gaskets on the upper chamber and black ones on the lower chamber. The white gasket does not recover nearly as well as black neoprene after being compressed, and it is much more difficult to remove.
Propafilm replacement
The clear-top leaf chamber (3×3 cm), large leaf chamber (6×6 cm), small plant chamber, and sprig blocks use Propafilm (Innovia Films Inc., Atlanta, GA) as the transparent chamber top. You will need to replace the film if it becomes torn, punctured, or excessively dirty. Replacement film and double-sided tape are provided in the spare parts kits for chambers. To replace the Propafilm:
- Remove the light source from the chamber, if necessary.
- Remove the old Propafilm and tape from the chamber.
- The tape has a fairly strong adhesive; it does not peel off readily. Use a solvent such as acetone to help dissolve the adhesive. Do not use a blade or other sharp instrument to remove the tape, as you could damage the surface of the chamber, making it difficult to achieve a tight seal with the new Propafilm.
- Prepare the new tape.
- Cut a piece of the double-sided tape that is slightly larger than the leaf chamber. Make it 6 × 6 cm for the small chamber or about 10 × 10 cm for the large chamber. Lay on a flat cutting surface, adhesive side up. The tape may be curled slightly; hold the corners down with cellophane tape.
- Attach the tape and trim.
- Lower the top surface of the chamber onto the tape and press firmly. Trim the tape around the outer and inner edges of the chamber. To get a clean cut, use a fresh blade and make your first cut as close to the edge as possible.
- Prepare a piece of Propafilm.
- Cut an oversized piece of Propafilm. Stretch the film on a flat, clean surface until taut. You may want to tape the corners with cellophane tape to secure it to the cutting surface.
- Remove the backing from the tape and attach the propafilm.
- Peel the backing from the tape and smooth any bubbles that may have formed. Lay the leaf chamber onto the Propafilm. Turn the chamber over and smooth the film. Bubbles can be lanced and smoothed.
- Trim to size.
- Trim the film around the outer edge of the chamber. Make your first cut as close to the edge as possible.
- Reassemble the leaf chamber.
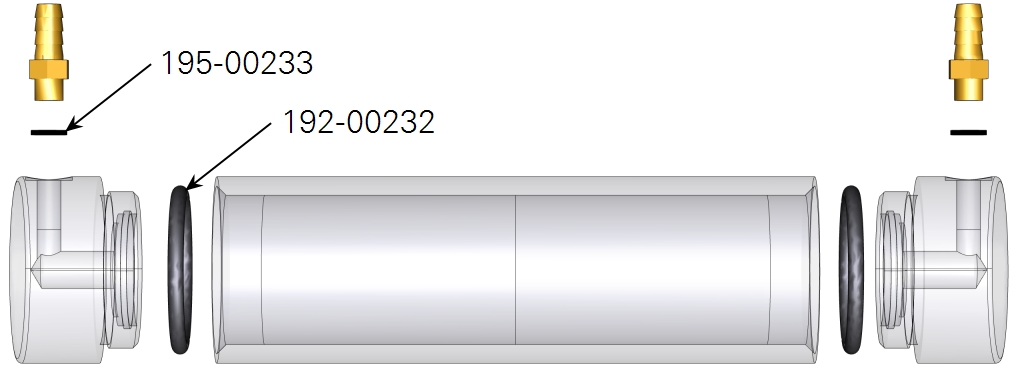
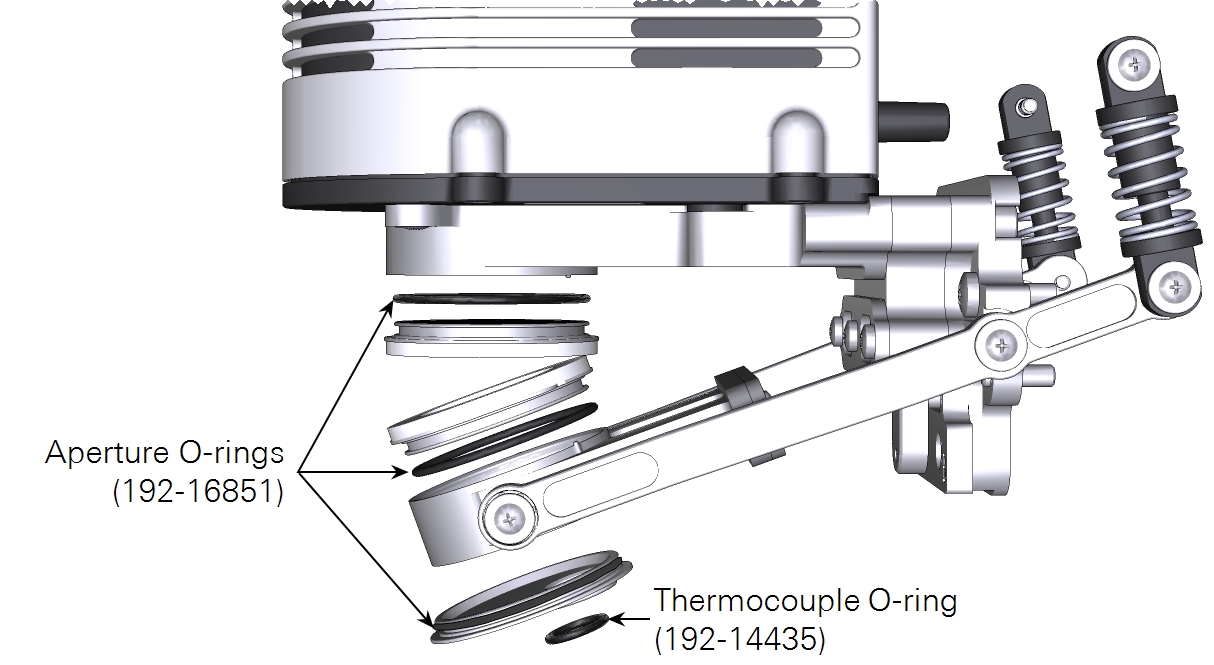
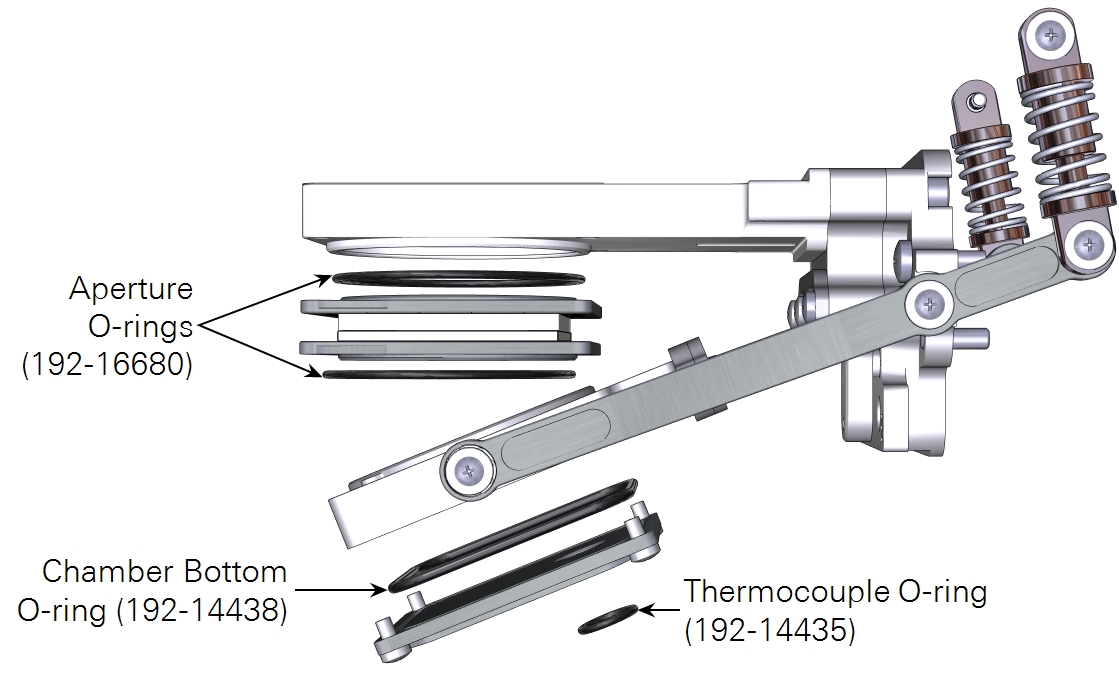
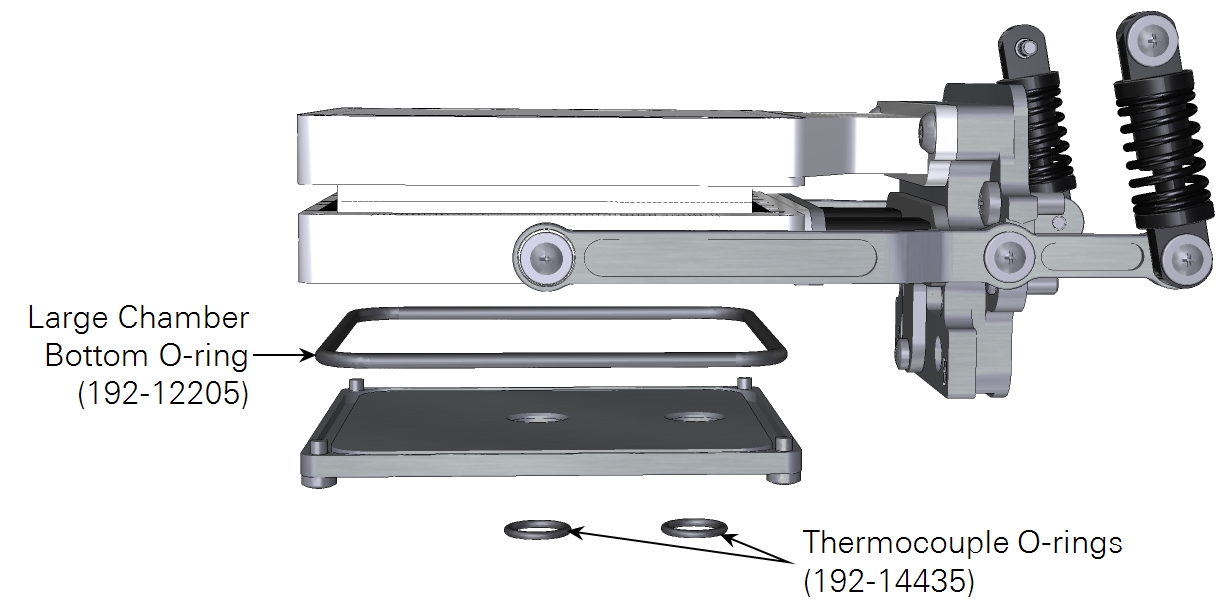
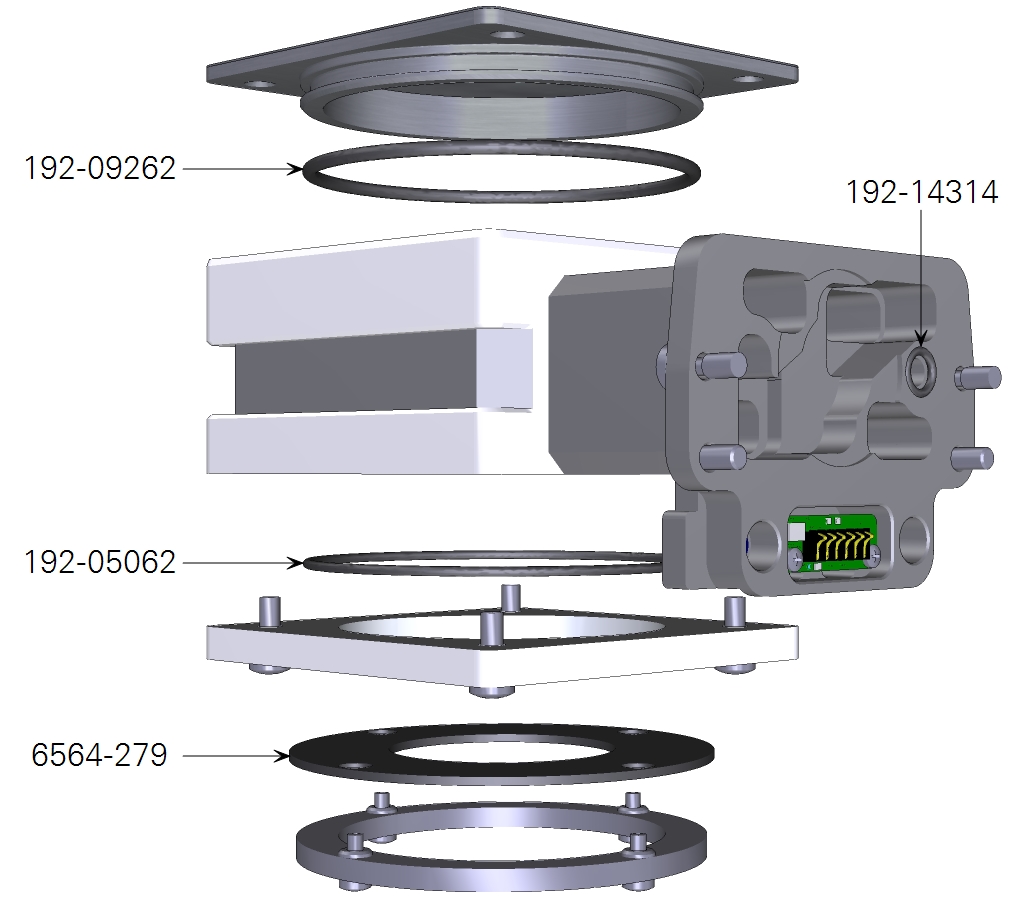
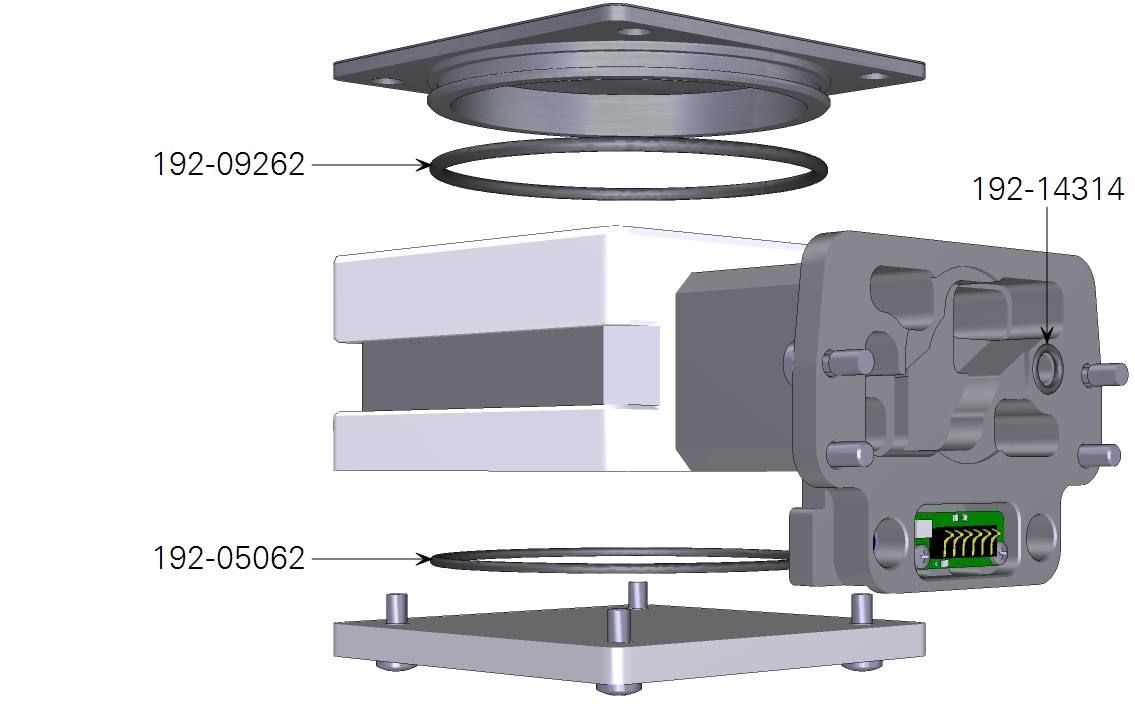
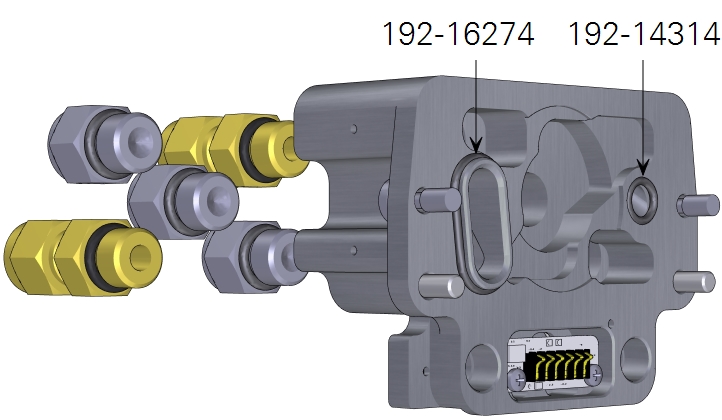
Chamber O-rings and gaskets
Each chamber includes a spare parts kit with replacement gaskets and O-rings. If the instrument fails a leak test, you may need to replace a damaged gasket or O-ring.
Fluorometer
Spare parts for the fluorometer are included in the fluorometer spares kit (see Fluorometer chamber) or the instrument spares kit.
Clear-top leaf chamber
Spare parts for the small leaf chamber are included in the clear-top leaf chamber spares kit (see Small leaf chamber (3×3 cm)) or the instrument spares kit.
Large leaf chamber
Spare parts for the large leaf chamber are included in the large leaf chamber spares kit (see Large leaf and needle chamber (6×6 cm)) or the instrument spares kit.
Small plant chamber
Spare parts for the small plant chamber are included in the small plant chamber spares kit (see Small plant chamber) or the instrument spares kit.

Bryophyte chamber
Spare parts for the bryophyte chamber are included in the bryophyte chamber spares kit (see Bryophyte chamber) or the instrument spares kit.
Custom chamber adapter
Spare parts for the custom chamber adapter are included in the custom chamber spares kit (see Custom chamber adapter) or the instrument spares kit.
Insect chamber
Spare parts for the custom chamber adapter are included in the insect chamber spares kit (see Insect respiration chamber) or the instrument spares kit.