EddyPro processing on the SmartFlux System
In Express Mode, EddyPro uses pre-determined processing settings that are well established and accepted in the research community. This approach dramatically reduces the need for user interaction, allowing you to get flux results with just a few clicks. Express Mode is suitable for most eddy covariance setups, including:
- Systems operated over relatively flat and homogeneous terrain,
- Systems with open path gas analyzers (e.g., LI-7500A/RS/DS, LI-7700),
- Systems with closed path (LI-7000) or enclosed path (LI-7200/RS) gas analyzers with short or properly heated intake tubes, and
- Systems that include up to three analyzers.
In Advanced Mode, you can choose how corrections are applied and configure these settings to suit your research needs, making it the correct choice for data collected in situations that deviate from those listed above. Effective use of Advanced Mode requires both a deeper level of understanding of the eddy covariance theory and a deeper interaction with the software.
Note: Be sure that you are running the same version of EddyPro on your desktop that you are running on the SmartFlux System (the EddyPro processing engine is part of the SmartFlux System firmware). You can download the latest software from licor.com/support/EddyPro/home.html. To view the EddyPro desktop version number go to EddyPro > Help > About. To view the version running on the SmartFlux Syste,m open the gas analyzer software (LI-7x00 A RS DS), click the SmartFlux button, and look for EddyPro version.
Express processing
EddyPro Express mode is the default configuration for the flux computation in the SmartFlux System. Express settings are loaded automatically unless you specify an EddyPro Advanced configuration file.
Advanced processing
Advanced Mode provides you with the high-level capabilities of EddyPro Advanced, computing fully corrected flux results in real-time with the processing options of your choice. The SmartFlux configuration file, needed to run EddyPro in Advanced mode in the SmartFlux module, is created in EddyPro Software version 6 or newer. The file is loaded is using the gas analyzer PC software.
There are additional considerations if you use EddyPro Advanced in the SmartFlux System. For many scenarios, you will simply need to configure the advanced settings as you see fit, and load the SmartFlux configuration file into the SmartFlux System.
However, if you wish to use a Planar-fit method for Axis Rotation, the Automatic Time Lag Optimization option, or one of the in situ spectral correction methods (Horst, 1997; Ibrom et al., 2007), you will need to process an existing data set from the site in order to configure the parameters for these settings, as explained in Planar fit, spectral corrections, and timelag optimization in the SmartFlux System.
Important: In order for the parameters to be valid, the site must not have undergone any significant changes between the time when the existing data set was collected and when the SmartFlux System is deployed. The instrument configuration should remain unchanged during the sampling period if the settings are to apply to the SmartFlux configuration file as well. For closed-path systems, the dataset used to optimize time lags and for the spectral assessment must refer to a period in which the sampling line did not undergo major modifications, such as replacement of tubing or filters, change of the flow rate, etc.
When you create the configuration file, only the controls that can be configured for the SmartFlux System are enabled, and the other controls are disabled.
Configuring the SmartFlux System
SmartFlux Configuration mode inside the EddyPro® Software is used to create an advanced configuration file for the SmartFlux System.
To use this mode, check the box, and proceed through EddyPro as you normally would. The steps are summarized below:
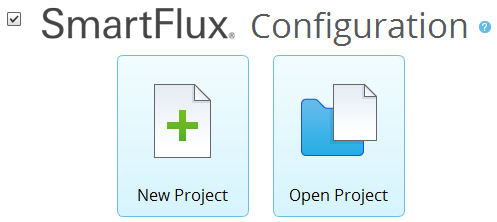
- Click the SmartFlux Configuration box on the EddyPro opening screen.
- Select New Project or Open Project.
- If you are creating a New Project and you do not intend to use planar-fit, automatic time-lag optimizations, or in situ spectral corrections:
-
- Set the Raw Data Directory to a .ghg file with metadata that applies to your site.
- Select variables and set flags as desired.
- Configure Advanced Settings (see Advanced processing).
- If you are creating the SmartFlux configuration file from an existing project:
-
- Click Open Project and select the project.
- Alter any settings that need to be changed.
- Configure Advanced Settings (see Advanced processing).
- If you are using planar-fit, automatic time-lag optimization, or in situ spectral corrections (see Planar fit, spectral corrections, and timelag optimization in the SmartFlux System for details):
-
- Select a planar-fit file that was generated by EddyPro using data from your site.
- Select the automatic time-lag optimization file that was generated by EddyPro using data from your site.
- Select the in situ spectral corrections file that was generated by EddyPro using data from your site.
- Click Create Package in the upper right of the EddyPro window.
-

- When prompted, name the package, select a directory and click Create.
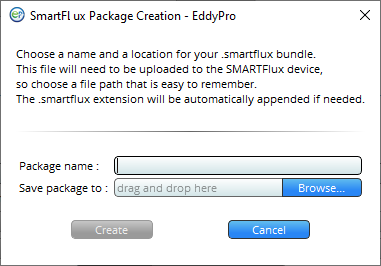
- The configuration file has a
.smartfluxextension. - Upload the SmartFlux configuration file to the SmartFlux System.
- See Loading a SmartFlux configuration file.
Planar fit, spectral corrections, and timelag optimization in the SmartFlux System
In order to use planar-fit, in situ spectral corrections or timelag optimization in the SmartFlux System, EddyPro needs to access the respective _planar_fit_, _spectral_assessment_, and _timelag_optimization_ files, hereafter referred to as “additional configuration files”. These files contain summaries of calculations performed on relatively large data sets (Table 7‑1) and that also apply to data to be collected in the future.
Note: File names of additional configuration files must remain unchanged from those assigned by EddyPro. The format will be similar to the following:

You can use three months of data to calculate a spectral assessment and then use this spectral assessment to correct fluxes calculated from data collected after those three months (if the system configuration didn’t change to such an extent that the spectral assessment is no longer representative). Similar considerations apply to the planar fit and the timelag optimization procedures. Refer to EddyPro documentation for more details on when and how to use these three advanced procedures.
The additional configuration files are created by EddyPro (3.0 and above), when used in the standard desktop mode. If you have been running your EC system (the EC system in which you intend to use the SmartFlux System) for some time, you may have already created one or more of these files, or you may have a .ghg dataset suitable for creating them, if the corresponding implementation is deemed necessary to calculate accurate fluxes (again, refer to EddyPro documentation to learn more about when it is suggested to use these options). If you do not have previously-collected .ghg files, then you will need to run the system for a suitable amount of time (for example using SmartFlux in Express mode), then use EddyPro in desktop mode to create the additional configuration files, and then provide them to the SmartFlux System as explained below.
Thus, assuming that you have a sufficiently long .ghg dataset (Table 7‑1), the procedure to correctly configure the SmartFlux System to use planar-fit, in situ spectral corrections or timelag optimization is illustrated here, using the in situ spectral corrections as an example. Analogous procedures shall be followed for the planar-fit or the timelag optimization.
- Open EddyPro (5.0 or above recommended) in normal desktop mode and complete the Project Creation and Basic Settings pages as usual (refer to EddyPro documentation if needed).
- In the Advanced Settings > Spectral Corrections, configure Corrections for low-pass filtering effects to use one of the in situ methods, i.e. Horst (1997), Ibrom et al. (2007) or Fratini et al. (2012). In the same page, customize the settings to instruct EddyPro to use the dataset of your choice and to filter data appropriately, so as to obtain a sound assessment of spectral attenuations. Click Run and when this is completed, locate the spectral assessment file (it contains the string “spectral_assessment” in the file name) in the subdirectory \spectral_analysis that you will find inside the selected Output folder. This is the file that you will use for the SmartFlux System.
- Open EddyPro (5.0 or above) in SmartFlux Setup Mode.
- Configure everything as explained in the previous sections. In the Advanced Settings > Spectral Corrections, configure Corrections for low-pass filtering effects to use one of the in situ methods among Horst (1997) and Ibrom et al. (2007) (the method of Fratini et al. (2012) is currently not usable in the SmartFlux System). In the “Spectral assessment file available” entry, select the spectral assessment file created earlier. Then proceed normally and when done, click on the Create File button to create the
.smartfluxbundle, as explained above.
An analogous procedure can be used to create and use the planar fit and the timelag optimization configuration files.
Advanced processing options
Similarly to EddyPro Advanced and Express, some controls must be configured, while others are optional. When you create the SmartFlux configuration file, only the controls that can be configured for the original SmartFlux System are enabled, and the other controls are disabled. In particular, you will find that:
- The Project Creation page is not available.
- This is because inside SmartFlux, EddyPro does not need any of the information that is entered in the Project Creation page. The file type (LI-COR .ghg), the use of metadata (“embedded”) and the use of biomet data (“embedded”) are all predefined settings in the SmartFlux.
- In Basic Settings:
-
- The selection of Dataset dates is deactivated because SmartFlux processes .ghg files one by one, as they are created by the gas analyzer software.
- The Flux averaging interval is deactivated because the SmartFlux System operates on a predefined interval of 30 minutes. In the SmartFlux System there is no option to calculate fluxes on any other time interval.
- The Master Anemometer is deactivated because LI-COR eddy covariance systems are designed around one only anemometer, which is detected automatically in the SmartFlux System as the “master”.
- In Advanced Settings > Processing Options, all processing options are active, and you can select them as you would do in EddyPro.
- The only exceptions are:
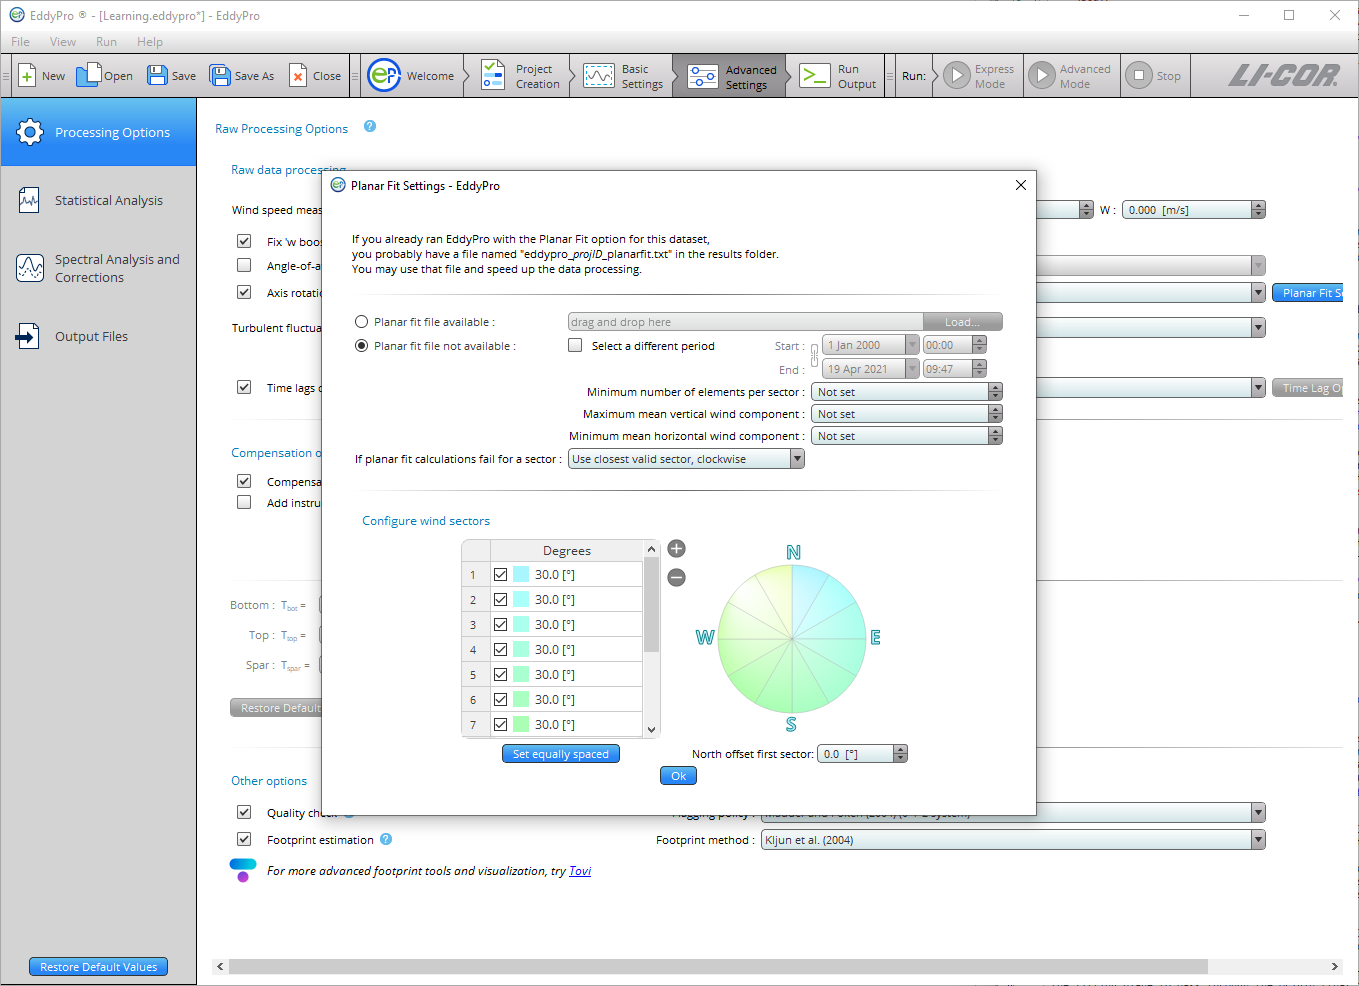
- The Planar Fit Settings... window, which activates when the Planar fit or the Planar fit with no velocity bias option is chosen as the Axis rotation for tilt correction method, presents only the Planar fit file available option. If you want to use the planar fit method in the SmartFlux System, you will have to load a previously created planar fit file at this time. Refer to Planar fit, spectral corrections, and timelag optimization in the SmartFlux System for instructions on how to create the planar fit file and more details on how to use it in the SmartFlux System.
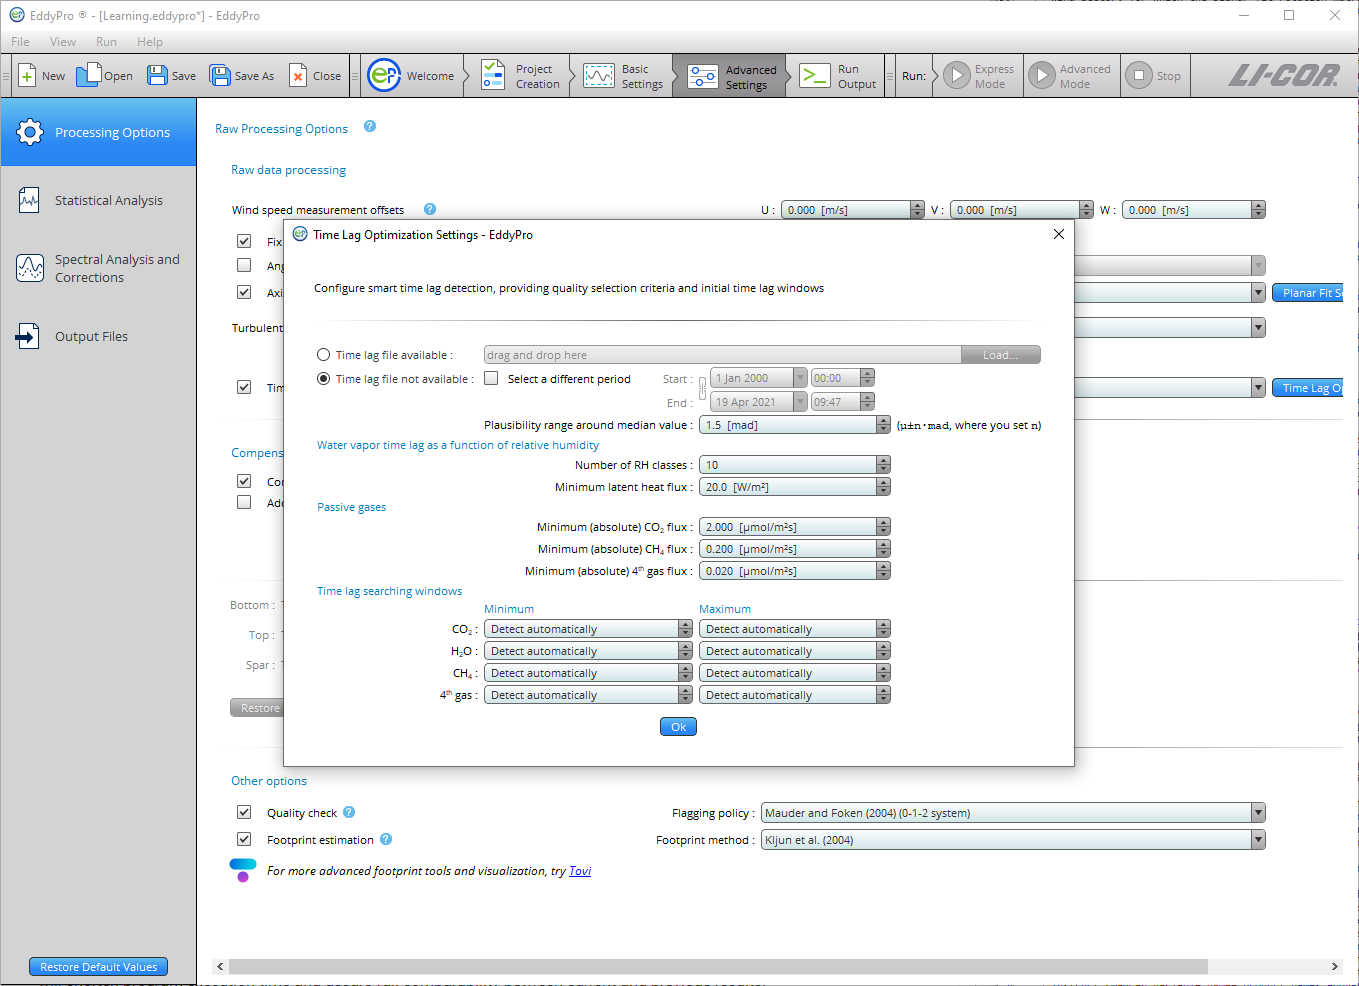
- The Time lag Optimization Settings..., which activates when the Automatic time lag optimization option is chosen as a Time lag compensation method, only gives the Time lag file available option. If you want to use the automatic timelag optimization option in the SmartFlux System, you will have to load a previously created timelag optimization file at this time. Refer to Planar fit, spectral corrections, and timelag optimization in the SmartFlux System for instructions how to create the timelag optimization file and more details on how to use it in the SmartFlux System.
- The Planar Fit Settings... window, which activates when the Planar fit or the Planar fit with no velocity bias option is chosen as the Axis rotation for tilt correction method, presents only the Planar fit file available option. If you want to use the planar fit method in the SmartFlux System, you will have to load a previously created planar fit file at this time. Refer to Planar fit, spectral corrections, and timelag optimization in the SmartFlux System for instructions on how to create the planar fit file and more details on how to use it in the SmartFlux System.
- In Advanced Settings > Spectral Corrections both low frequency and high frequency corrections are available.
- However:
- In the Correction for low-pass filtering effects, the method by Fratini et al. (2012) is deactivated, because this method requires an auxiliary file that is currently not available in the SmartFlux System.
- If an in situ method is selected (Horst 1997 or Ibrom et al., 2007), only the option Spectral assessment file available is active, similar to the planar fit and timelag optimization options discussed above. If you want to use one of these in-situ methods in the SmartFlux System, you will have to load a previously created spectral assessment file at this time. Refer to Planar fit, spectral corrections, and timelag optimization in the SmartFlux System for instructions on how to create the spectral assessment file and more details on how to use it in the SmartFlux System.
- In Advanced Settings > Statistical Analysis, all processing options are active, and you can select them as you would do in EddyPro with no exceptions.
- In Advanced Settings > Output Files, most options are active, with the following exceptions:
- The Set Minimal, Set Typical and Set Thorough pre-selection buttons are deactivated, because those pre-selections do not apply completely to the SmartFlux System.
- The Full output file and related settings are deactivated because this file will always be created by the SmartFlux System or in a predefined format.
- The Ensemble averaged cospectra and models is unchecked and deactivated, because this output cannot be created in the SmartFlux System, where .ghg files are processed one at a time. To create those outputs, use standard EddyPro instead.
- All full length (co)spectra outputs are deactivated. These files occupy large amounts of disk space and are thus not allowed in the SmartFlux System. To obtain full length (co)spectra files, use standard EddyPro instead.
- Processed raw data outputs are deactivated. These files occupy large amounts of disk space and are thus not allowed in the SmartFlux System. To obtain those outputs, use standard EddyPro instead.
Loading a SmartFlux configuration file
Note: EddyPro Express settings are loaded by default. Only load a configuration file to use EddyPro Advanced settings.
- Create the SmartFlux configuration file created in EddyPro.
- Click the SmartFlux button.
-

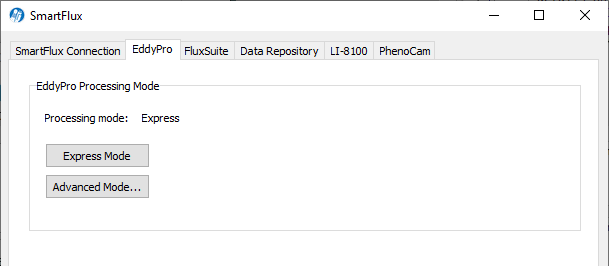
- Select the EddyPro tab, and click the Advanced Mode.... Read the warning dialog.
- Browse to the advanced configuration file created in EddyPro (extension *.smartflux) and select it.
After loading the file, the SmartFlux System will compute flux results based upon the defined Advanced settings. Be sure to turn on datalogging after altering the configuration.