
LI-8150 Multiplexer DC-DC Converter
Printable PDF: LI-8150 Multiplexer DC-DC Converter
This content as a pdf that can be saved to your computer or printed.
Important: The incoming voltage from the solar panels is above 24 volts. Be careful, as there is a risk of hazardous electrical shock. Additionally, make sure the LI-8150 is not already connected to AC power while connecting wires for the DC-DC converter.
Components
The DC-DC Converter Kit includes the following components:
- Multiplexer access panel with DIN rail attached
- DC-DC converter with a black male connector and a white female connector
Install the DC-DC converter
- If you're connected to AC power, unplug the LI-8150 multiplexer power cable to avoid electrical shock.
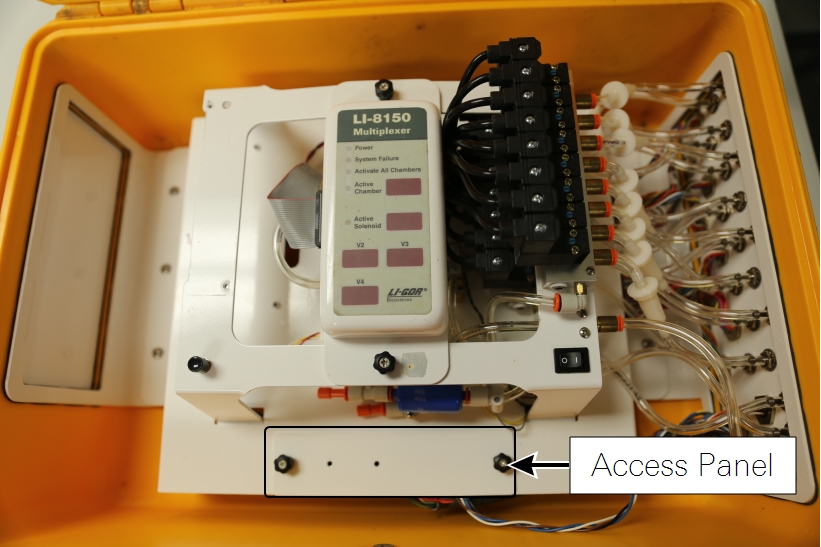
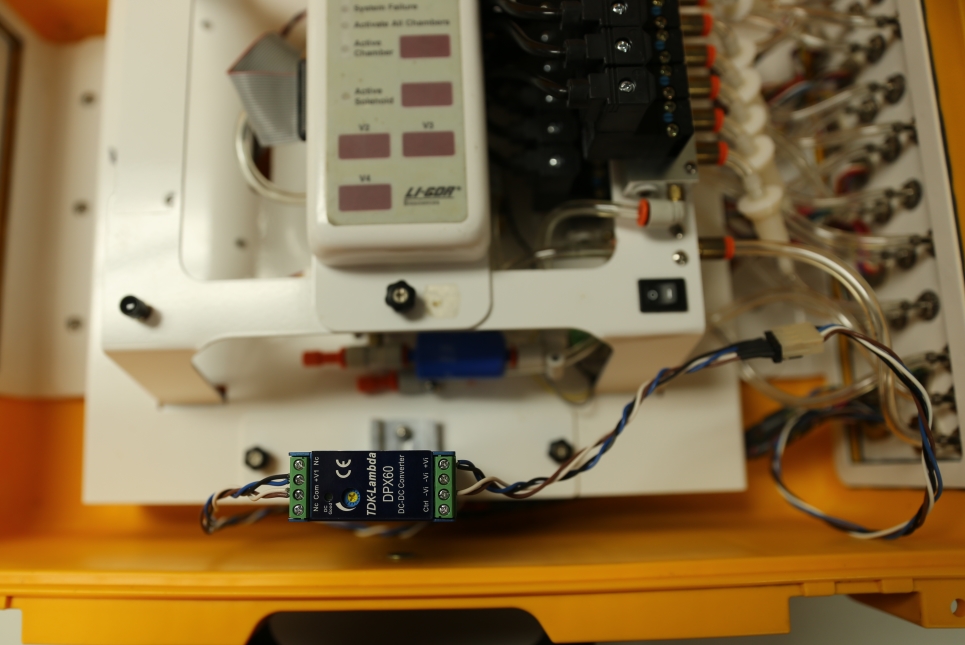
- Locate the access panel in the LI-8150.
- Loosen the two thumbnuts on the access panel and lift off to access the connector.
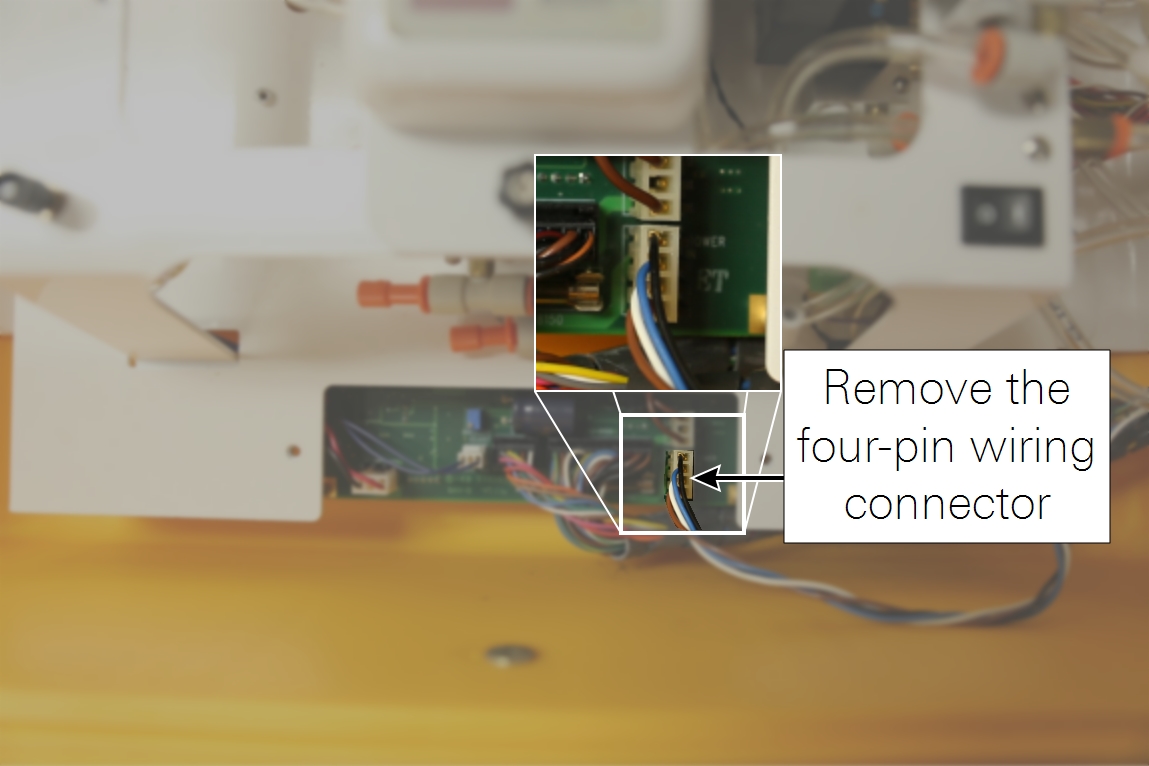
- Pull the four-pin white wiring connector with black, blue, white, and brown wires from its socket.
- Pull it by the wiring connector, not by the wires, as the wires can pop out.
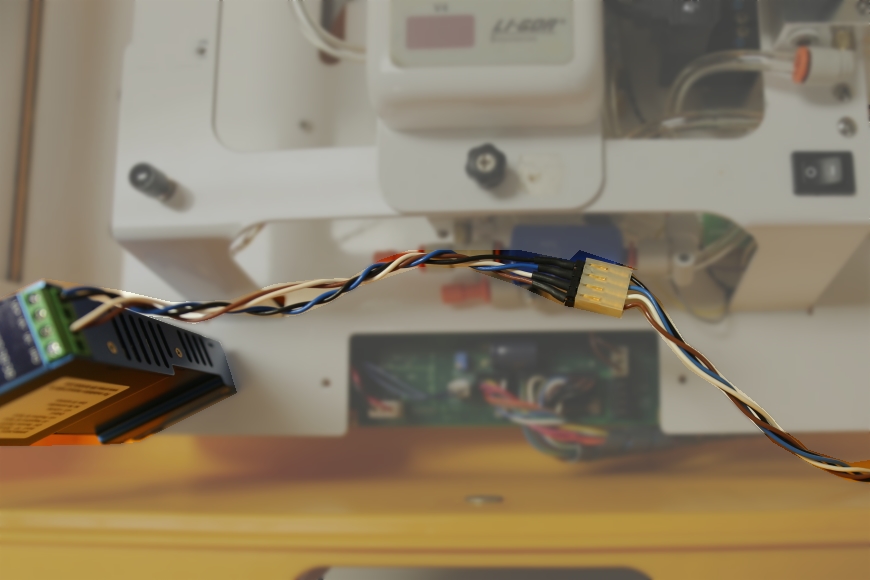
- Connect the wiring connector you just unplugged from the multiplexer to the black connector from the DC-DC converter.
- It's important to align the wire colors (black with black, blue with blue, and so on).
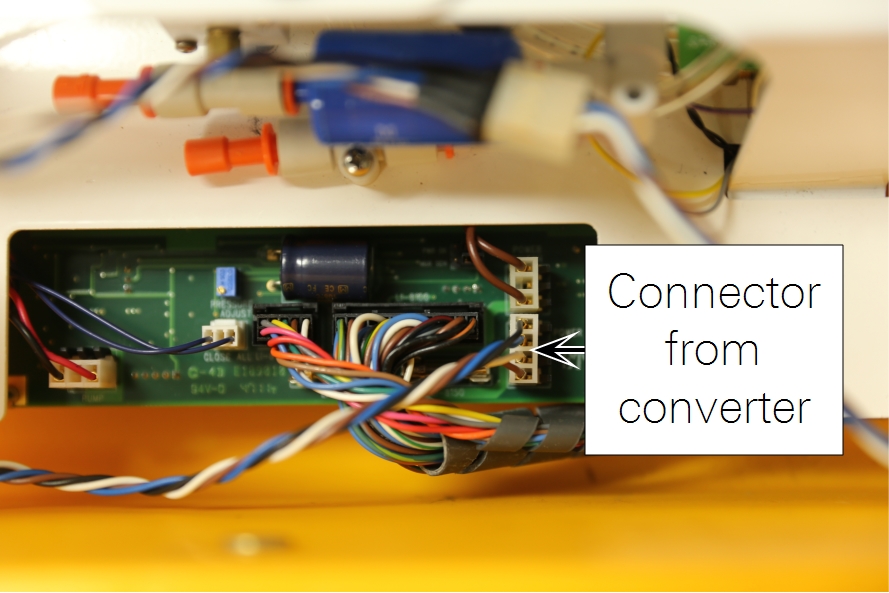
- Plug the white connector from the DC-DC converter into the now-empty socket.
- The black wire should be on top, and the brown wire on bottom.
- Place the DC-DC converter into the DIN rail on the new access panel.
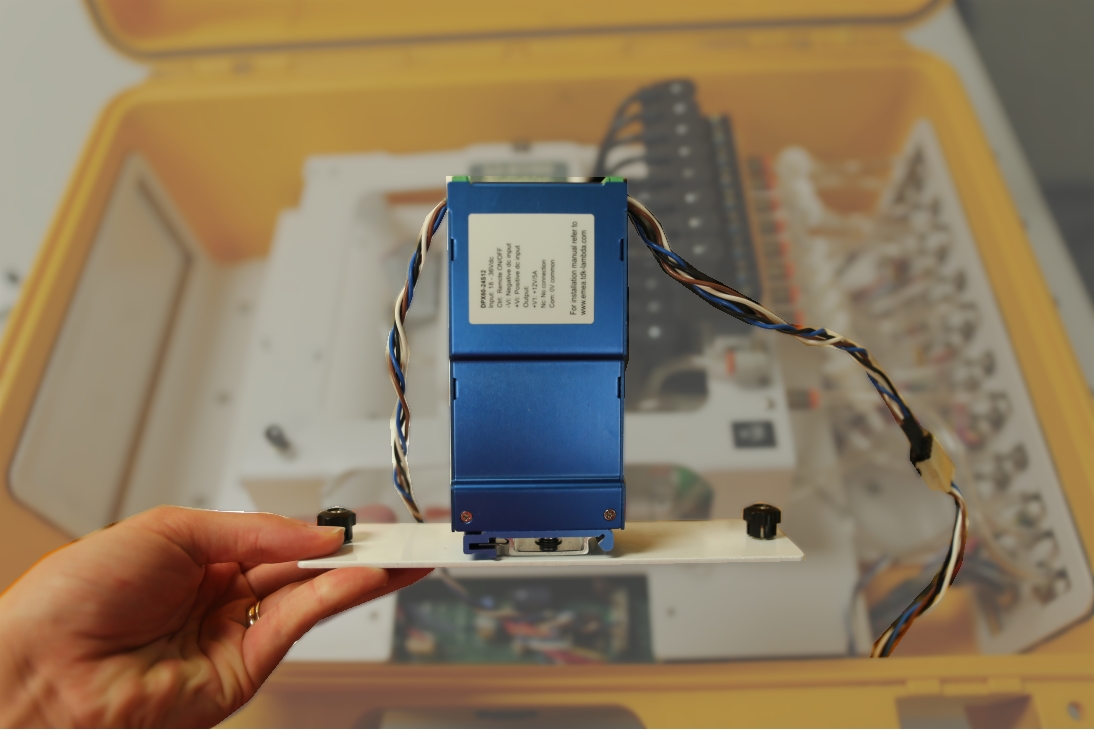
- Position the new access panel and tighten the two thumbnuts.
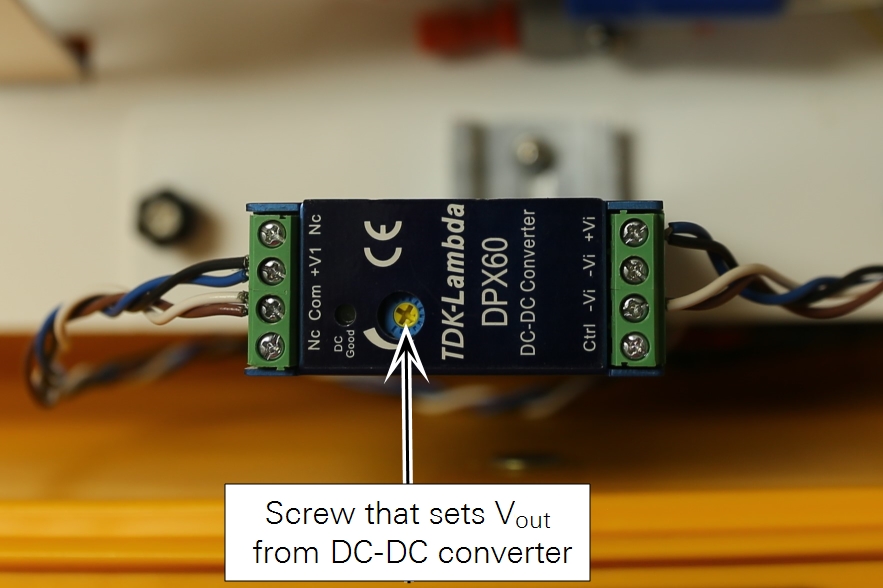
Note: The screw on the top of the DC-DC converter sets Vout from the DC-DC converter. If the LI-8100A analyzer control unit won't turn on and the LI-8150 multiplexer does turn on, it's likely that this screw is set so that Vout is too low. Use a screwdriver to turn the screw clockwise until the LI-8100A powers on.
Connect the LI-8150 power cable to the battery box
A power cable is included with every LI-8150 Multiplexer. The power cable (part number 8150-706) is a 3 meter cable with bare wire leads which you can connect to the solar panel system. The red wire connects to TB3 and the black wire connects to TB5 in the battery box of the solar panel system.
- Check that the power cable is not connected to the LI-8150 Multiplexer to avoid electrical shock.
- Open up the battery box from your solar panel system.
- Remove the knockout on the left side of the battery box and thread the power cable through the hole.
- Connect the red wire from the LI-8150 power cable to TB3 (Figure 1‑1).
- Connect the black wire from the LI-8150 power cable to TB5.
- Connect the other end of the power cable to the LI-8150 Multiplexer.
It is now safe to turn on the LI-8150 Multiplexer.