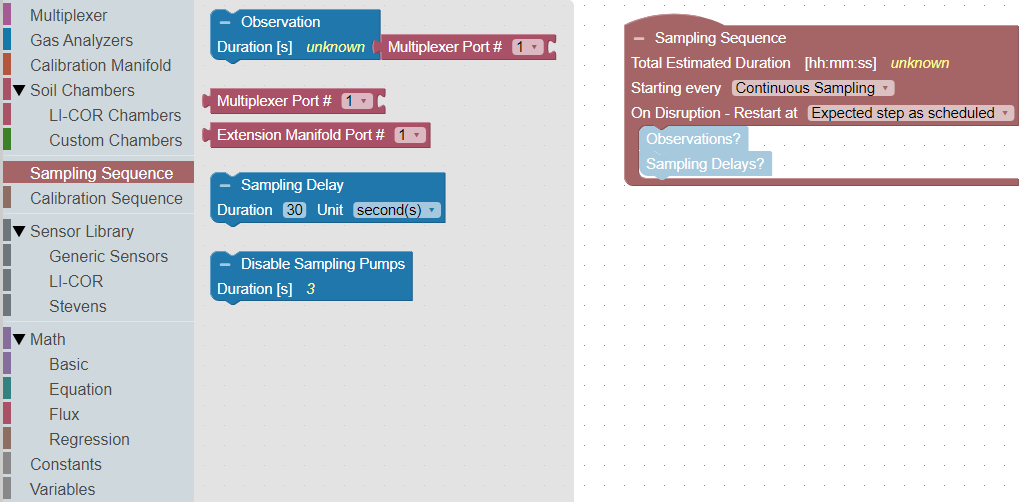
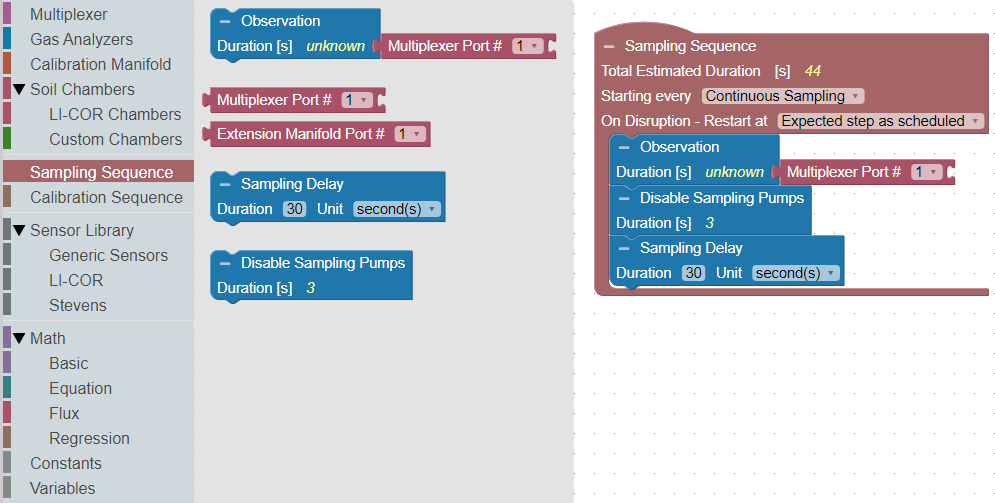
This section describes the elements under the Sampling Sequence block. The Sampling Sequence has three different events that can be added: Observation, Delay, and Disable Sampling Pumps. Each block added will update the Total Estimated Duration of the sequence which must be taken into consideration when choosing when to start the sequence.
It may be helpful to first configure the physical components under the LI-8250 Multiplexer block before configuring the Sampling Sequence (see Multiplexer and component blocks).
The Sampling Sequence runs in sequential order from top to bottom and completes or repeats when it reaches the bottom, depending on the instructions.
Note: When configuring a system with multiple chambers and extension manifolds, you can copy and paste or duplicate blocks to speed things up.
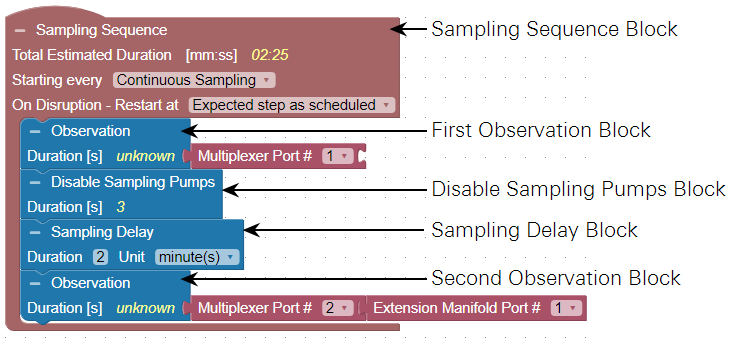
The Sampling Sequence block
As the root block, the Sampling Sequence cannot be deleted. It must be configured as a sequence of observations and possible delays between them.
- Displays: Sequence properties, such as Total Estimated Duration of the sequence, an instruction for when to Start Sequence, and the action to take On Disruption.
- Fits into: As the root block, the Sampling Sequence block does not fit into any other blocks.
- Accepts: Observation blocks and Delay blocks.
- Requires: The sampling sequence holds observations and delays between them.
The Start Sequence block defines when the LI-8250 Multiplexer will begin its sequence after you click Start on the Home page.
- Continuous Sampling will immediately start the sequence, run through all events, and will begin again once finished.
- 15 [min] or 30 [min] starts the sequence on the next quarter- or half-hour. For example, if you set the Start Sequence to 15 [min] and click Start at 12:07 AM, the sequence would begin at 12:15 AM.
- 1 [hr], 2 [hr], 4 [hr], 6 [hr], or 12 [hr] starts the sequence on the specified hour. For example, if you set the Start Sequence to 1 [hr] and click Start at 12:07 AM, the sequence would begin at 1:00 AM.
- Daily will start the sequence at midnight of each day.
In event system experiences a disruption, such as a power outage, you can define how the Sampling Sequence will behave when it comes back online by configuring the On Disruption behavior.
- Beginning will restart the Sampling Sequence over from the beginning.
- Next tells the LI-8250 Multiplexer to see where it was in the Sampling Sequence and start from the next event.
- As Expected will cause the LI-8250 Multiplexer to assess the length of the disruption and to pick up where it should be at in the Sampling Sequence.
Observation block
Expand the Sampling Sequence options to view the options for Observations. Observations represent measurements of a gas that came through a port, and the port can be either on the multiplexer or an extension manifold. Several observations can be strung together for a single port or multiple ports. Each observation Duration is determined by the combined Pre-Purge, Post-Purge, and Observation Length for the chamber on that port.
- Displays: The Duration of the observation. Duration will be unknown unless the LI-8250 Multiplexer block has been configured to include chamber or flask blocks. The time parameters from those blocks (Pre-Purge, Post-Purge, Observation Length) contribute to the Total Estimated Duration.
- Fits into: Accepted by the Sampling Sequence block.
- Accepts: Multiplexer Port block or Extension Manifold Port block.
- Requires: The port number to be assigned, whether the port is on the Multiplexer or an Extension Manifold.
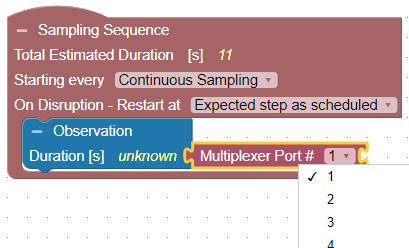
Multiplexer Port block
Each Observation will host a Multiplexer Port. If applicable, that block can also has an Extension Manifold.
- Displays: Multiplexer port selected from the menu. Also shows the Duration computed from the sampling sequence for the port.
- Fits into: Accepted by the Observation block.
- Accepts: If applicable, and Extension Manifold Port block.
- Requires: The port number to be assigned, whether the port is on the Multiplexer or an Extension Manifold.
Extension Manifold block
Each Extension Manifold block will host a Port.
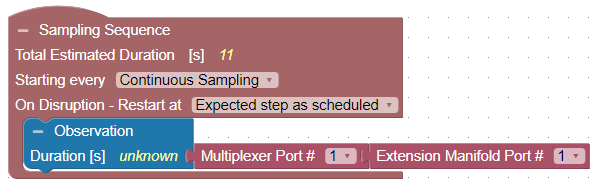
- Displays: Multiplexer port selected from the menu. Also shows the Duration computed from the sampling sequence for the port.
- Fits into: Accepted by the Observation block.
- Accepts: If applicable, an Extension Manifold Port block.
- Requires: The port number to be assigned, for ports on the Multiplexer and the Extension Manifold.
Disable Sampling Pumps block
You can disable the sampling pumps, for example if you have programmed an extended delay want to disable the pumps to reduce noise and preserves the life of the pumps. A Disable Sampling Pumps block should be added immediately before a Delay block. Pumps will be disabled for the duration specified in the Delay block. Pumps are re-enabled after the delay time has passed.
Note: Although the Disable Sampling Pumps block shows a Duration of 3 seconds, the pumps will be disabled for the entire Duration of the following Delay block.
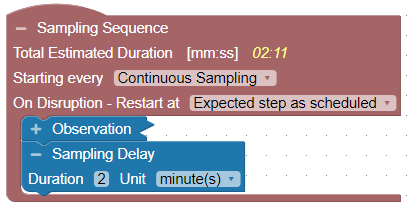
Sampling Delay block
Sampling Delay is a pause in the Sampling Sequence. You can place a Sampling Delay wherever it is needed and configure it to run as long as is needed. To add a Delay and drag a Sampling Delay block to where you would like to add the Delay in the sequence.
- Displays: The Delay that you have entered.
- Fits into: Accepted by the Sampling Sequence block.
- Accepts: No blocks are accepted.
- Requires: A delay value and units of seconds, minutes, or hours.