
Getting started
Although your path through Tovi will depend upon your objectives, the initial steps are largely the same. For any project, we recommend the basic workflow begins with creating a site.
The basis of a Tovi project is a Site. A site is an eddy covariance station with data that has been processed in EddyPro Software, either on a computer or by the SmartFlux system. A site organizes all of the information about a research station.
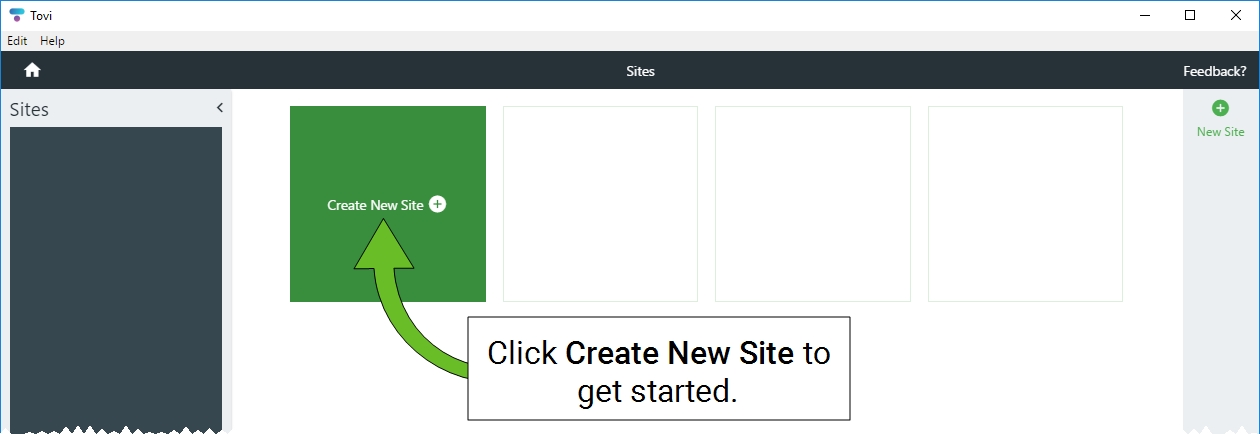
- Click Create New Site to get started.
- Tovi will prompt you to name the site and add data files.
- Enter a Site Name.
- The Site Name is to identify your site and distinguish it from other sites you'll create. Although you can click Create after entering the name, we recommend that you add data files, load site information, and select external data first. If you load a metadata file at a later time, the site name will be read from the metadata file and Tovi will overwrite the name you entered here.
- Add Data Files.
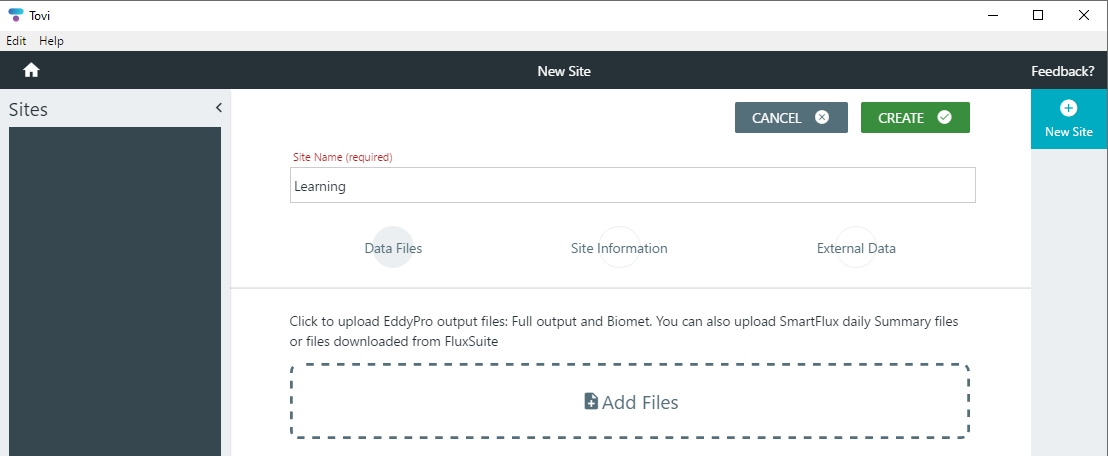
- With the Data Files node selected, click Add Files and select any of the following from your EddyPro and SmartFlux outputs:
-
eddypro_*_full_output.csveddypro_*_biomet.csveddypro_*_metadata.csvep-summary.txt
- Note: If you get an error message while adding files, see Resolving an unexpected error when adding data files for solutions.
- Load Site Information.
- With the Site Information node selected, you can add information about your site, either by importing the .metadata and the .eddypro files from your EddyPro project or by manually entering the information into the fields provided. The minimum required site information includes the time step of the data (e.g., 30 or 60 minutes) and the latitude and longitude of the site.
-
- A .metadata file is bundled with each .ghg file. To access the .metadata file, copy one of your .ghg files, rename it with a name of your choice, and change the file extensions from .ghg to .zip. Decompress the file. The decompressed folder will include the .metadata file. Adding the .metadata file will cause Tovi to update the Site Name according to information contained in the file. You can manually change the site name if you prefer. The metadata file includes a list of all instruments at your site.
- The .eddypro project file specifies which sonic anemometer is the Master anemometer, if your site had more than one. In addition, the project file includes the processing steps that were carried out by EddyPro.
- If you're satisfied with the site location and time step interval, click LOCK INFORMATION. After you lock the location, Tovi is able to retrieve data from nearby meteorological sites and read those data with the time step required by your site.
- Load External Data (optional).
- Tovi can find external data sets that can be used in your project. Under the External Data node, you'll be presented with a map, where you can zoom out to expand the area addressed by external data. Select datasets to download by choosing regions on the map (for gridded data) or by selecting the dataset.
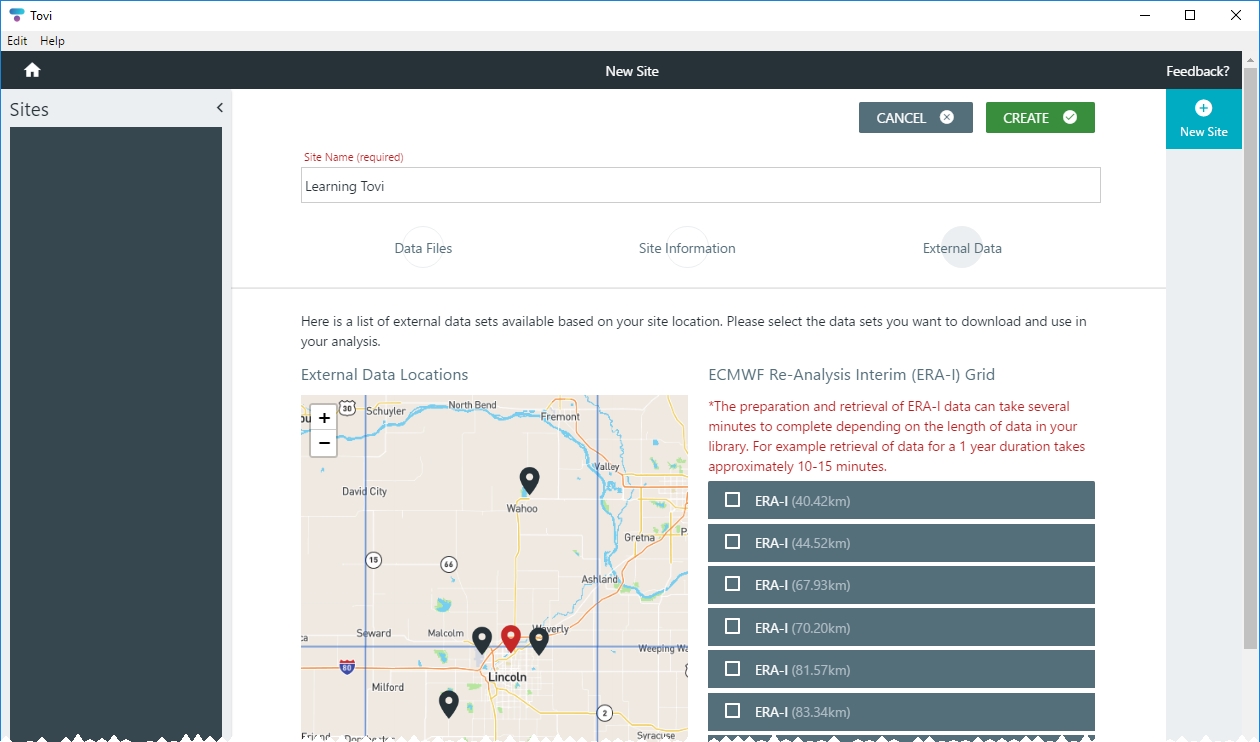
- The external data sets available are the European Center for Medium Range Weather Forecasting (ECMWF) Re-Analysis Interim (ERAI) data and the Integrated Surface Dataset (ISD, released by NOAA). The ERAI data set is a gridded, surface meteorological data set that covers the Earth’s surface at a horizontal resolution of approximately 80 km (https://www.ecmwf.int/en/forecasts/datasets/reanalysis-datasets/era-interim). The ISD data set is a collection of approximately 14,000 active surface meteorological observing stations (https://www.ncdc.noaa.gov/isd). You can choose both ERAI and ISD data sets. Generally, it is enough to choose the ERAI grid square that contains your site and the 2 or 3 ISD stations closest to your site.
- Review the Error Codes (optional)
- The list of error codes is created automatically using common codes from EddyPro. Tovi will examine your data for error codes given here. If you want to screen data for custom error codes, add the custom code here. Simply type it in and click the [+] button.
- Create the site.
- Click Create when you're done. Tovi will begin collecting and processing the external data so that the time step interval corresponds to the time step interval of your EddyPro output files. The collection of external data can take some time, typically 10 to 15 minutes for 1 year of data. The downloading of external data will continue in the background. You can to continue working with Tovi while these data are obtained.
Resolving an unexpected error when adding data files
An error message (An unexpected error occurred) while creating a site may indicate that the Date column is formatted improperly or that a header character has been replaced with an unrecognized character.
If any of the .csv output files from EddyPro have been opened in Excel or another spreadsheet application, the date format may have been altered from the original format.
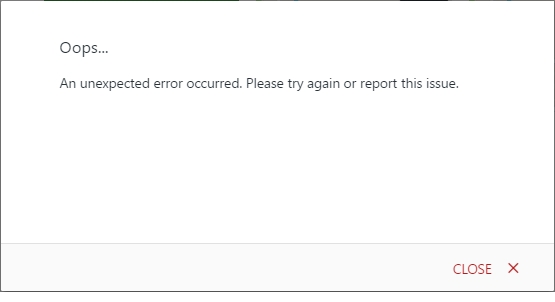
The format applied to the Date column should be yyyy-mm-dd. Depending on the region settings of Windows, it can become formatted differently (dd.mm.YYYY in Europe, for example) when reading the file. This can happen even if you did not save the file.
To correct the issue, open affected files in Excel. Select the Date column, right-click the selection, and click Format Cells. Select Custom and set the format to yyyy-mm-dd. Save changes to the files (use the .csv extension) and re-import them into Tovi.
Additional tips are provided in Troubleshooting.
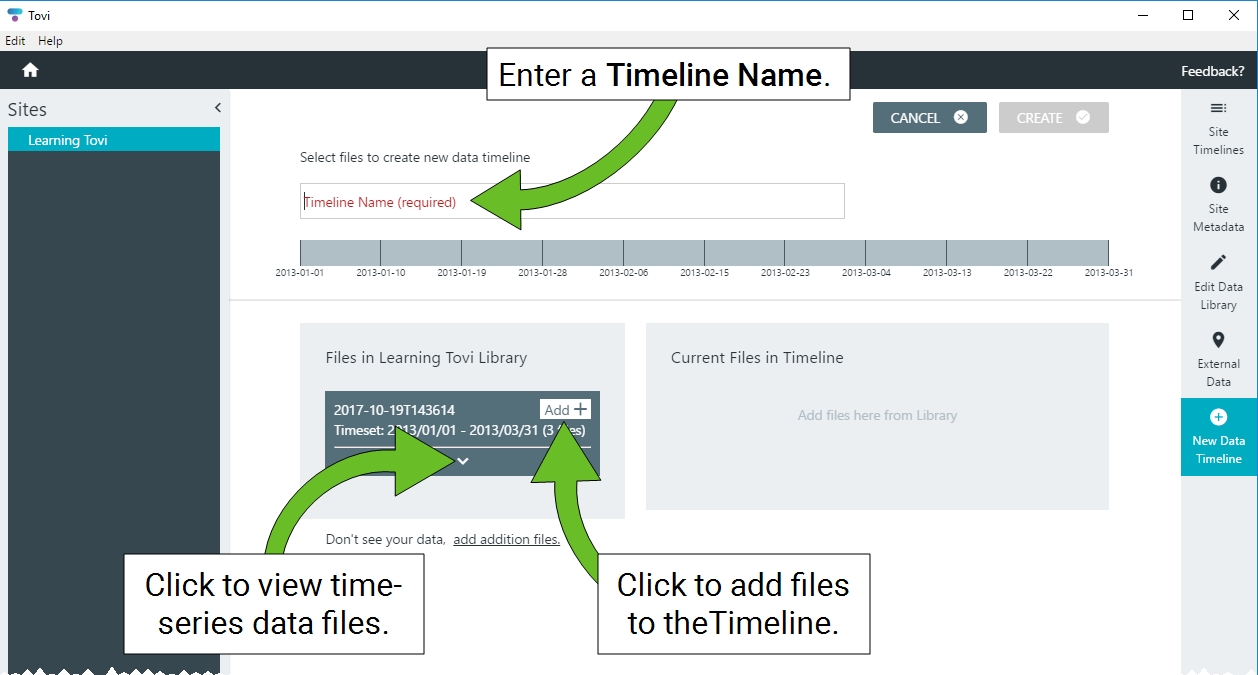
After creating a Site, you'll be prompted to create a Timeline. The timeline has 10 even, arbitrary divisions to help you visualize the dataset. To create the timeline:
- In the Timeline window, name the timeline.
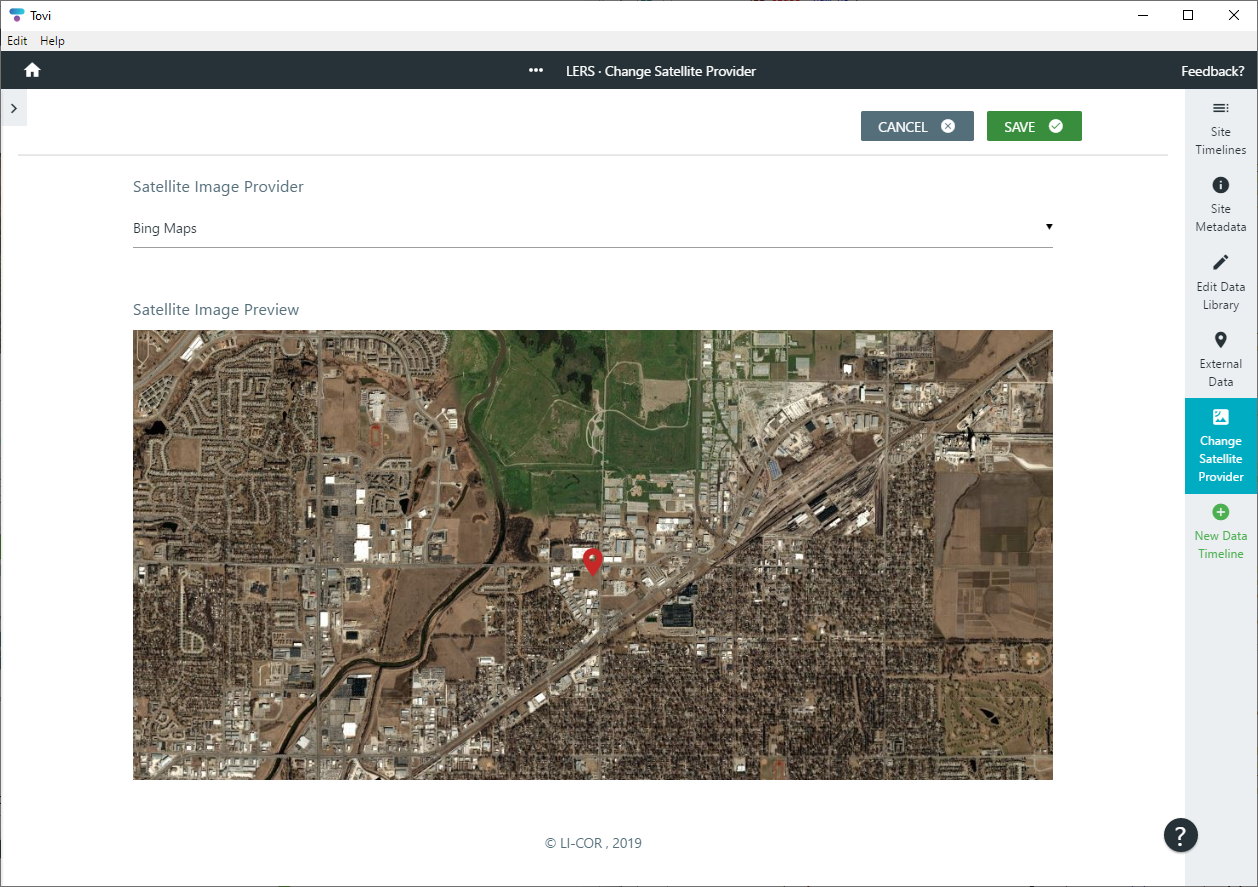
- Check the satellite imagery.
- You can look at the satellite imagery for your site and choose an alternative provider if the default imagery is unsatisfactory for any reason (e.g., cloud cover). Click Change Satellite Provider and choose from MapBox or Bing Maps. You can preview the imagery to see which is best. After selecting a provider, click Save.
- Add files to the timeline.
- Tovi will show a timeline with 10 evenly spaced divisions.
- Create the timeline.
- When you are satisfied with the data files on the timeline, click Create.
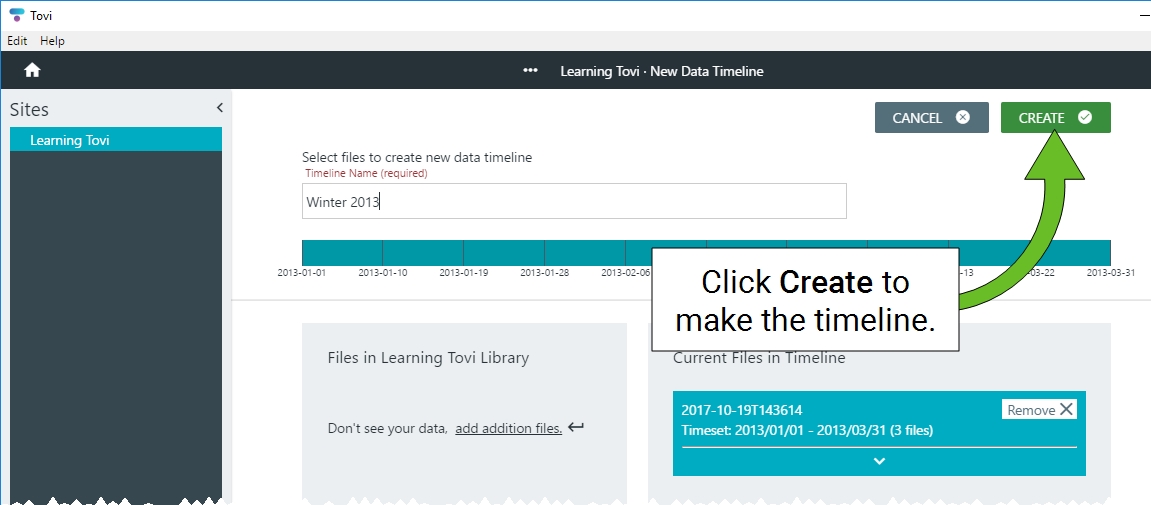
- Tovi will create the timeline.
- If Tovi detects overlapping data files or conflicts, it will prompt you to resolve the issue by merging or overwriting the data.
If you need to make changes to the timeline, you can rename the timeline, add more data files and edit the timeline at any time.
After you've created the Timeline, you can create an Analysis. To do so:
- Click New Analysis.
- An analysis of your dataset requires a unique name. You can constrain the start and end dates and times.
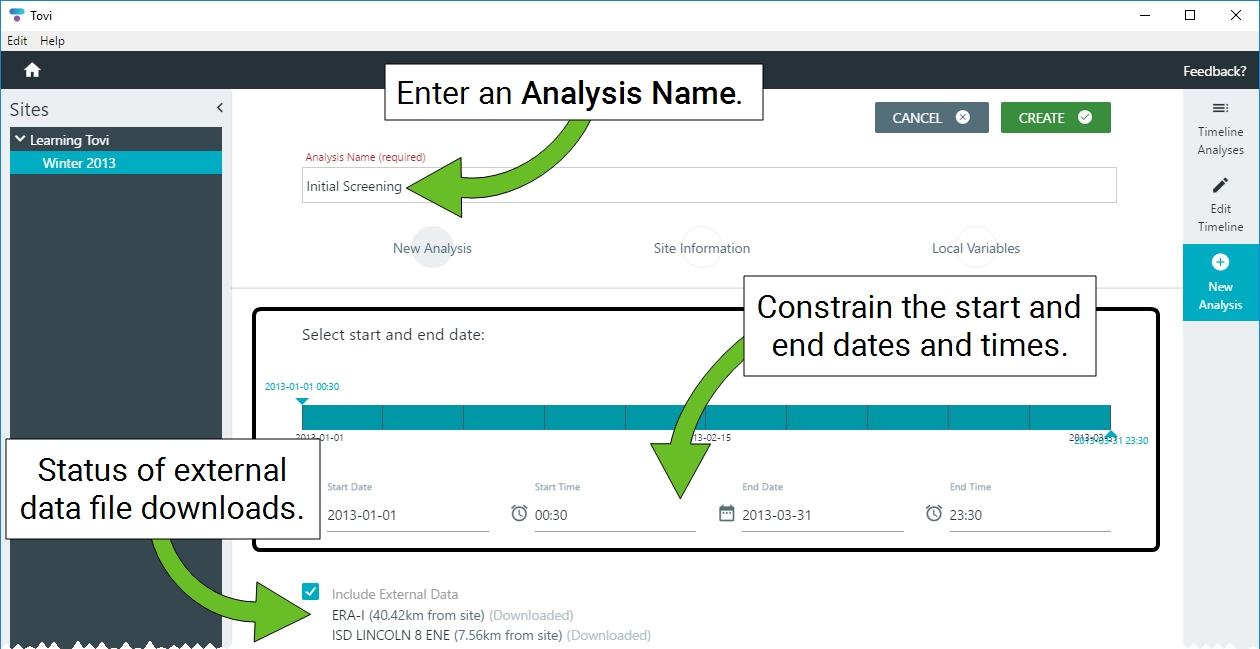
- Tovi will continue to load and process the external data files until it is done (15 minutes, perhaps). You cannot click Create until the External Data are downloaded.
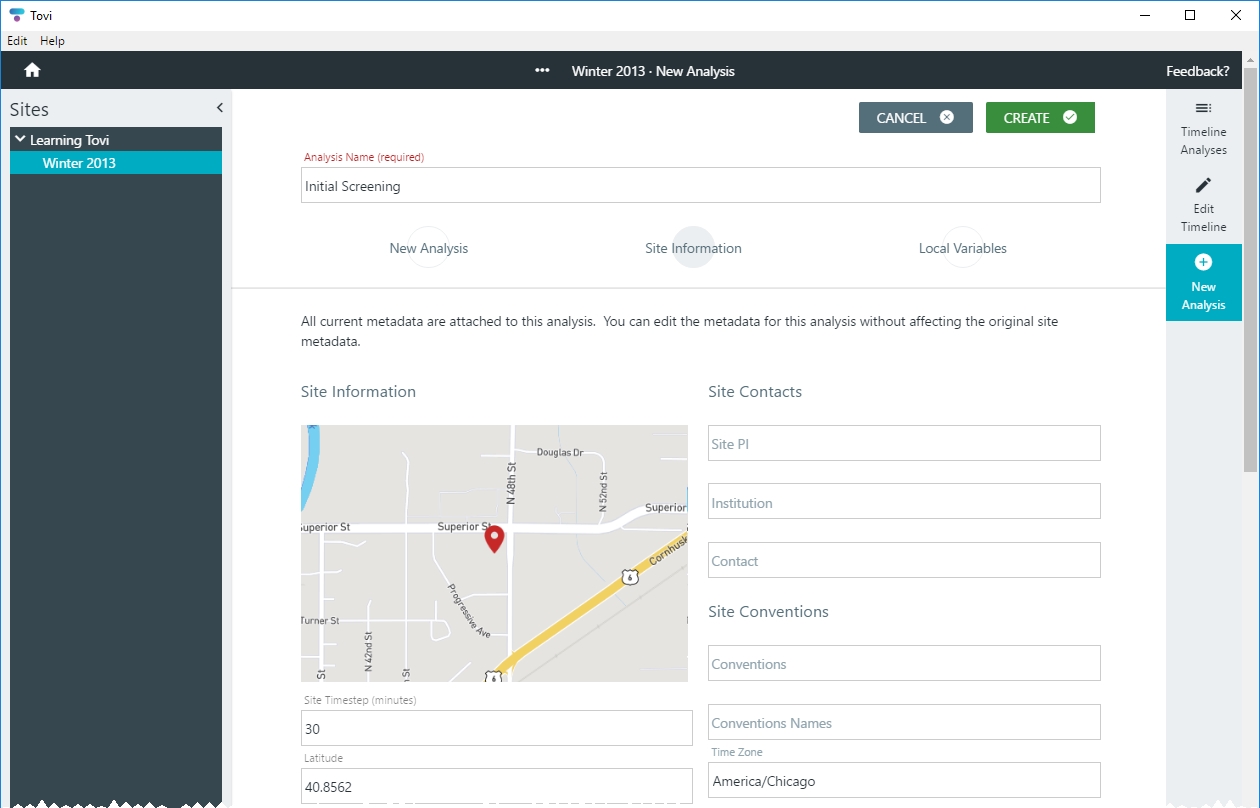
- Update the Site Information.
- All current metadata are attached to this analysis. You can edit the site information.
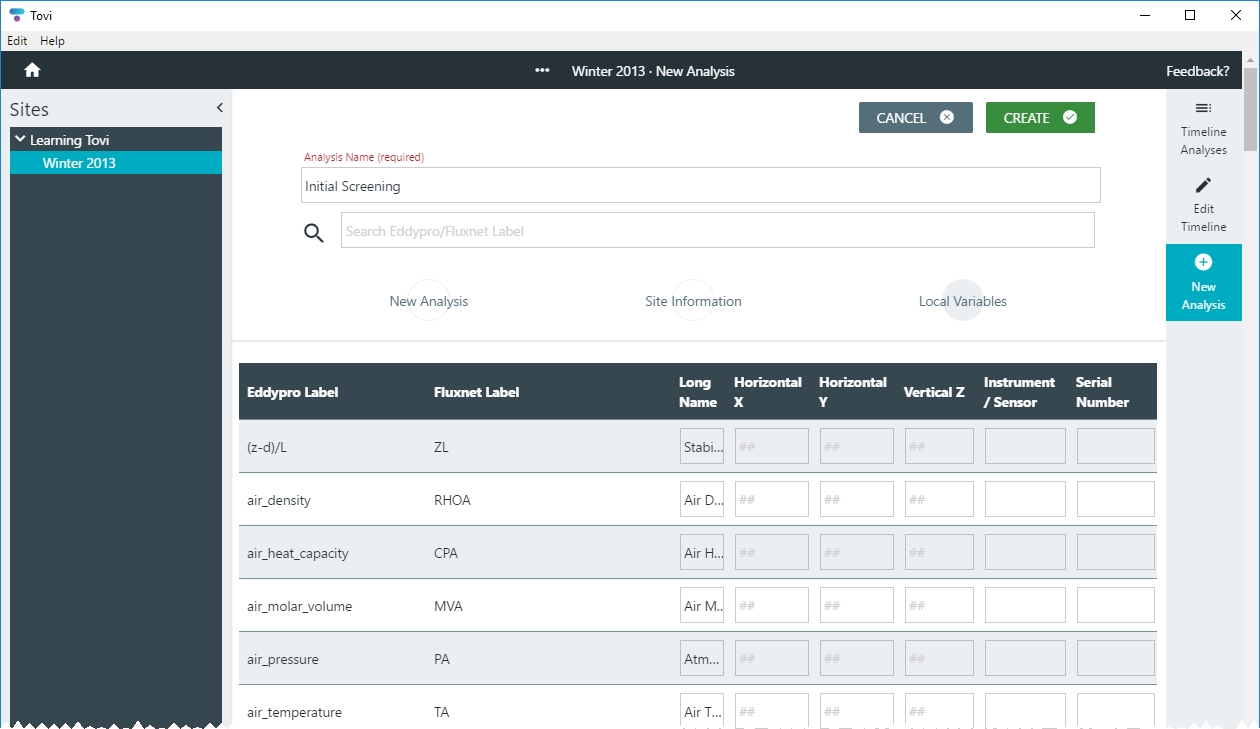
- View Local Variables.
- You can enter information in the Local Variables table, concerning details and location of the instruments and sensors measuring the parameter.
- Create the New Analysis: Click Create.
- Tovi will take a few minutes to create the analysis, after which you'll be presented with a Coverage Chart.
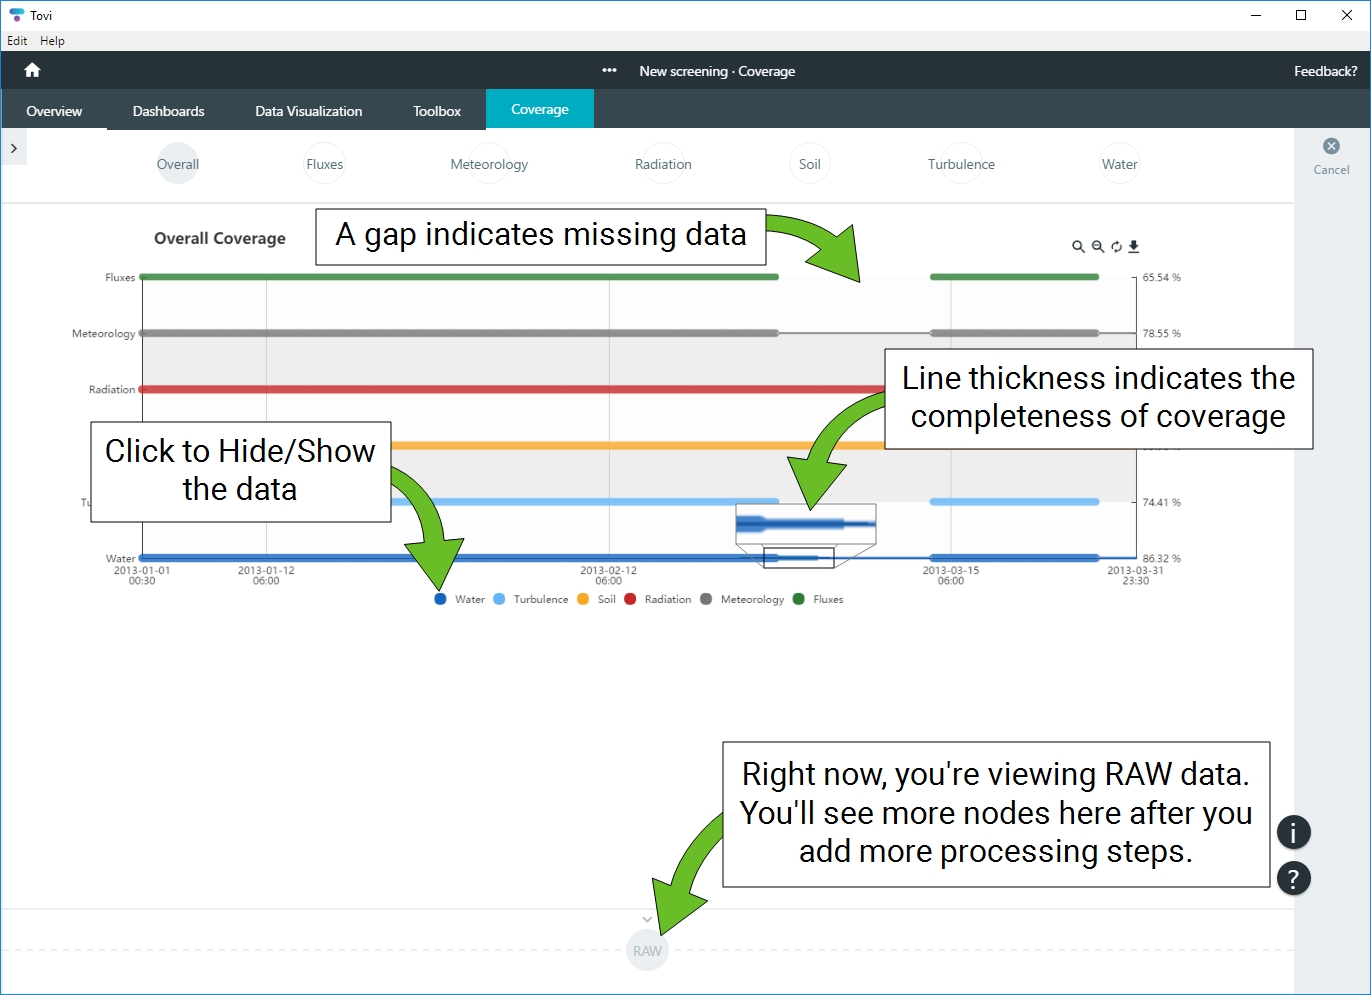
And now, you are ready to view the data coverage and start the analysis.