


Each LI-5800A includes a pH meter that reads a pH electrode and transfers data to the computer. Early models included an Orion A211 pH meter; current models include the Thermo Scientific™ Orion™ Pro Star PH211. If you need to change the setup and output configuration, follow the steps below or refer to the manufacturer's documentation.
Orion PH211
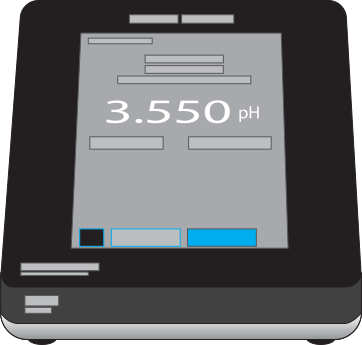
Configure communication parameters in the PH211 pH meter. You may need to do this if you provide your own PH211 or if you changed the settings on the unit provided with the LI-5800A.
Communication and output timing setup
To configure communication parameters:
-
Open the main menu (
 ), tap Settings, and then select Instrument Settings.
-
Select Read Type.
-
Select Timed mode.
-
Set the time interval to 5 seconds (0:00:05).
-
-
Select Data Transfer Settings.
-
Set the Export Destination to Computer.
-
Set the Custom Data Log Export to Basic.
-
Set the Export Output Format to CSV (Comma Separated Values).
-
Set the Export Baud Rate to 9600 baud.
-
-
Tap Save to apply the setting.
Measurement setup
To configure the measurement units:
-
Open the main menu (
), tap Settings, and then select Instrument Settings. -
Set Measure Mode to mV.
-
Tap Save to apply the setting.
Starting measurements
Measurement must be started before data are transferred to the computer.
-
Tap Start to start the measurement.
The meter will save measurements at 5-second intervals and export them according to the Data Transfer Settings while in measurement mode.
-
To stop timed measurements, tap the Stop button or exit measurement mode.
Orion A211
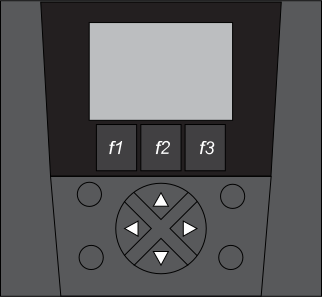
Follow these steps to configure the discontinued A211 communication parameters. You may need to do this if you provide your own A211 or if you changed the settings on the unit provided with the LI-5800A.
When the titration program is running and communicating with the pH meter, the program automatically applies the following settings to the pH meter:
-
Display is in Abs mV.
-
Output/print is in timed mode.
-
Output interval set to 5 seconds.
-
Output format is comp.
If you need to change the setup and output configuration, follow the steps below or refer to the manufacturer's documentation.
Communication setup
These steps are adapted from the Orion A211 manufacturer's documentation. Follow along to change the communication settings of the meter.
-
In measurement mode, press
 (setup) to access the main menu.
-
Turn Print to on.
-
Press
 (mode) and then press f3 (select) to view System Setup.
-
With Export Data selected, press f3 (select) to open the settings.
-
With Printing selected, press f3 (select) to open the settings.
-
Set Printing to On (press
 (log/print) to select on and press f3 (select) to change the setting).
-
-
Verify that the Comm Setup is set to RS232.
-
Set Data Format to PC (CSV).
-
Press
(log/print) to select Data Format and press f3 (select). -
Select CSV (press
(log/print) to select PC (CSV) and press f3 (select) to change the setting).
-
-
Set the baud rate to 9600.
-
Press
(log/print) to select Comm Config and press f3 (select). -
Press
(log/print) to select 9600 and press f3 (select) to change the setting. -
Press f1 (back) to return to the menu.
-
-
Disable local data storage.
-
Press
(log/print) to select DataLog and press f3 (select). -
Press
(log/print) to select off and press f3 (select) to apply the setting.
-
-
Disable auto-shut off.
-
Press f2 (page).
-
Press
(log/print) to select Auto Shut Off and press f3 (select). -
Press
(log/print) to select off and press f3 (select) to apply the setting.
-
-
Press measure (esc) to return to measurement mode.
Output timing setup
Follow these steps to configure the data output timing on the Orion A211.
-
In measurement mode, press
(setup) to access the main menu. -
Select Channel and press f3 (select).
-
Press
(log/print) to select Mode and settings and press f3 (select). -
Set Measure mode to mv.
-
Press
(log/print) to select Measure mode and press f3 (select). -
Press
(log/print) to select mv and press f3 (select).
-
-
Set read type to timed.
-
Press
(log/print) to select Read Type and press f3 (select). -
Press
(log/print) to select Timed.If the setting shows 00:00:05, press f3 (select). If it is not 00:00:05:
-
Press
(mode) to select the last two digits 00:00:xx. -
Press f3 (edit) to access the numeric entry screen.
-
Press
(mode) to select number 5, then press f3 (enter) and f2 (done) to apply the setting.
-
-
-
Press measure (esc) to return to the measurement mode.