The basics
Powering On and Off
Press the power ON/OFF key  to turn on the LI-1500. You will see one of these messages:
- New Config File: Start at step 2 under Creating a configuration.
- Select Config File: Scroll up or down

 to highlight a configuration. Press OK to activate the highlighted configuration and enter monitor mode (Monitor mode navigation).
Note: You must add sensor information and create and activate a configuration in order to receive light readings (Configuring the LI-1500).
Press the power ON/OFF key to turn off the LI-1500.
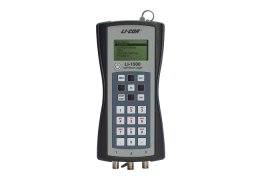
Keypad
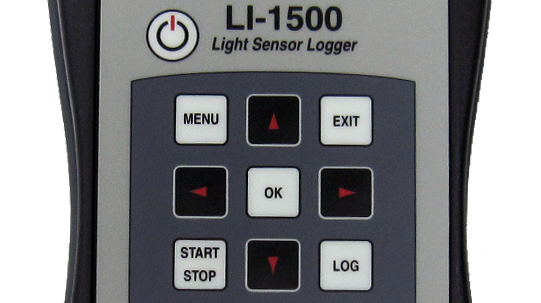
The LI-1500 features a 22-button tactile response keypad. The upper block of nine keys are used to navigate through menus, select menu options, and log data. Basic functions of the upper nine keys are described in Table 2‑1.


The lower block of 12 keys are used to enter alphanumeric characters. Each key is used to enter the letters and numbers indicated by the label on the key. The 22nd key is the power on/off key at the top left of the keypad. The period key is also used to initiate remark entries during logging sessions (Logging data). Numbered keys (1–9) are also used to record GPS data during logging sessions (GPS tagging).
When using the alphanumeric keys, each key press cycles through the alphanumeric characters on that key (e.g. pressing the '1' key cycles through a, b, c, and 1 in a continuous loop). The cycle continues until a different button is pressed, or until one second has passed without a key press. Some fields can only accept numeric or alphabetic characters. The right arrow key is used to enter spaces and the left arrow key functions as a backspace key in alphanumeric fields.
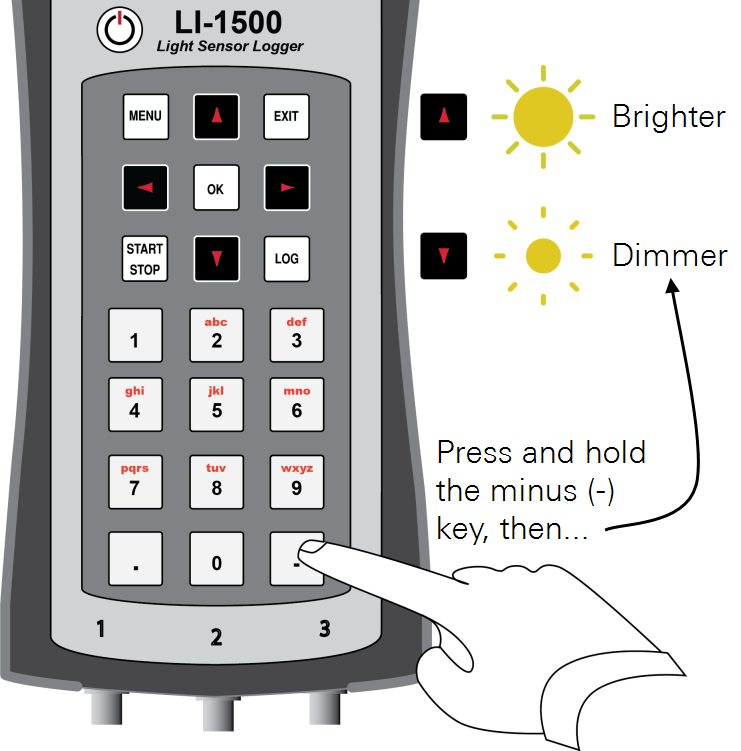
Adjusting display brightness
The LI-1500 display is a 128 x 64 LCD graphics display. It displays alphanumeric characters. To adjust the display contrast, hold the minus(-) key and press the up or down arrow keys.
Monitor mode navigation
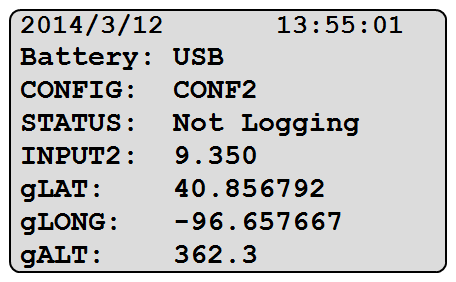
After the LI-1500 is powered on and a configuration is chosen or created, the Monitor Mode screen (at right) is displayed. Monitor Mode consists of eight user-selectable lines of real-time information (variables). Each line of the Monitor Mode screen can be set to display any of the variables shown in the table below.
| Variable Name | Description |
|---|---|
| NA | Date (YYYY/MM/DD) and Time (HH/MM/SS) |
| Battery: | Indicates USB power or battery voltage and percentage level |
| CONFIG: | Name of active configuration (or <none> if there is not one active) |
| STATUS: | Routine status |
| [Output List] | Any Light or Math outputs each have a line for real-time data display |
| [Prompt List] | If there are any prompts, each has a line |
| MULT_[input #]: | If Prompt on Log is enabled, indicates Air or Water multiplier in effect |
| gLAT: | GPS Latitude |
| gLONG: | GPS Longitude |
| gALT: | GPS Altitude |
| gNSATS: | Number of satellites visible and HDOP (Horizontal Dilution of Precision) |
| gDATE: | GPS UTC Date (YYYY:MM:DD) |
| gTIME: | GPS UTC Time (HH:MM:SS) |
| Blank line |
To change variables on the display, press the up or down arrow key to select a line. The active line will be highlighted for about one second. Press the right or left arrow keys 
 to scroll through available variables.
Menu navigation
Navigation through menus is accomplished with the upper block of nine keys.
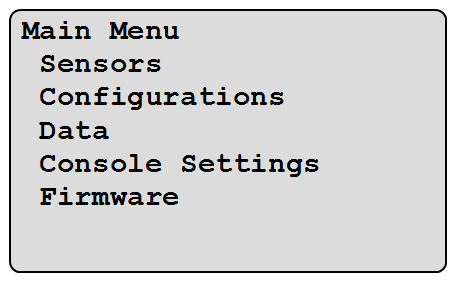
- From monitor mode, Press the MENU key to view the main menu.
- Scroll up and down to highlight a menu option. Press OK to select the highlighted menu option.
- Press OK after entering file names or other data.
- Press EXIT to go back to the previous screen.
Console settings
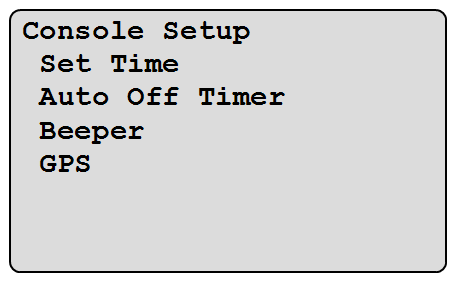
Console settings are global—they take effect no matter what configuration is active.
Time and date
The clock is a 24 hour clock (i.e., 6:00 pm = 18:00). The time is entered as HH:MM, where H=hour and M=minute. The date is entered as YYYY/MM/DD, where Y=Year, M=Month, and D=Day.
Select MENU > Console Settings > Set Time. Use the right and left arrows to switch between Hour, Minute, Year, Month, and Day. Use the up and down arrows to change the numbers in each field.
When the Global Positioning System (GPS) is enabled and a satellite fix is available, Use GPS appears as an option under Set Time. For this method, enter your offset from UTC in hours. For example: Chicago, IL = -6 hours from UTC during standard time or -5 hours from UTC during daylight saving time.
Auto-off timer
- Select MENU > Console Setup > Auto Off Timer.
- Set the timer as desired using the up and down arrow keys .
- Disable the Auto Off Timer by pressing the down arrow until OFF appears on the screen.
Note: The "Auto Off Timer" will not turn off the LI-1500 if a logging routine is running.
Beeper
If enabled, an audible "beep" accompanies events such as powering on/off or logging data during manual logging routines. Select MENU > Console Setup > Beeper and select On or Off. The default setting is On.
Global Positioning System (GPS)
Enable the Global Positioning System (GPS): Select MENU > Console Setup > GPS and select Enabled. If a satellite fix is available, real-time GPS data are now visible in Monitor Mode.
Overview of GPS
An internal Global Positioning System (GPS) module is an available option for the LI-1500. To enable viewing or logging of GPS data:
- Select MENU > Console Setup > GPS and select Enabled. It usually takes 5–10 minutes to get a satellite fix with a good view of the sky. When a satellite fix is available, real-time GPS data are visible in Monitor Mode. Continue with Step 2 to enable logging of GPS data.
- Add the GPS output to a configuration (Adding an output). GPS data is automatically added to each sensor reading logged with this configuration and GPS tagging is available during logging sessions.
Note: The sampling rate must be set at 1 Hz or less in order to log GPS data (see The basics). Also, batteries will drain faster while GPS is enabled, even when no logging is taking place. The default setting is "Disabled".
GPS tagging
With the GPS output added to the active configuration, press a numbered key (1–9) to record current GPS data in a separate record during a logging session.
Example: Mark the corners of "Plot 1" by pressing the "1" key at each corner of Plot 1 and then mark the corners of "Plot 2" by pressing the "2" key at each corner of Plot 2—all during the same logging session.
GPS fix quality
The LI-1500 reports two variables (visible on the "gNSATS:" line in Monitor Mode) indicating the quality of a satellite fix. The first variable is the number of satellites visible to the instrument. The second variable is HDOP (Horizontal Dilution of Precision). HDOP is a measure of the geometric quality of the configuration of satellites in the sky. The lower the number, the better the configuration and the better the fix quality. If all satellites are grouped close together, the triangulation gets worse, and HDOP goes up. An HDOP under 2 is very good. If HDOP is above 5, the GPS may not be seeing enough satellites in the right configuration for a good fix.
GPS variables
The following variables can be viewed in Monitor Mode or in logged data files:
| Name in Monitor Mode | Description |
|---|---|
| gLAT: | GPS Latitude |
| gLONG: | GPS Longitude |
| gALT: | GPS Altitude |
| gNSATS: | Number of satellites visible and HDOP (Horizontal Dilution of Precision) |
| gDATE: | GPS UTC Date (YYYY:MM:DD) |
| gTIME: | GPS UTC Time (HH:MM:SS) |