Using the LI-600 interface
The LI-600 user interface includes four arrow buttons, a round enter button, and the display. The up and down arrows navigate through options in the display, and the left and right arrows navigate through the screens. The Enter button powers the LI-600 on, selects highlighted options, and initiates or logs a measurement.
The LI-600 instrument display has four parts: GPS map pin (when GPS is on), time, and battery percentage icons at the top, headings and prompts, options or information in the main portion of the screen, and navigation icons and text at the bottom.
Select Configuration and Matching
Select Configuration appears when the LI-600 is powered on. It lists the configurations loaded onto the instrument (see Configurations).
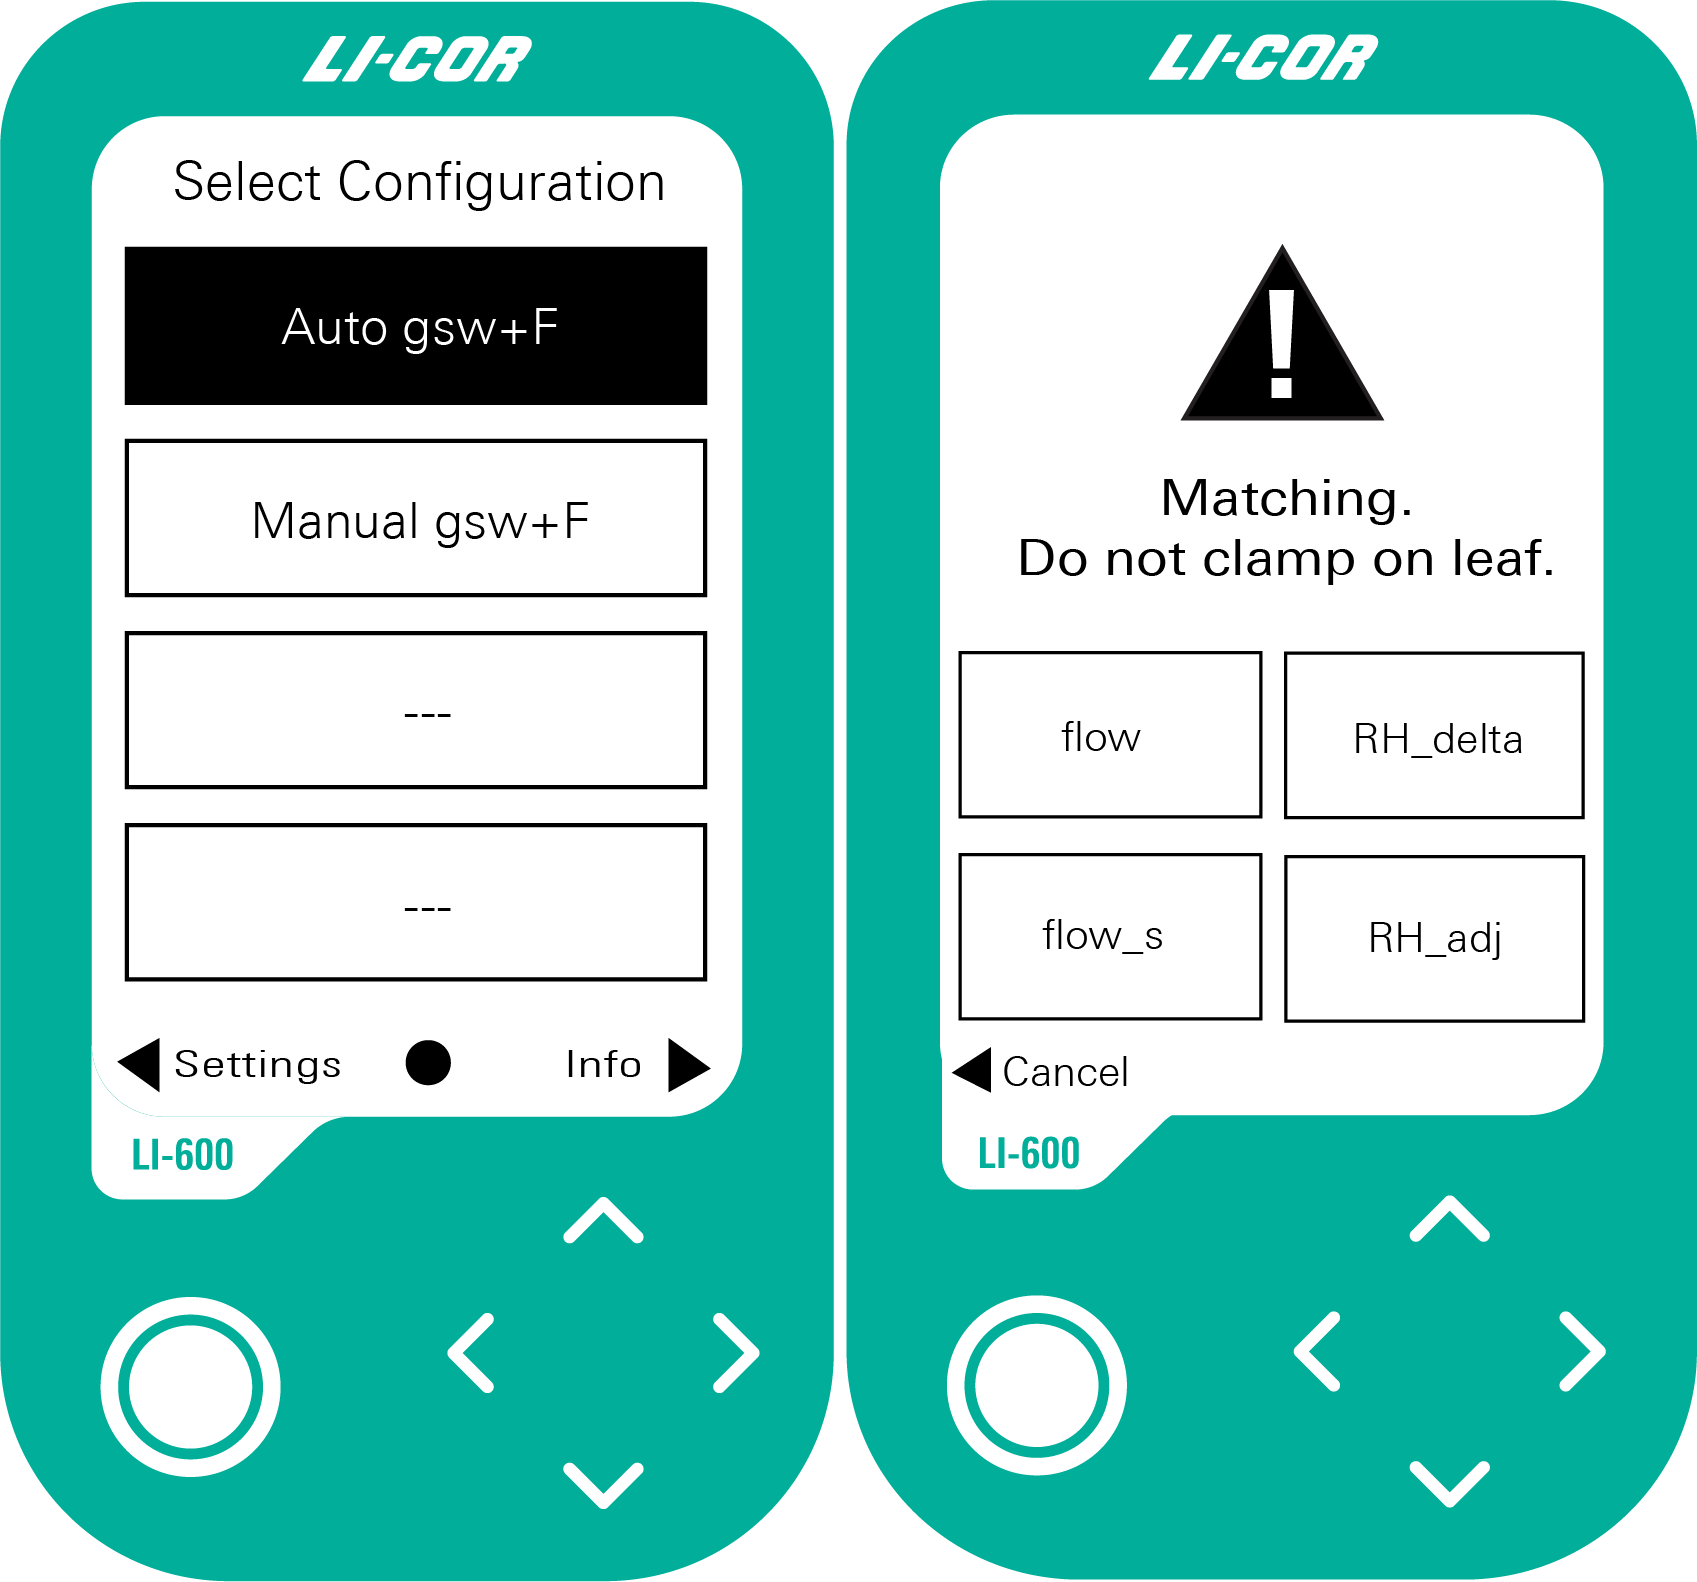
Select Configuration is Home in the navigation, and from it you access Settings and Info with the arrow buttons.
After a configuration is selected, the LI-600 will go into Matching. Matching may include user prompts asking whether a leaf is in the chamber. For a full description of RH sensor matching and user prompts, see Match mode. Matching should only be done when the chamber is empty.
Measurement
After a configuration has been selected, the Measurement screen appears. The screen headings include a prompt, measurement status, and how many measurements have been logged. The main part of the display includes the variables and layout set in the configuration (see Display Layout). The bottom includes navigation to labels and remarks, and indicates whether to log or initiate a new measurement with the Enter button.
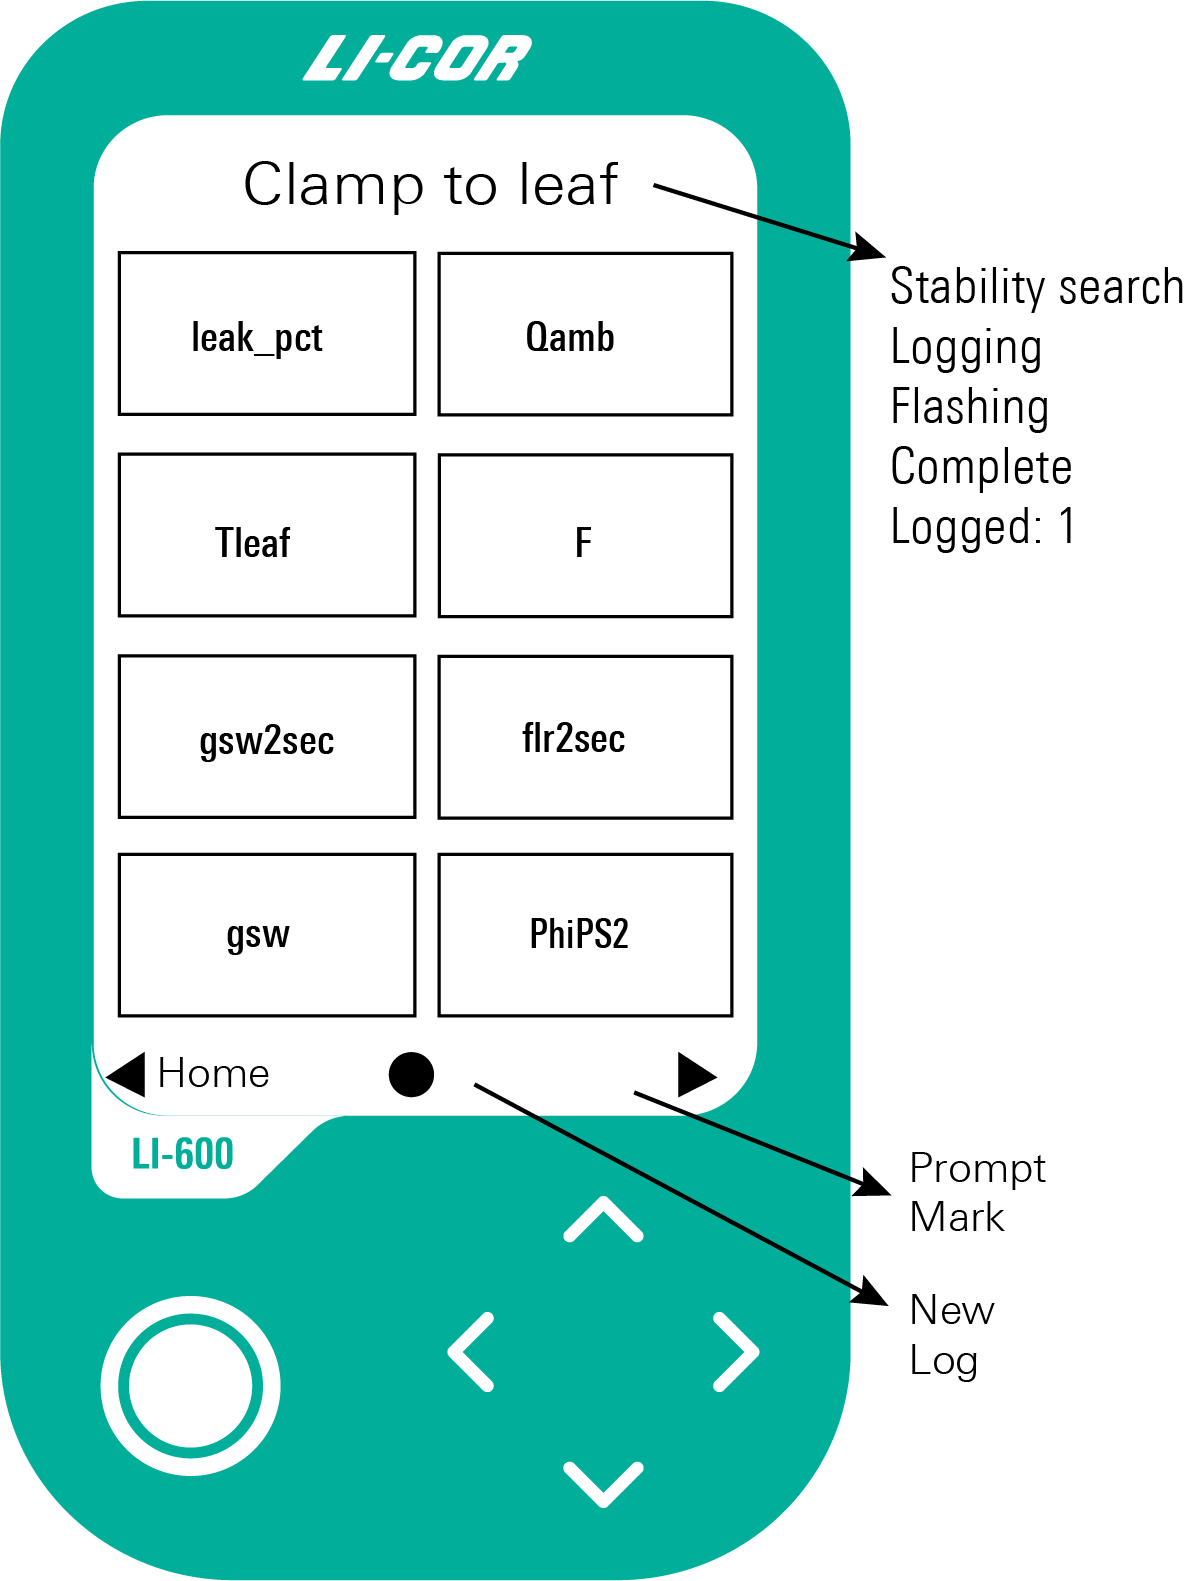
Clamp to leaf and Stability search appear when the instrument is in Auto mode; they do not appear in Manual mode. When taking a measurement with the LI-600 Porometer/Fluorometer, the heading cycles through Logging, Flashing, Complete, and Logged. When taking a measurement with the LI-600 Porometer, the heading cycles through Logging, Complete, and Logged. At the bottom of the screen, the prompt for the Enter button in Auto mode is New; in manual mode it is Log then New. The right arrow is either Mark or Prompt. The left arrow navigates back to Select Configuration.
At the Measurement screen, the leak percent and stability variables will invert to white text on a black background to alert that the leak percent is too high or the stability criteria set in the configuration are not met.
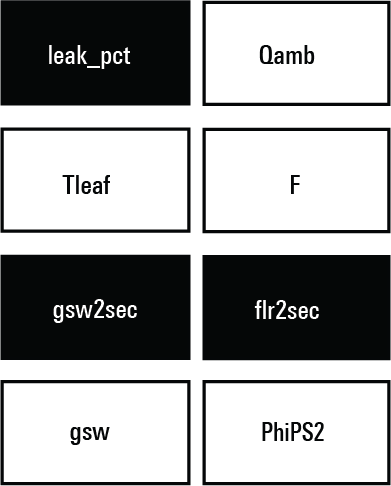
Since the LI-600 has an open cuvette, the leak_pct variable will be inverted when the chamber is empty.
Data labels and remarks
Data labels and remarks are configured in the LI-600 computer software (see Data Labels and Remarks) and correspond to Prompt and Mark on the instrument. The data labels heading is Press enter to edit highlighted values, and the remarks heading is Mark Reason.
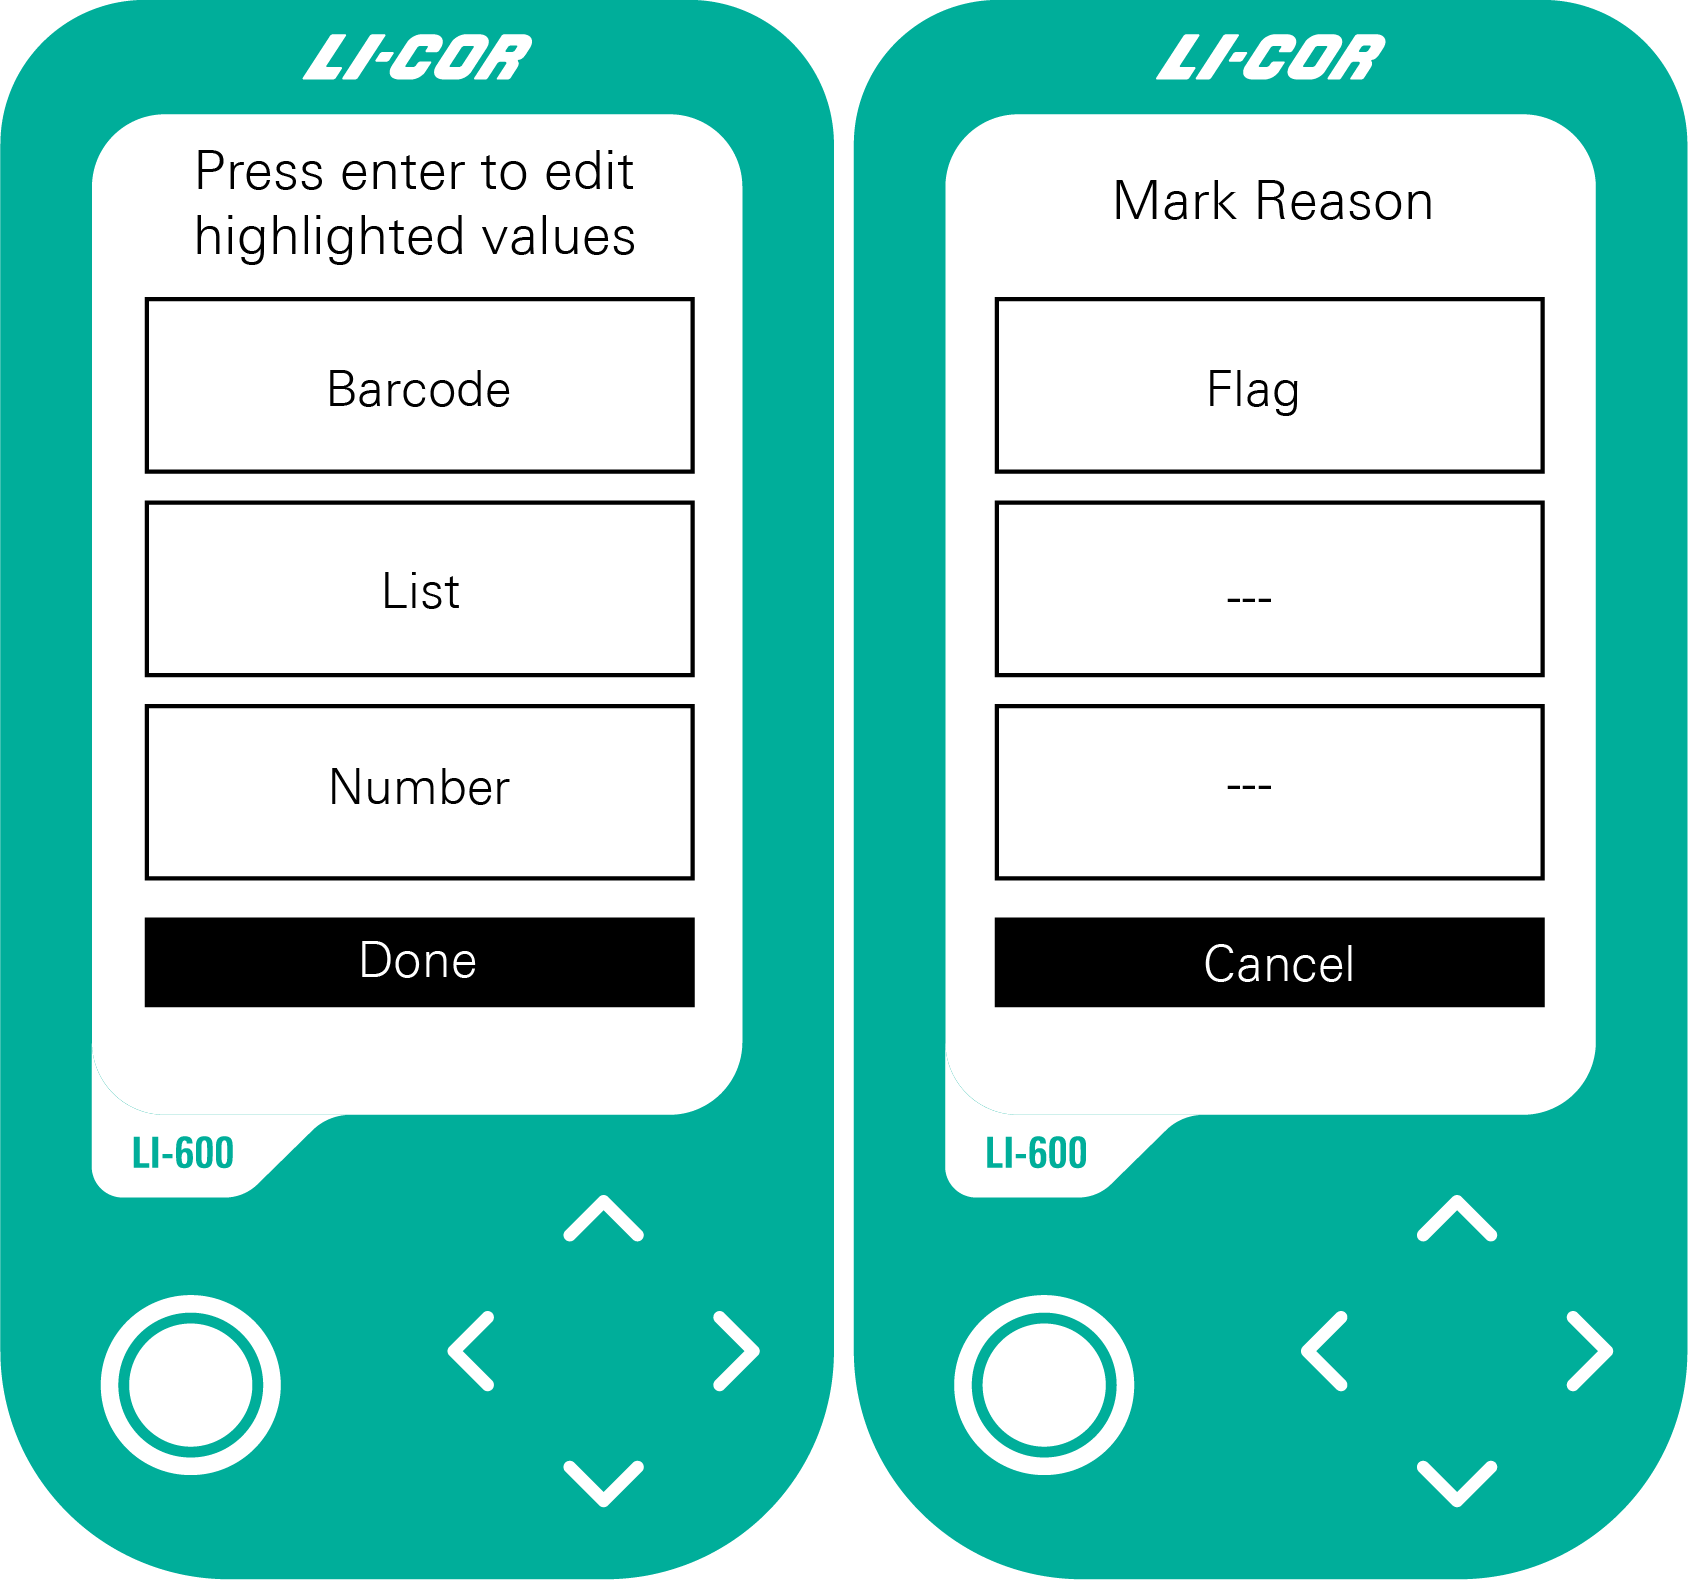
The data label options appear (Press enter to edit highlighted values) after each measurement if Prompt on log is enabled in the configuration. If Prompt on log is not enabled, the options are accessed with the right arrow before taking a measurement. When accessed and selected manually, data labels and barcodes apply to subsequent measurements until a new label or barcode is selected. Done takes you back to Measurements. See Data Labels.
Remarks are accessed with the right arrow after logging a measurement (Mark Reason). You can select one of up to three remarks in a configuration. Cancel takes you back to Measurements. See Remarks.
Matching
This screen appears when the RH sensors are matching, and goes to Measurements with a beep when matching is complete. Matching can only be done when the cuvette is empty. If the instrument is clamped onto a leaf when the instrument is matching, the instrument will beep and prompt the user to unclamp the leaf.
Scan Barcode
Scan Barcode prompts you to scan a barcode when a barcode data label is selected and the onboard barcode scanner on the bottom of the instrument is activated. See Using the barcode scanner and Data Labels.
Settings
Settings options include Shut Down, Match, Instrument Settings, and Warning(s). Navigate to Settings with the left arrow from Select Configuration.
- Shut Down powers off the LI-600.
- Match manually matches the RH sensors; it will beep when complete.
- Instrument Settings sets the time or clears all data. The percentage of memory used and the firmware version also appear at the top of the screen.
- GPS: turn on or off. Indicates number of satellites, latitude, longitude, altitude, pitch, roll, and heading. Getting a GPS lock can take several minutes after turning on the instrument.
- Set Time: sync with GPS, or set manually. For instruments with GPS, we recommend always syncing the time with GPS. See Clocks.
- Clear All Data: erase all of the data on the instrument.
- Back: go back to Select Configuration.
- Warning(s) shows instrument warnings (see Instrument warnings).
Info
From Select Configuration, navigate to Info with the right arrow button. The information lists porometer and fluorometer settings for the active configuration.