Measurement examples
The following examples are to familiarize the measurement procedures.
Preparing the sample
To prepare the sample for measurements, determine sample dilution or concentration requirements. Follow your standard procedure to control for chlorophyll density. Spin the sample in a centrifuge to separate the old growth media from the algae, and then decant off the old media. Re-suspend the algae in fresh pre-equilibrated media (see Pre-equilibrate media). Add a small aliquot (~0.5 mg for a 15 ml sample) of carbonic anhydrase to the sample mixture.
A basic photosynthesis irradiance response measurement
This simple protocol demonstrates the general steps of a measurement by taking a basic photosynthesis irradiance (PI) response measurement. In this exercise, you are using the fluorometer as a basic light source (Start Up > Chamber set up > Fluorometer functions as: Light source only).
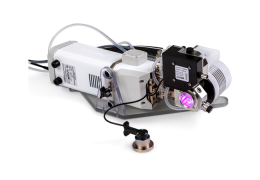
- Prepare the chamber.
- Do the things relevant to you in Preparing for measurements.
- Remove the pre-equilibrated media from the chamber and load 15 mL of newly re-suspended algae sample into the chamber. Install the chamber top plug.
- Install the light sensor aperture on chamber to ensure that the sample is in dark conditions. Let the sample acclimate to the darkness.
- Match the IRGAs.
- Tap Match IRGAs > Auto to initiate the automatic match. Review the adjustments and close the Matching screen.
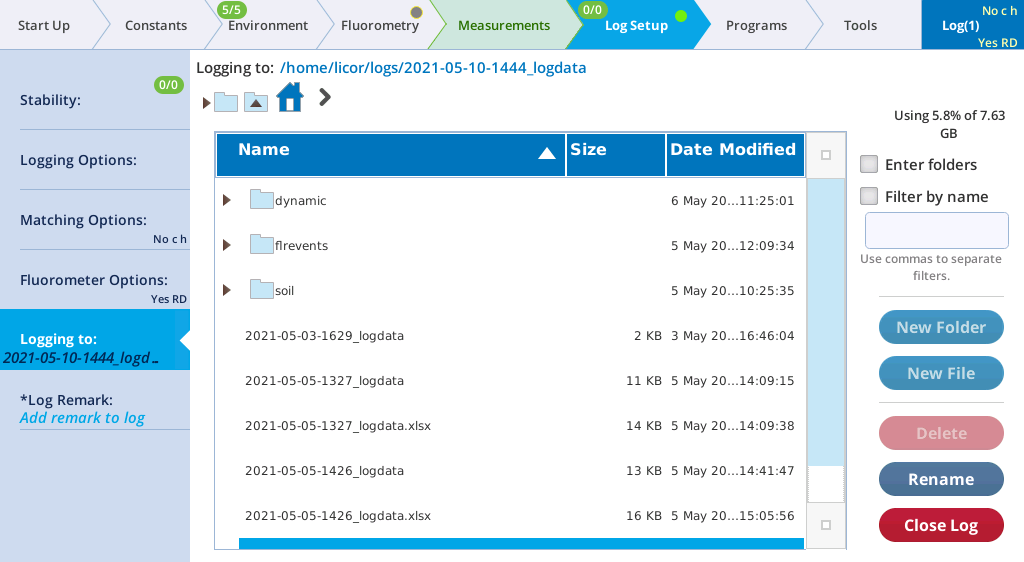
- Open a log file or create a new one.
- Review The Log Setup tab for details.
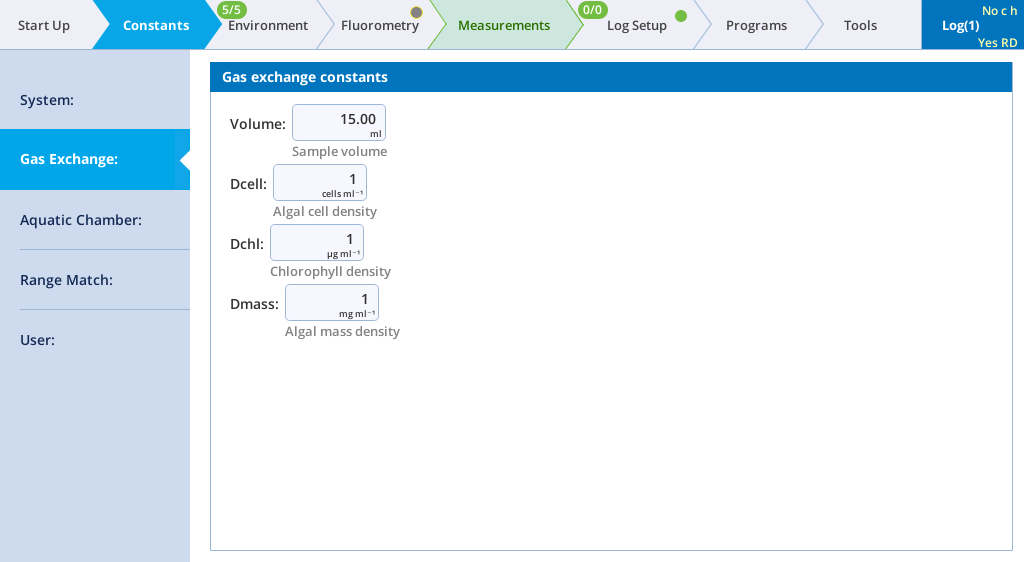
- Enter the sample constants.
- Under Constants > Gas Exchange, enter the sample volume. If you know it already, enter cell density, chlorophyl density, or mass density, depending on the terms you use to photosynthesis. These are the denominator of the flux equation. They can be adjusted later, so don't worry if they are inexact at this time.
- After the sample has acclimated to the darkness, tap Log to record the first measurement. The measurement is sample respiration.
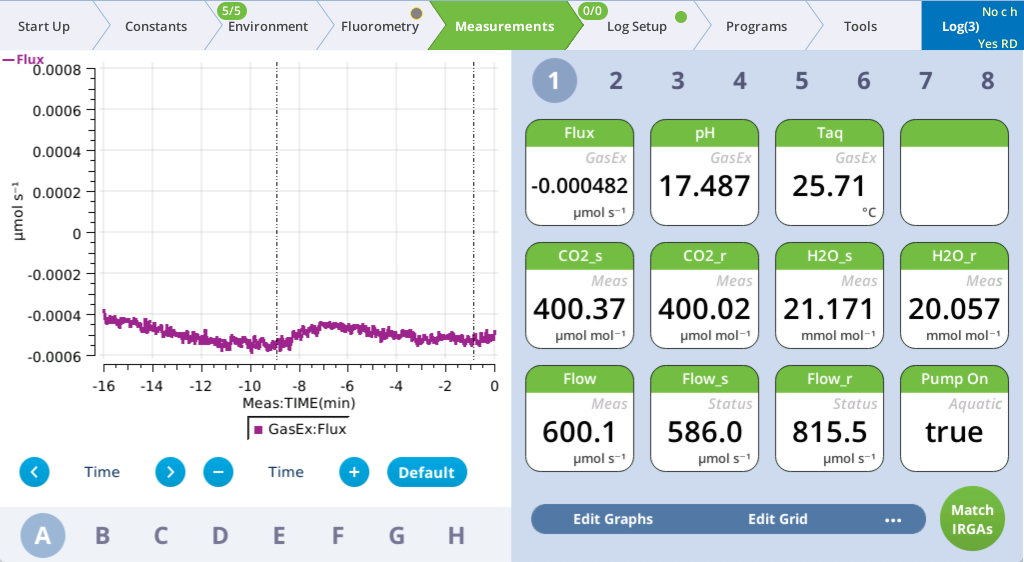
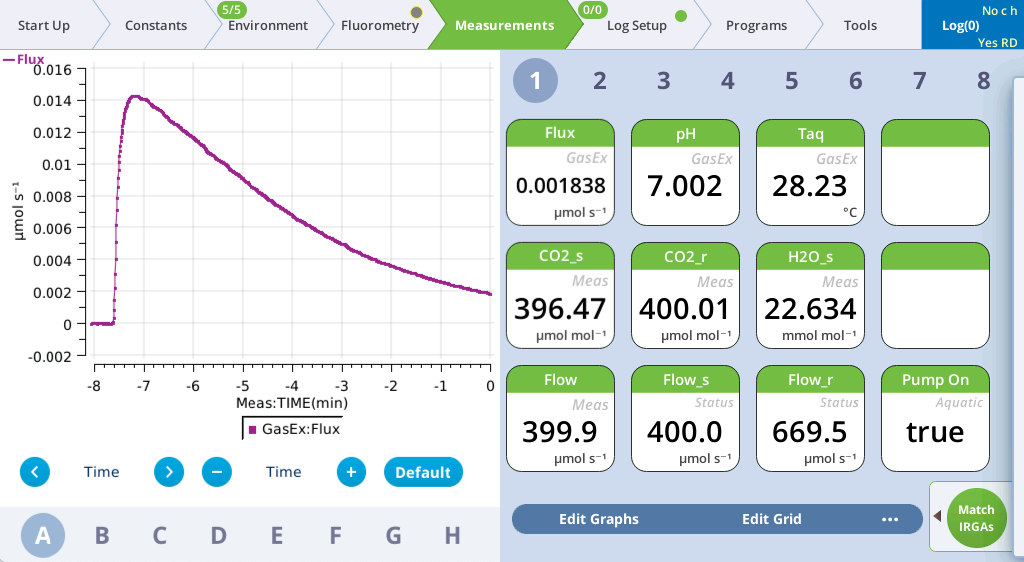
- Turn on the light, wait for stability, and log.
- Under Environment > Light > Fluorometer, change the setpoint to 5 µmol m-2 s-1.
- Under Measurements, observe changes to CO2_s and Flux as the sample responds to the light. Observe that CO2_r remains steady as the instrument controls CO2 in the air stream.
- When it is stable, tap Log to record the measurement.
- Change the light setpoint., wait for stability, and log again.
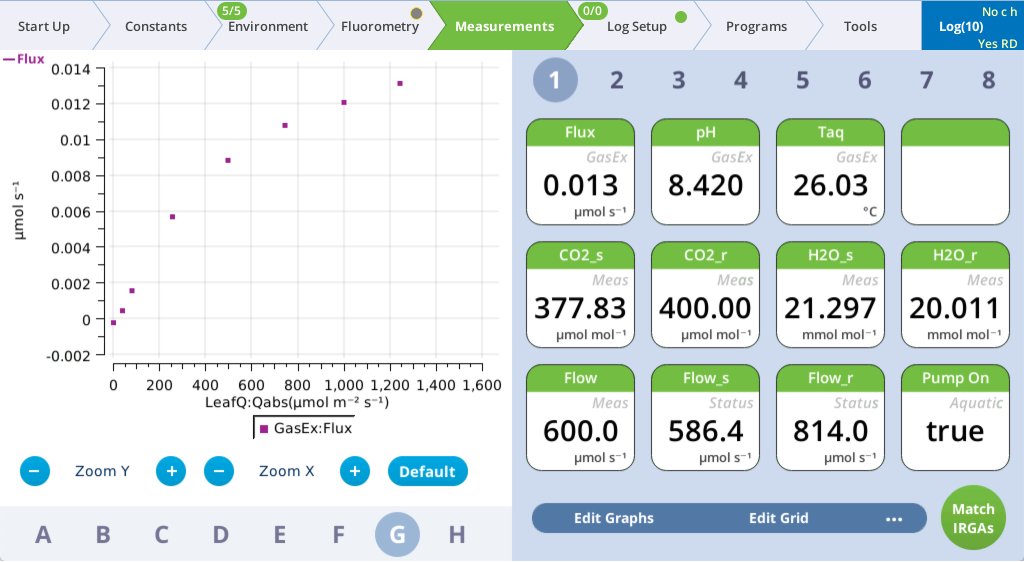
- You'll change light a little at a time, wait for stability, and log another data point. For example, use light setpoints of 0, 30, 75, 150, 250, 500, 750, 1000, 1250 µmol m-2 s-1. If you don't have much time, use fewer points.
- Review chart G. It is configured to show the flux (µmol s-1) vs. irradiance (µmol m-2 s-1).
- After the measurement is complete, measure cell density and the chlorophyll density from the sample in the chamber.
- Transfer the Excel version of the log file from the instrument (see Transferring files to a computer).
- In the Excel file, identify columns for the cell density (Dcell), chlorophyll density (Dchl), and mass density (Dmass). Enter these parameters into the columns. The Excel file maintains the photosynthesis equations; the final flux results will be recomputed automatically when these parameters are entered.