Preparing for measurements
This section describes how to prepare the media, instrument, and sample for measurements.
Pre-equilibrate media
Prepare media by equilibrating it to the CO2 concentration that you will have in the chamber during the first measurement. For example, if starting measurements with a CO2 concentration of 400 µmol mol-1, ensure that the air dissolved in the media has been pre-equilibrated to this concentration. You can bubble tank air (400 µmol mol-1 CO2 in air) through the media to prepare it. Blank media is used to prime the chamber (see Prepare the instrument) and as a carrier for the algae (Preparing the sample).

Prepare the instrument
The following steps summarize how you might prepare and configure the instrument for measurements.
Set the temperature controls
If you are using a water bath to control temperature, start it now so the temperatures can stabilize. See Controlling temperature with a water bath.
If maintaining a sample temperature above ambient, review Operation at temperatures above ambient and set the heat exchanger to a suitable temperature, if needed (Environment > Temperatures).
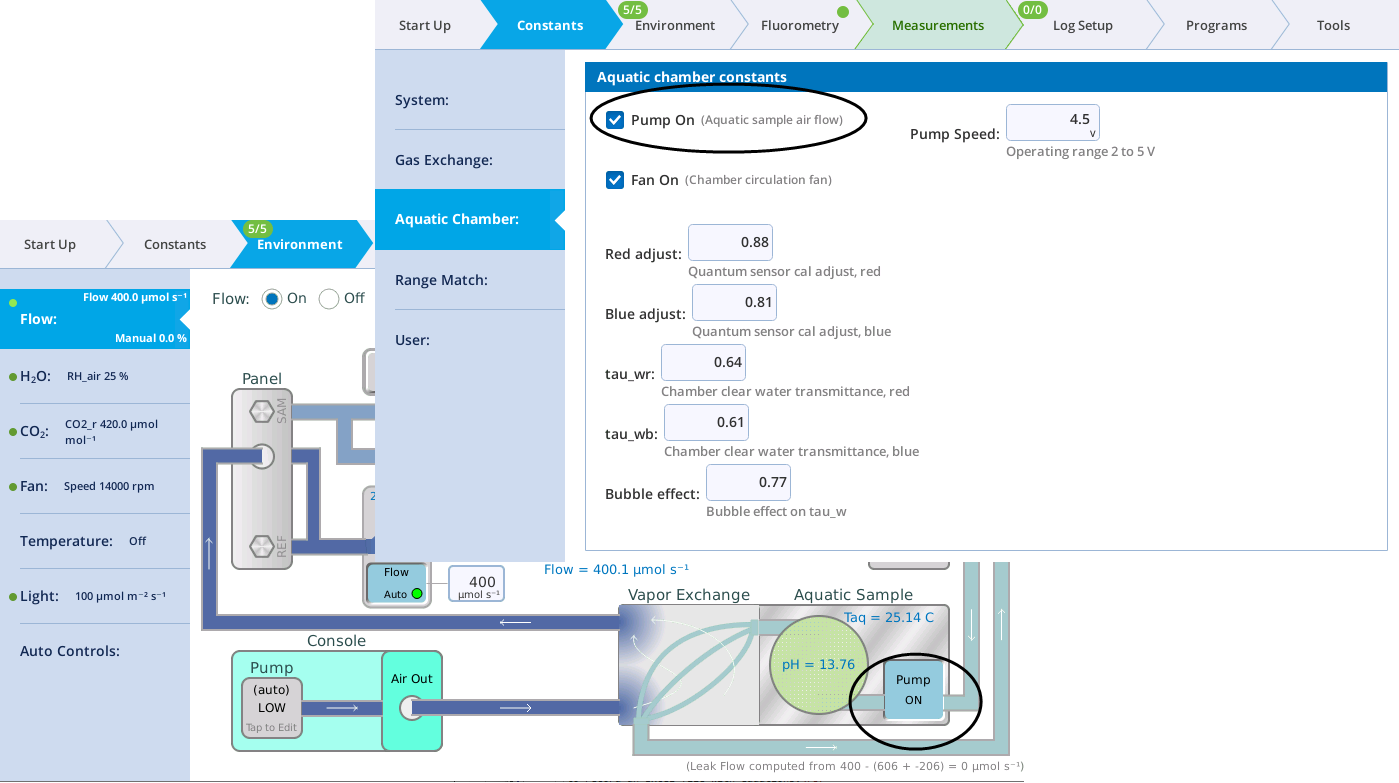
Turn on the subsample pump
The pump will turn on automatically unless you have disabled it.
Important: Be sure the subsample pump is on before loading media into the chamber. Keep it running until the chamber is empty. If the chamber is loaded while the pump is off, air passages may become blocked, requiring disassembly and cleaning of the chamber.
The pump can be controlled from Environment > Flow and Constants > Aquatic Chamber.
Load pre-equilibrated media into the chamber
Load 15 mL media in the chamber to prime the Nafion tubing with water vapor. If the chamber is new or has been sitting dry for several days or longer, it may take 30 minutes to hydrate the Nafion. Let the chamber sit with blank pre-equilibrated media (to 400 µmol mol‑1 CO2, for example) with the pump running while you go through the remaining steps.
Set the fluorometer operating mode
The fluorometer can operate as a basic light source or as a full fluorometer. Set the mode under Start Up > Chamber Setup > Fluorometer functions as:.
- Light Source Only: Select this option to provide light with adjustable intensity and red-blue ratio. When this option is selected the fluorometer-related controls are hidden.
- Full Fluorometer: Select this option to induce and measure chlorophyll a fluorescence from the sample.
Review the constants
Be aware of any constants that you may need to update. Under System > Constants, averaging time and ambient O2, can be adjusted at this time.
Important: If using an oxygen concentration different from ambient (21%), be sure to change this setting in the Constants before taking measurements (see System constants).
Under Constants > Gas Exchange, you can set the sample volume and approximate cell density, mass density, or chlorophyll density. These sample properties can be adjusted later, so it is OK if they are inexact at this time.
Configure logging
Under Log Files > Logging Options, be sure to check Also log data to Excel file to record an Excel file with equations.

Matching the IRGAs for aquatic measurements
If temperature and CO2 are held constant over the course of measurements, it is acceptable to match only at the beginning of a measurement sequence. However, if either of these are changing between measurements, you should match more often. There is no harm in matching with each measurement.
If you want matching to be carried out automatically when a data point is logged, you can configure it under Log Files > Matching Options (see Matching options for more details). Otherwise, you can match manually whenever you want under Measurements > Matching > Auto.
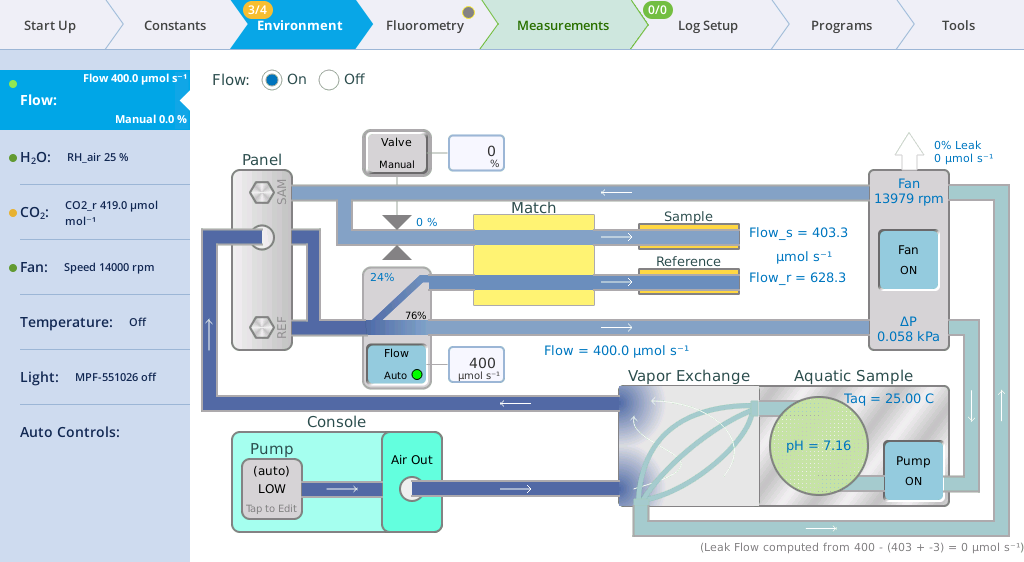
Configure the sample environment
- Under the Environment > Flow tab, set the following:
-
- Flow: On
- Pump Speed: Auto
- Flow Setpoint: 400 µmol s-1
- Press. Valve: 0
- Fan: ON
- Pump: ON
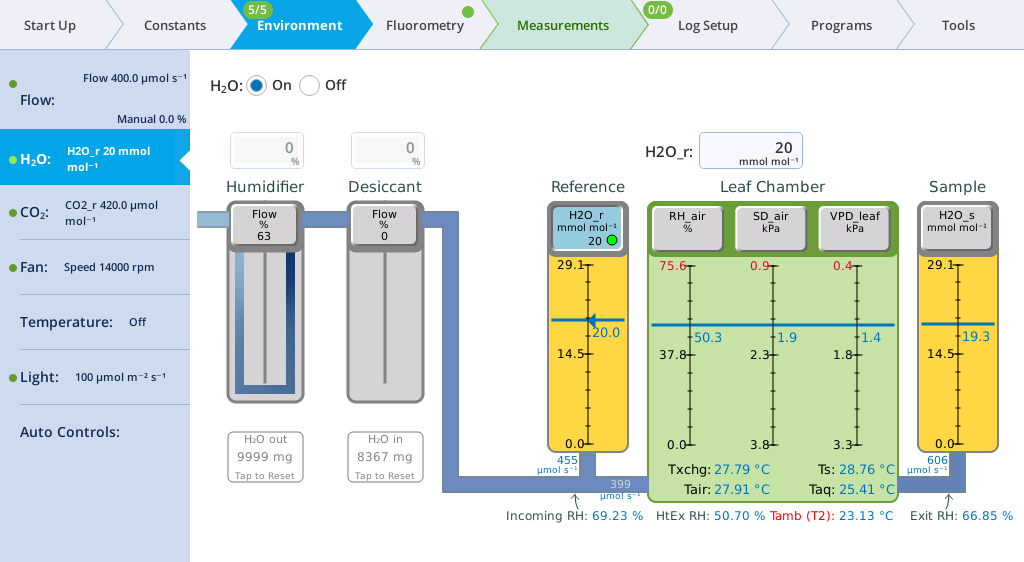
- Under the Environment > H2O tab, set the following:
-
- Set H2O: On
- Tap H2O_r, and enter: 20 mmol mol-1as a starting point
- Under the Environment > CO2 tab, set the following:
-
- CO2 injector: On
- Soda Lime: Scrub Auto
- Tap CO2_r and enter the CO2 concentration used to pre-equilibrate the media (e.g., 400 µmol mol‑1).

- Under Environment > Fan, set the mixing fan speed to 14,000 rpm.

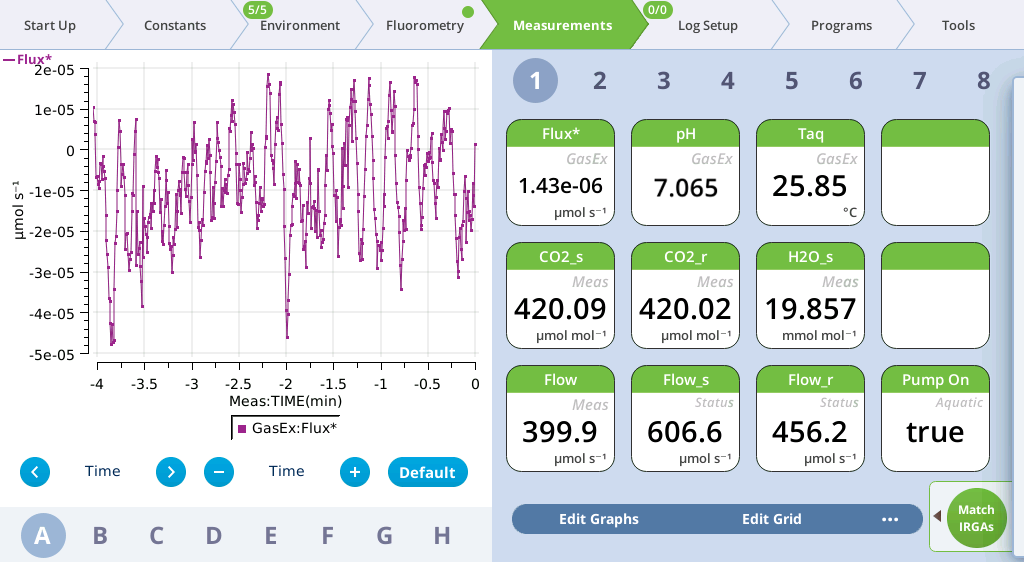
- Go to Measurements and review the CO2_s, CO2_r, and Flux values.
- Match the IRGAs (tap Match IRGAs > Auto) to resolve any offsets. When measuring blank media, you'll see CO2 values very near the setpoint and a flux value close to 0 µmol s-1. If you have adjusted any settings, it may take a few minutes to stabilize.
- If the Flux value is consistently above or below 0, match IRGAs to resolve it.
- Tap Match IRGAs, then Auto Match. Allow the instrument run the match routine to remove offsets, then dismiss the match window.