The LI-6800 can operate autonomously with either a simple Program or a more sophisticated Background Program (BP). Programs log data in some sort of automated fashion, while perhaps maintaining control over one or more conditions in the sample chamber. A log file doesn't have to be open to run a program, but no data are logged without one. Background Programs can do the same things as programs, but they have three significant advantages: 1) you can make your own BPs, 2) the scope of what can be done with a BP exceeds that of a simple program, and 3) any number of BPs can run simultaneously. Programs are loaded from the Programs list. Background Programs are loaded by tapping the BP Builder button. Both simple programs and Background Programs are introduced in the following section. BPs are described in detail in Using Background Programs.
Working with programs
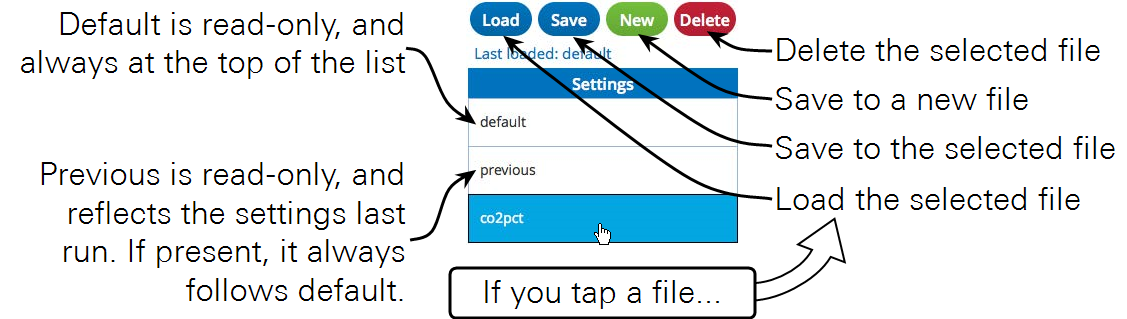
You can Load and Save settings from named files, or load settings from the previous time the program was run (called Previous). Default, which loads the factory default settings, is always at the top of the list. Previous (if present) is always below default. You also can select any of the named files.
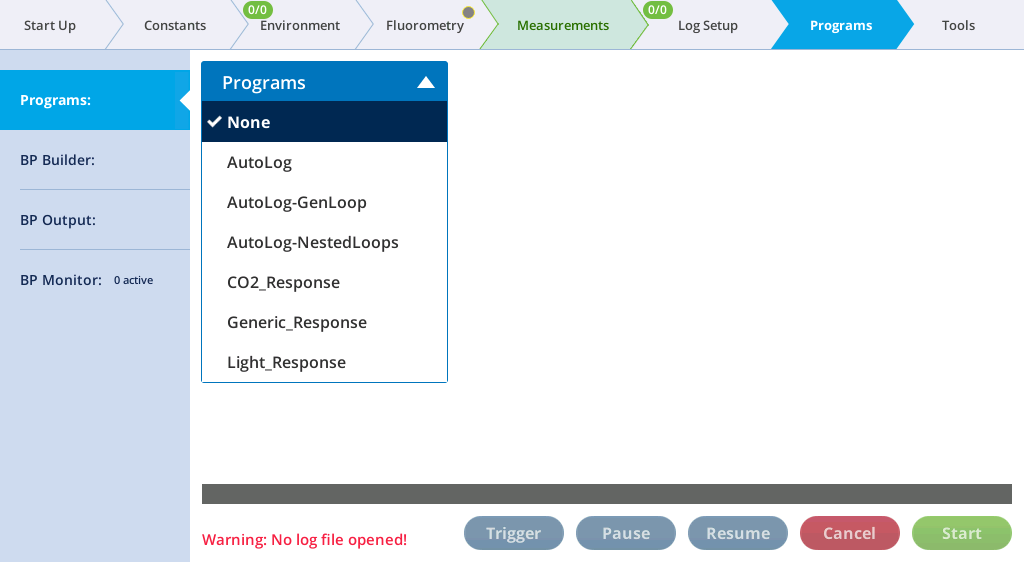
List of programs
The LI-6800 includes a number of basic programs, described below.
| Program | Description |
|---|---|
| AutoLog | Automated logging for a fixed time at regular intervals. You can set the interval (Log interval) and the duration (Total time). |
| AutoLog-GenLoop | Automated logging within a control loop. |
| AutoLog-NestedLoops | Automated logging within a nested loop. |
| CO2_Response | Loop over CO2 values. |
| Generic_Response | Loop over any collection of controls |
| Light_Response | Loop over a range of light values. |
| LogOnce | Waits for stability and then logs once. The Min. wait and Max. wait settings specify the minimum and maximum wait times, respectively. Early match tells the instrument to initiate the match when the reference gas has stabilized, rather than waiting until both sample and reference have stabilized, which can save time. |
| Nested_Responses | Two nested control loops |
| Repeated_Responses | Generic response, repeated N times. |
| Survey Setup | An easy way to set up survey measurements. |
We'll go over response curves later in the tutorials (see An automatic response curve using the CO2_Response program and An automatic response curve using the Light_Response program).
Under any response measurement, you can configure settings to Wait for Stability and early matching.
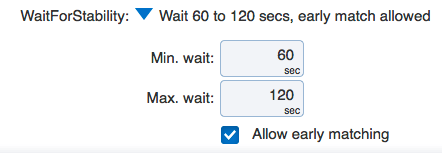
The Allow early matching option will let matching happen sooner if the reference cells are stable before logging has to happen, and if matching is called for. The window of opportunity for an early match is at least 30 seconds into the minimum wait time, and no later than 60 seconds before the end of the maximum wait time Thus, if the minimum wait is 60 seconds and the maximum is 120 seconds, then early matching would only have a 30 second window of opportunity—from 30 to 60 seconds into the wait.
About MultiControl Loops
MultiControl loops (MCLoops) allow you to control any number of controls (see Table 3‑5), constants, and settings in the following programs:
- AutoLog-GenLoop
- AutoLog-NestedLoops
- Generic_Response
- Nested_Responses
- Repeated_Responses
A simple example is a control loop that sets light intensity and light color all in the same loop. You could just as easily add fluorescence flash parameters to the mix, if you wanted those changed as well.
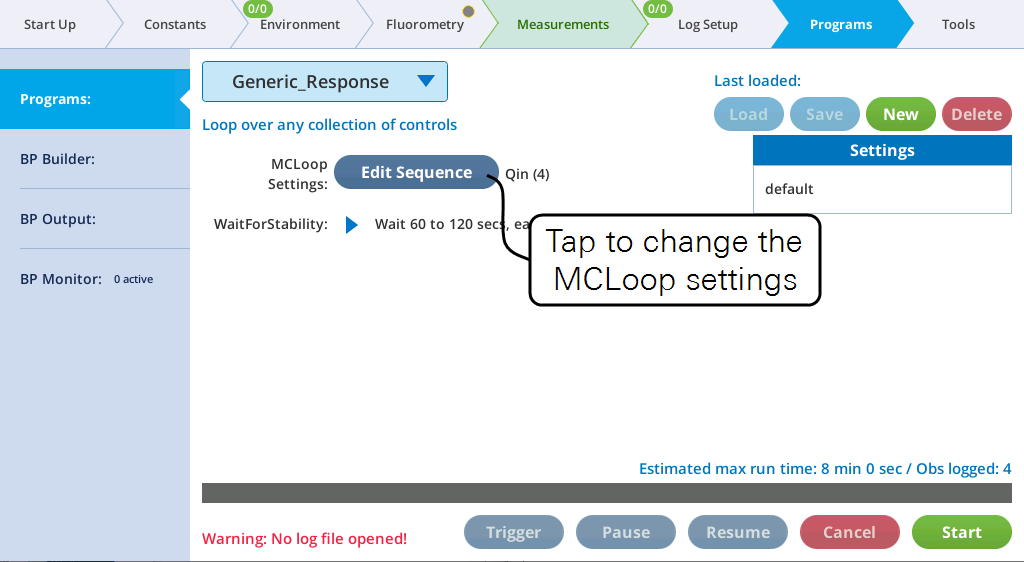
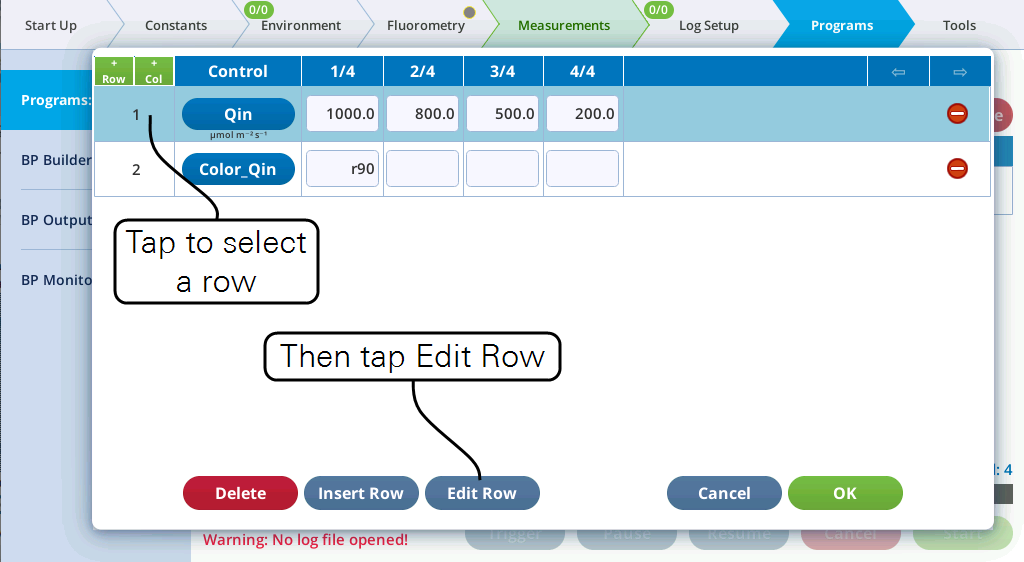
To illustrate, we start with the Generic_Response program and configure it to do a four-point light response twice, changing colors midway through. To configure the control loop:
- Tap Edit Sequence to change the MCLoop settings
-
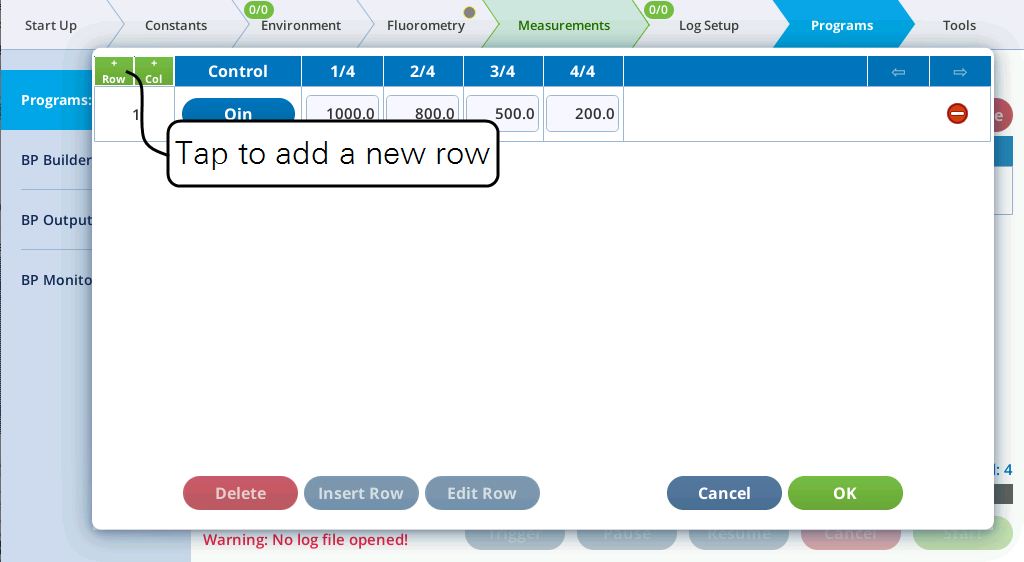
- Tap the plus (+) to add a new row.
-
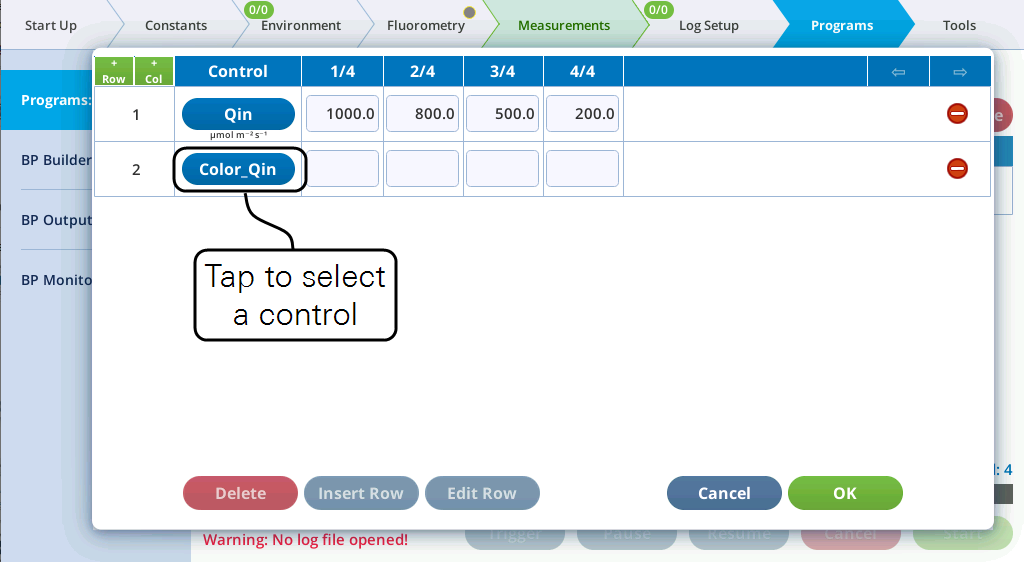
- Tap an item in the Control column to select a control.
-
- Enter the target. In this example the target for the first step is r90 for 90% red.
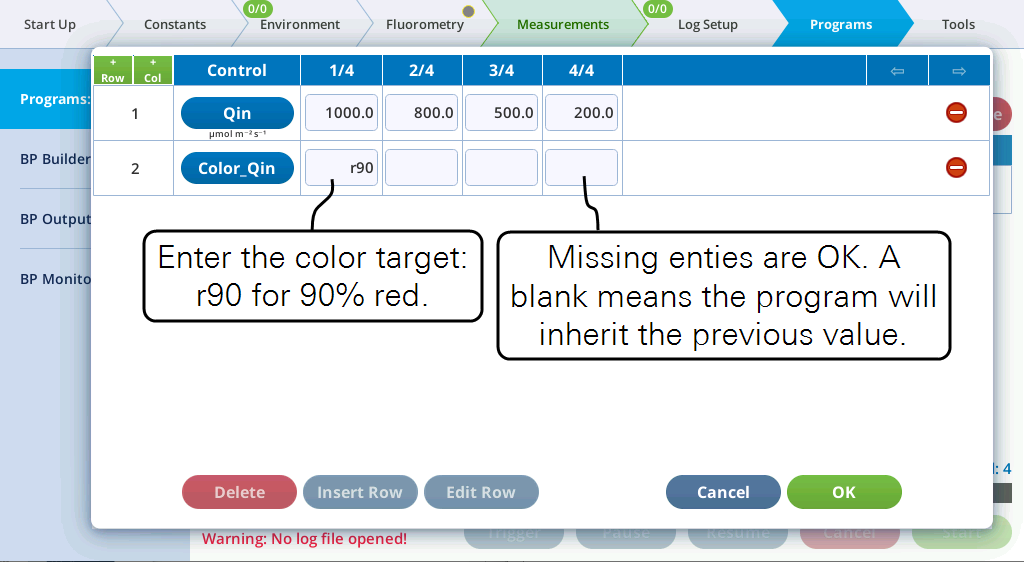
- Now you have a 4-step light curve that will use a color that is 90% red. You can expand this to repeat the curve with a different color.
- Tap a row to select, then tap Edit Row.
- Enter new values separated by commas.

- Enter a new color in step 5/8.
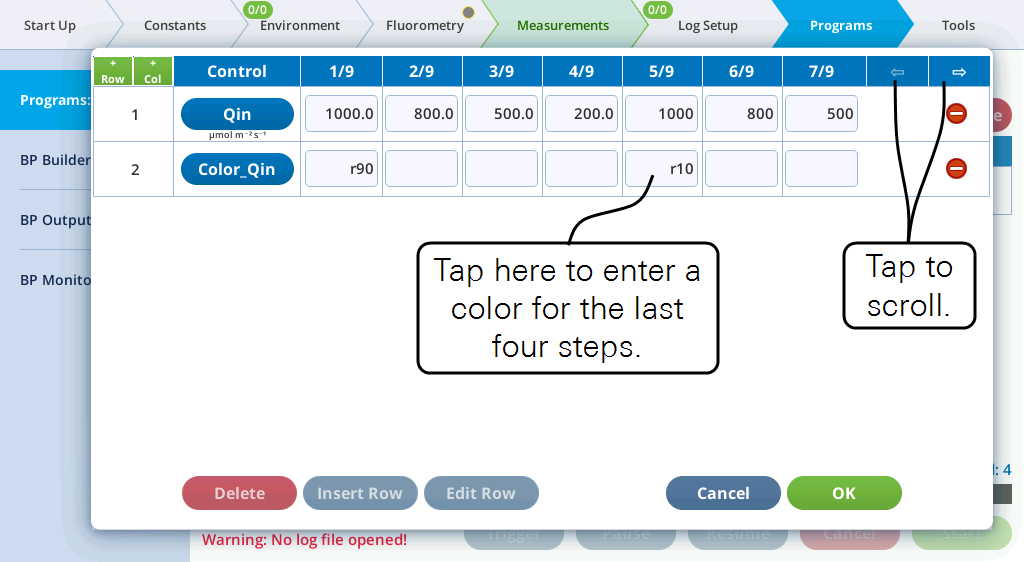
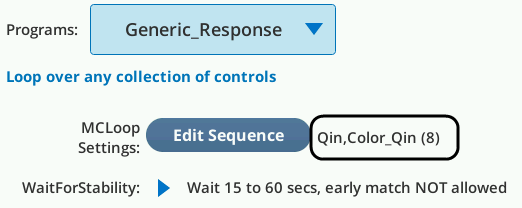
- When you tap OK, the Programs screen will summarize the settings.
Tips for using MultiControl loops
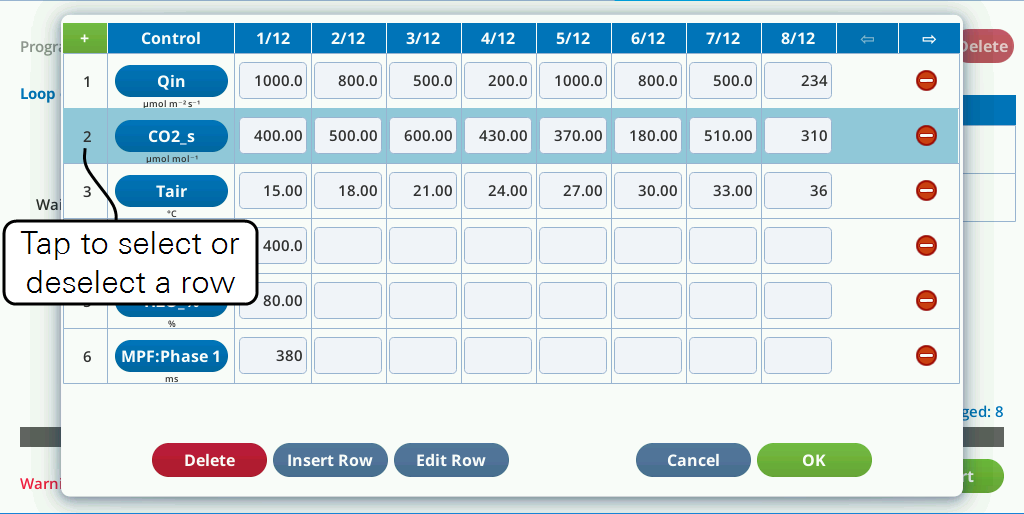
There are two methods to increase the number of columns in the table:
- Select a row and tap Edit Row, and enter the desired number of entries, or
- Select a column and tap Insert Col. Insertion goes to the left of the selection.
To decrease the number of columns, select a column and tap the Delete Col button.

Launching programs
All programs are launched in the same way:
- Open a Log File.
- Select the program.
- Tap Start.
When the instrument is done it will stop automatically. You can view the progress under the program tab and observe the instrument controls under the Environment tab. When the instrument is running an program, the environment controls will be covered with a box that says Controlled by AutoProg. It will not prevent you from making changes, and in fact you can. With something like an program, which sets the control and doesn’t change it again until the next step, you can successfully override the setting until that next step.
Background Program overview
While BPs can do the same things as conventional programs, they have three significant advantages: 1) you can make your own BPs, 2) the scope of what can be done via a BP exceeds what can be done with a program, 3) any number of BPs can be run simultaneously.
A quick overview of BPs is below. The complete guide to writing and using BPs is found in Overview of Background Programs.
Accessing
Background Programs are under the Programs > BP Builder tab (Figure 4‑2), where you can run, edit, and create new programs.
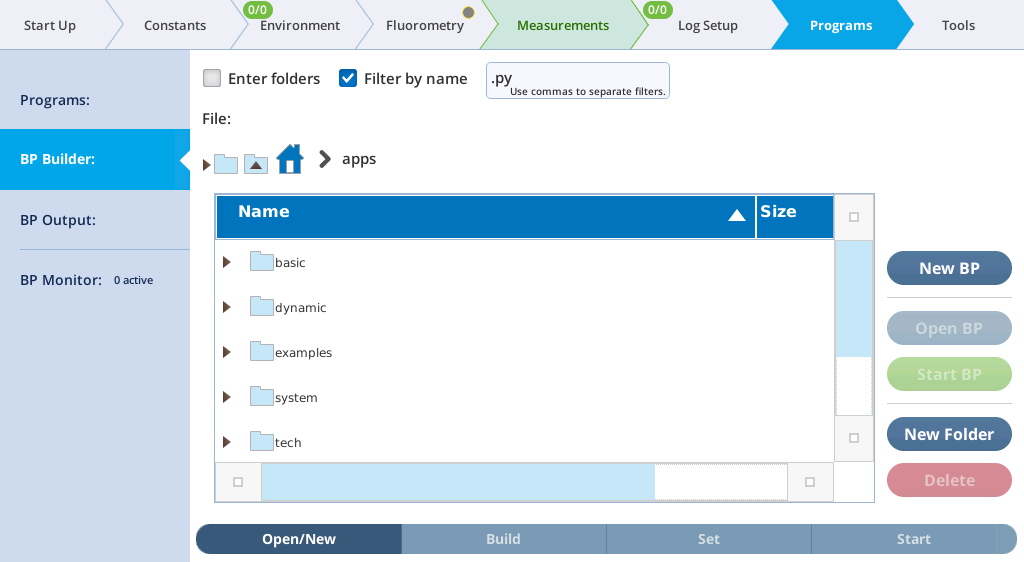
BPs can be found in the /home/licor/apps folder, and are distributed across several subfolders. In the basic folder are several simple BP’s that duplicate the functionality of some of the simple programs. The other BP folders include examples (example programs used in the BP user guide), system (helper programs used by the system), utilities (useful tasks, if you need them), and tech (specialty tasks that a technician might use or ask you to run).
Running
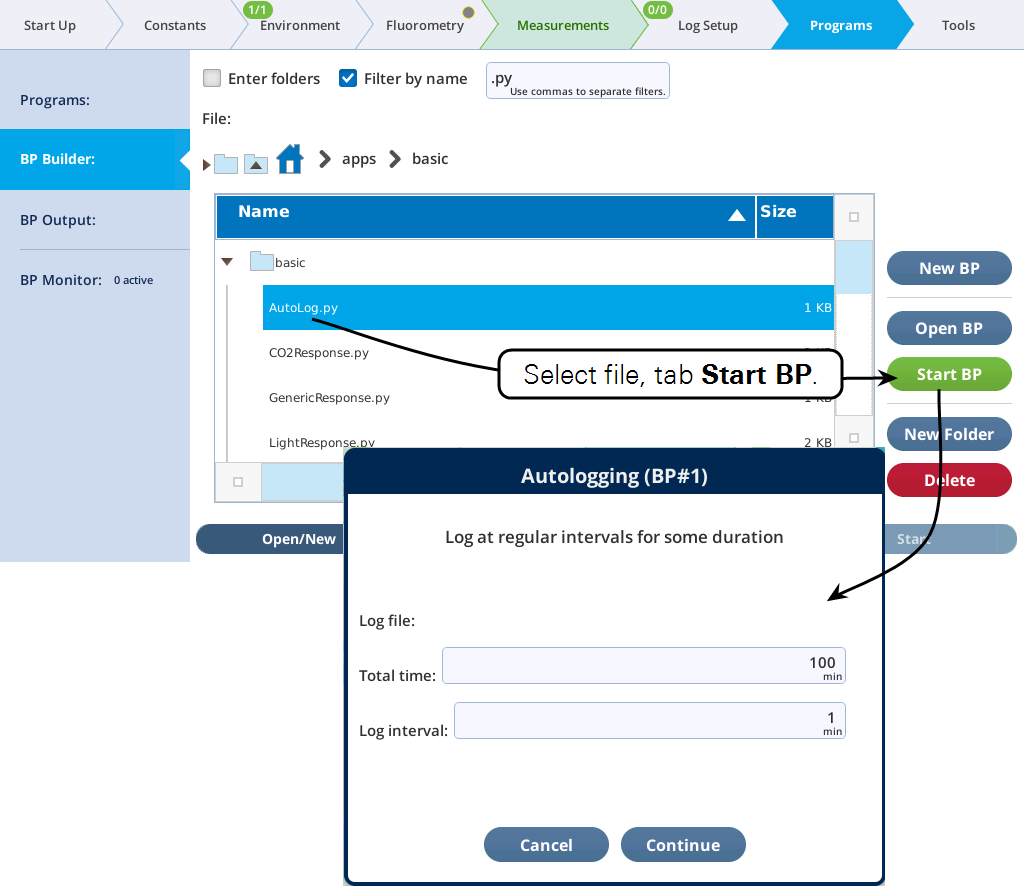
BPs can be run by selecting a BP file and tapping Start BP. After that, what happens is entirely up to the BP itself. The files in the basics folder will display a dialog (Figure 4‑3) letting the user configure and run, or cancel the program.
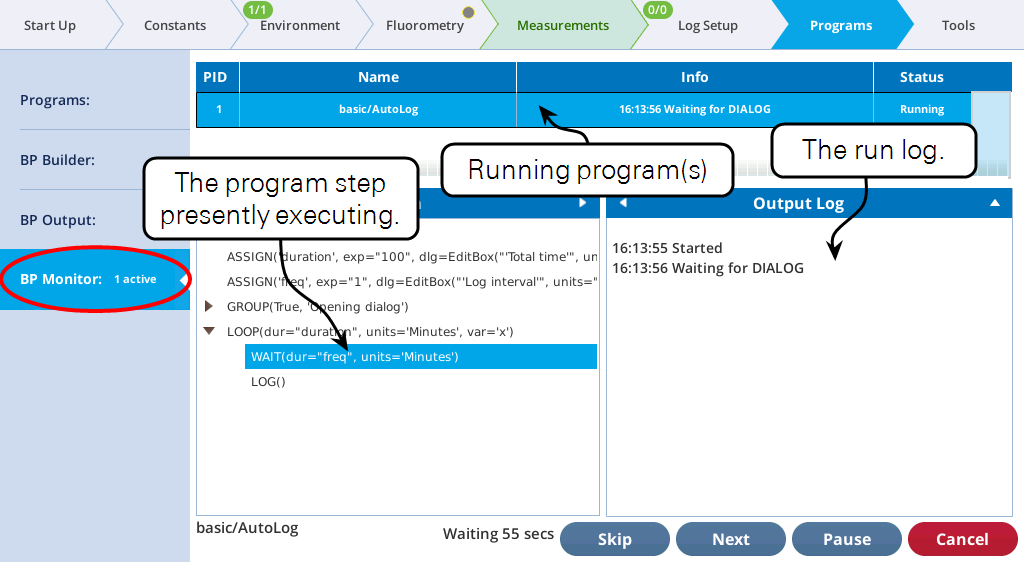
Once a BP is running, it can be monitored (and paused, canceled, etc.) from the BP Monitor screen (Figure 4‑4).
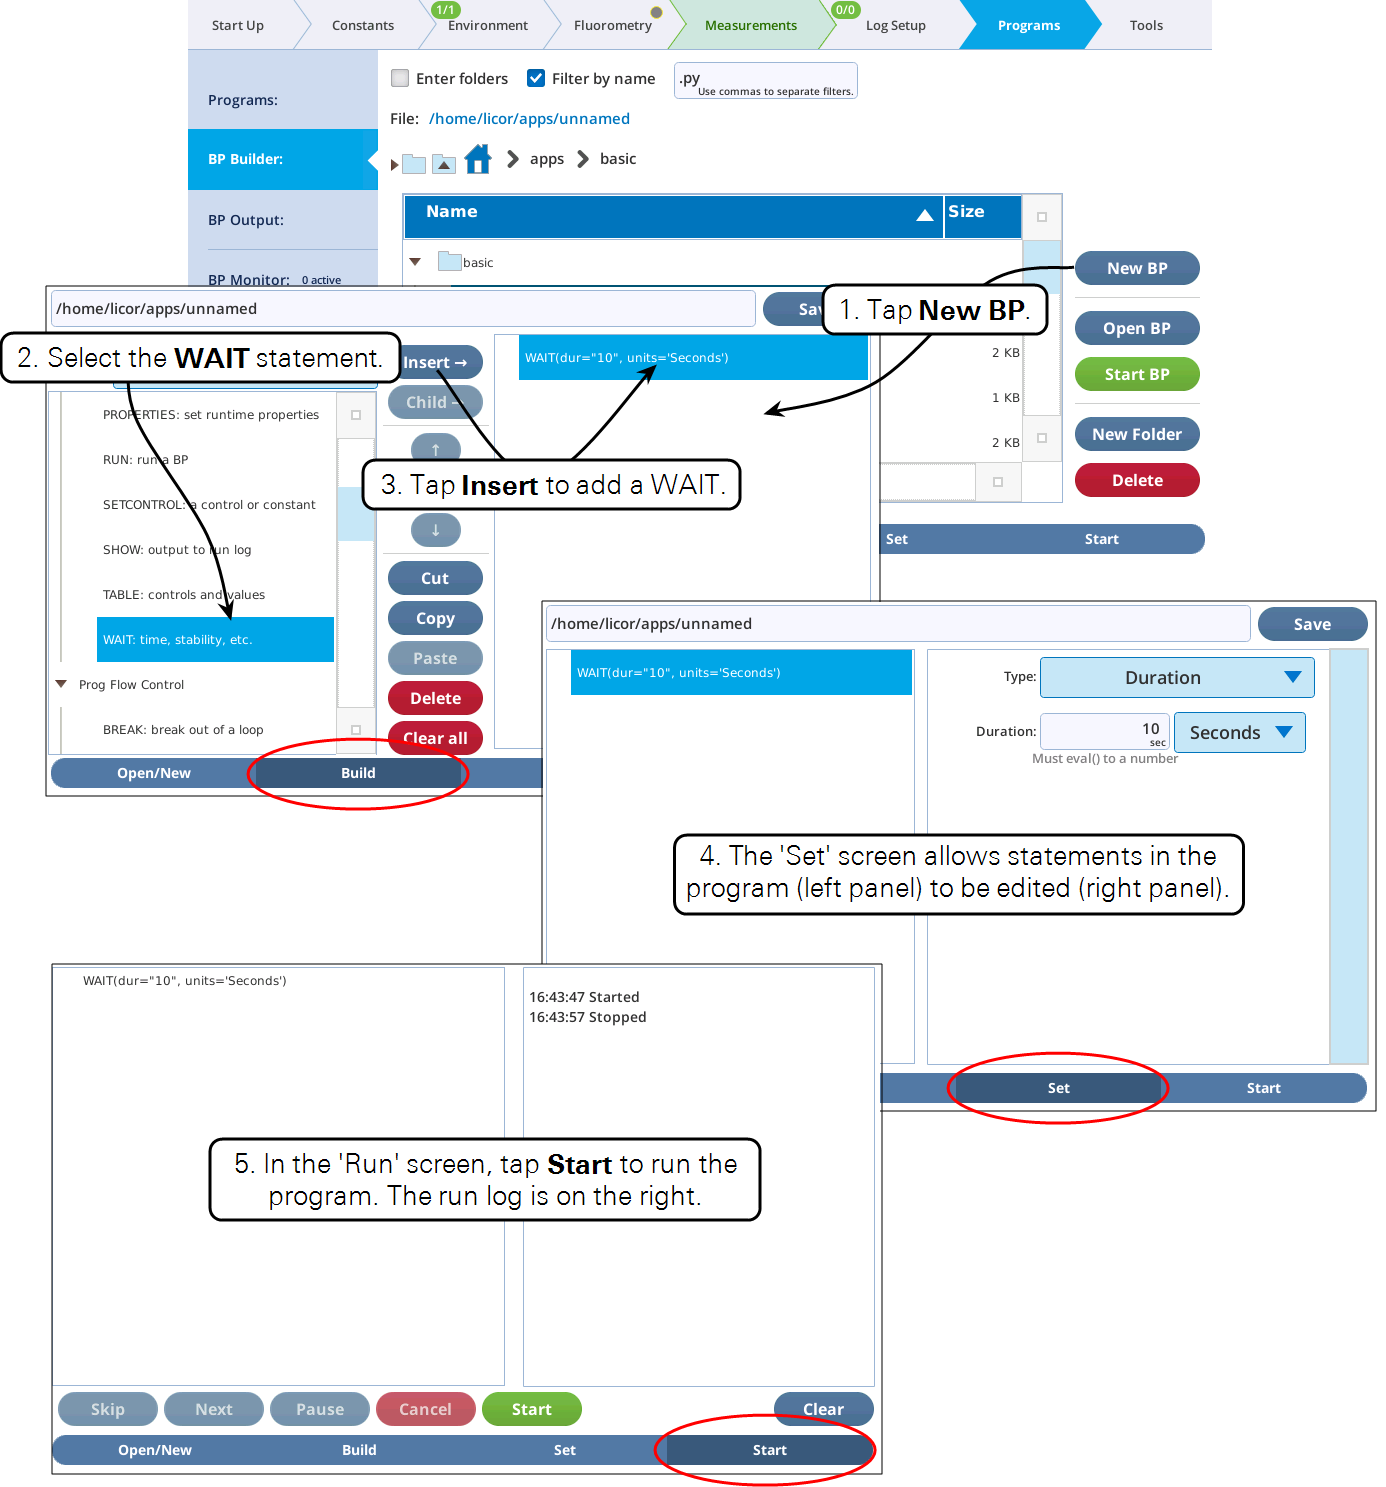
Building
The Builder environment lets you make new BPs from scratch, or modify existing BPs. The steps in Figure 4‑5 make a trivial BP that waits for 10 seconds then quits, but illustrates the Build, Set, Monitor screens of the Builder environment.