Using the MPX™ System
Learn how to use your MPX System.
Assembling the MPX System
Using clean, gloved hands, place the MPX on a clean benchtop.
Remove the clamping nuts and set aside.
Lift the top plate from the posts, flip it over, and place it face down on the bench.
- The port openings should face the bench.
- The open side of the channels should face upward.
Place a new foam cushion on the base plate. Center the cushion between the posts and etched notches (Figure 150).
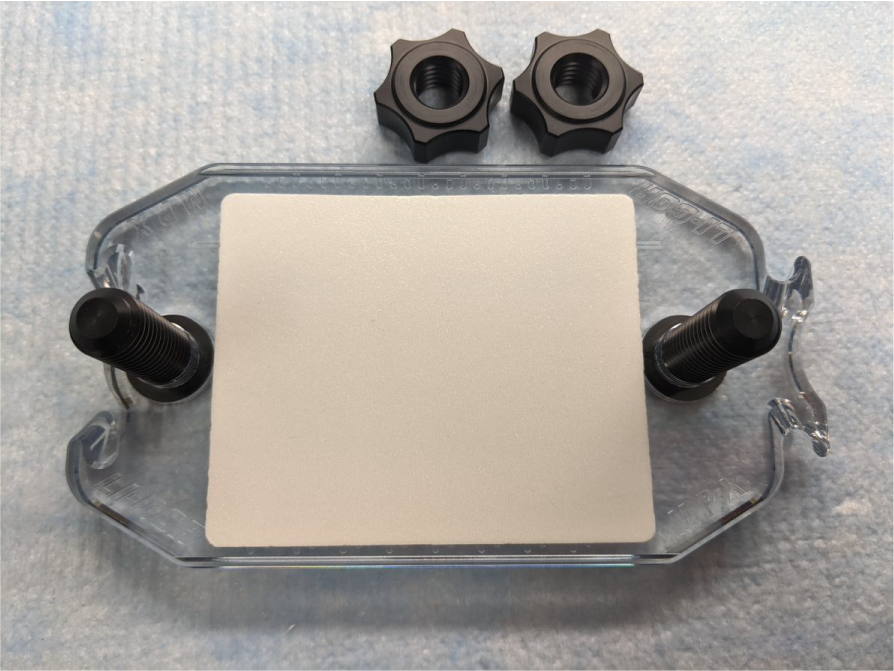
Figure 150. Set the base plate aside.
Using clean forceps, hold the membrane by the edge and align it on the open channel side of the top plate. The protein side should face down toward the bench. The wet membrane will stay in place.
Pick up the top plate and flip it over so that you are looking at the membrane through the plate.
If you are using a ladder, position the membrane, so the ladder lies just outside the first channel (Figure 151). Ensure the ladder is parallel to the channels even if the membrane is not square with the top of the plate.
Note: You may use gloved hands along the back of the membrane for repositioning only.
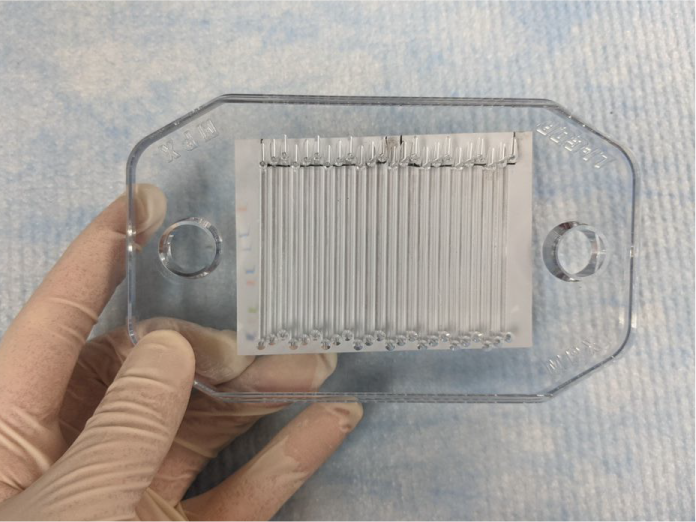
Figure 151. If you have stained the membrane with Revert™ 700 Total Protein Stain, line up the channels with the stained proteins, as straight as possible, using the outside edge of the stained proteins as a guide.

Figure 152. Make sure the MPX channels cover the sample and membrane side to side and top to bottom.
Slide the top plate onto the posts of the bottom plate. Confirm that the membrane is touching and surrounded by the foam pad.
- Recheck the orientation of the membrane.
- Be sure the foam pad lies completely underneath the membrane
- Ensure both the membrane and pad are aligned in the MPX. No foam or membrane should be outside of the edges of the MPX.
Simultaneously tighten the clamping nuts onto the posts until they are finger tight. (Figure 153). Then tighten them another ¼ turn.
Note: Do not allow the membrane to dry out.
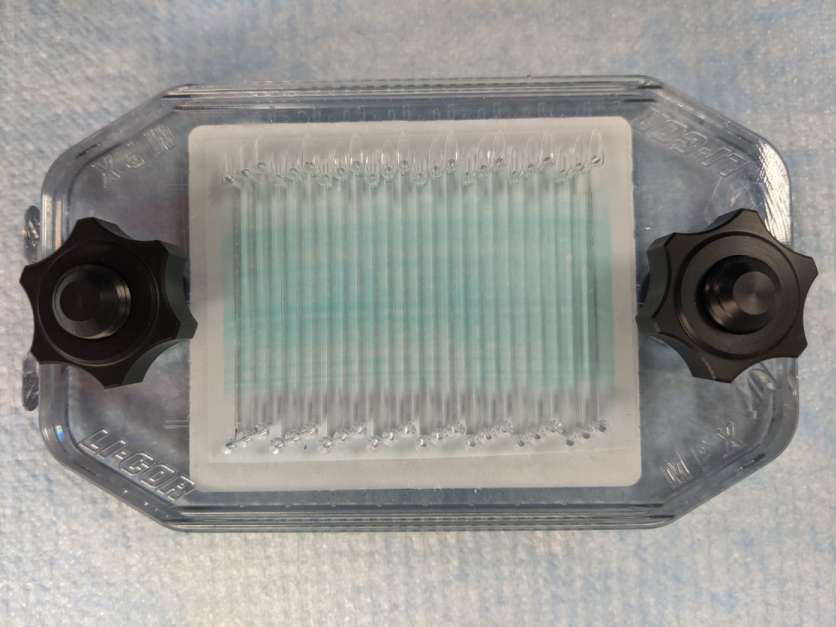
Figure 153.
Using Multiple MPX Systems
When using multiple MPX Systems, it is possible to connect them by sliding the nesting–dovetail joints together.
After placing the membranes on the top plates but before securing the tops, orient the base plates with the socket on the left and the tail on the right (Figure 154).
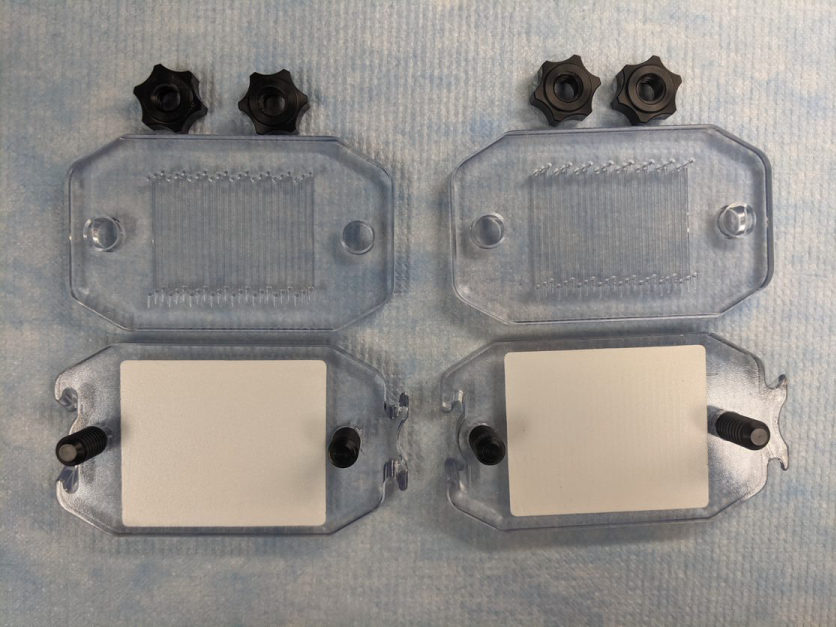
Figure 154. Assemble the left-most MPX and slide the tail end of the assembled MPX into the socket on the base of the unassembled MPX (Figure 155).
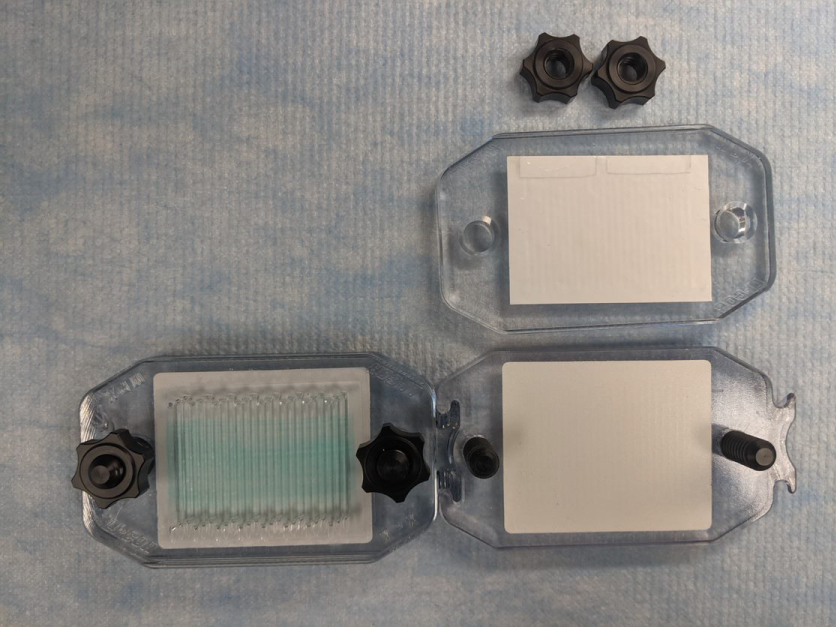
Figure 155. Assemble the right-most MPX (Figure 156).
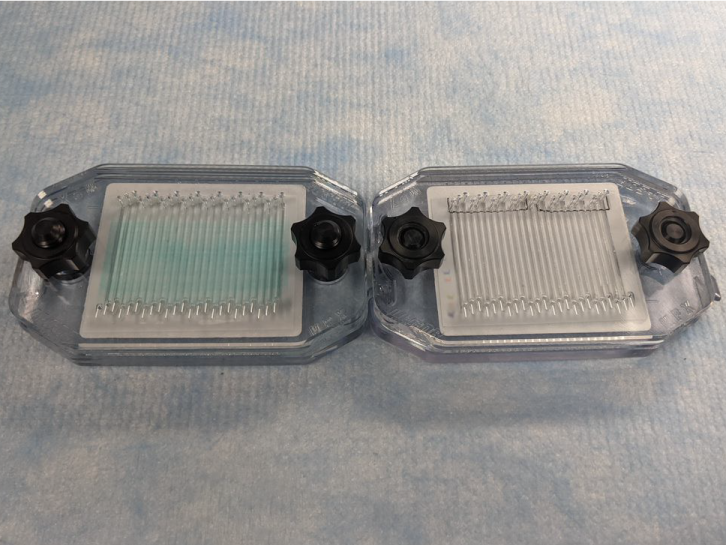
Figure 156.
Loading the MPX System
Use a marker, such as a Sharpie®, to draw an X above any channels you do not plan to use. Label the remaining channel ports to correspond with your planned experiment.
For example, if you were testing three different antibodies (A, B, and C) and two dilutions of each (1:500 and 1:1000), you can label your channels from 1 to 6 and the corresponding tubes with the antibody dilutions from 1 to 6. Then load the channels accordingly.
| Channel | Antibody | Dilution |
|---|---|---|
| 1 | Anti-A | 1:500 |
| 2 | Anti-A | 1:1000 |
| 3 | Anti-B | 1:500 |
| 4 | Anti-B | 1:1000 |
| 5 | Anti-C | 1:500 |
| 6 | Anti-C | 1:1000 |
Note: Any unused channels marked with an X must still be filled with PBS/TBS during the experiment to prevent wicking between channels.
How to Load the MPX Using a Single Pipette
Adjust a standard 200 µL pipette to approximately 200 µL.
Place the MPX flat on the bench top and have a Kimwipe ready.
Use a clean pipette tip and fill the pipette with primary antibody solution.
Place the pipette tip into the appropriate port and dispense solution slowly (Figure 157).
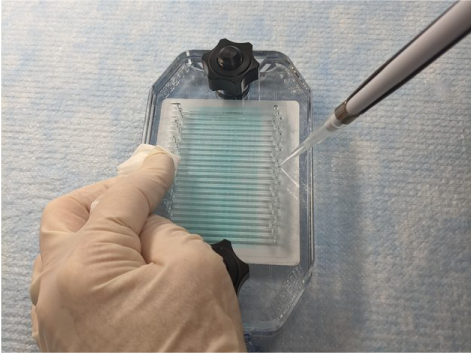
Figure 157. Watch the liquid fill the channel. If bubbles appear in the channel, stop pipetting and gently aspirate the air bubble by reversing the action without removing the tip. Allow the bubbles to float to the top of the pipette tip, then resume pipetting.
The channel is full when liquid appears outside the beveled port hole opposite the pipette. Stop pipetting immediately and remove the tip from the port before releasing pressure on the plunger.
Blot excess liquid away from port openings with a Kimwipe to avoid cross-contamination.
Change tips and repeat steps 1 through 7 until all channels are full.
How to Load the MPX Using a Multi-Channel Pipette
If you do not have experience with a multi-channel pipette, it may be best to start with the single pipette method.
Adjust a standard multi-channel pipette (8- or 12-channel) to approximately 200 µL.
Place the MPX flat on the bench top and have a Kimwipe ready.
Position clean tips on eight consecutive tip holders, then fill pipette from a multiwell plate (Figure 158). Maintain the orientation of the pipette after it has been filled. Do not flip the pipette as that will change the order.
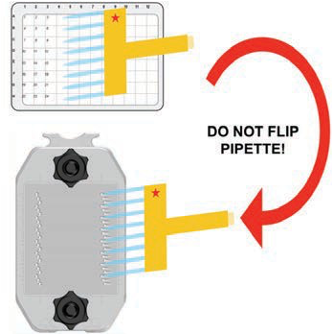
Figure 158. Place the tips into the appropriate staggered port holes and dispense primary antibody solution slowly (Figure 159).
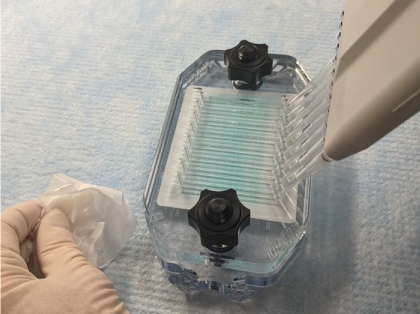
Figure 159. Watch the liquid while channels fill. If bubbles appear in the channels, stop pipetting and gently aspirate the air bubbles by reversing the pipette action without removing the tips. Allow bubbles to float to the top of the pipette tips, then resume pipetting.
The channels are full when liquid appears outside the port holes opposite the pipette tips. Stop pipetting immediately and remove the tips before releasing pressure on the plunger.
Blot excess liquid away from port openings with a Kimwipe to avoid cross-contamination.
Change tips and repeat steps 1 through 7 until all channels are full.
Imaging
Please refer to your manual for specific information on your imager model. For Odyssey Imagers where the membrane is placed on a glass scanning surface, it may be beneficial to image the blot with a small amount of PBS/TBS to keep the membrane from drying out.