Bacterial Colony Imaging
Introduction
This document describes how to use an Odyssey M Imager and LI‑COR® Acquisition Software to acquire an image of bacterial colonies.
Instructions for how to use a bacterial colony kit will vary depending on the type of assay and the manufacturer of the kit. Follow instructions provided by the manufacturer.
Brief Background About Bacterial Colony Imaging
Researchers can use bacteria to produce proteins using DNA cloning techniques. This process uses bacterial transformation to introduce a target gene of interest, contained within a plasmid, into bacteria. The plasmid may also include genetic information for antibiotic selection and a reporter (e.g., green fluorescent protein (GFP) or beta-galactosidase).
Antibiotic selection and reporters provide an easy method to identify bacteria that have taken up the plasmid and contain cloned DNA. Identifying the transformed colonies via imaging can inform which colonies to select and provide an electronic record of the results.
Planning the Experiment
Please look to the instructions for the bacterial colony kit (or other materials) that you are using while planning your experiment. This document focuses on image acquisition, not experimental planning or lab protocol. However, here are a few things to keep in mind when planning your experiment.
Petri plates
Petri plates with lids may not exceed 23 mm in total height.
Agar depth
Avoid making overly thick agar plates. To accommodate the maximum focus offset of the (5.00 mm), pour less than a standard amount of agar into Petri plates. Standard nutrient agar has been imaged on an Odyssey M Imager, but blood agar has not.
Autofluorescence
Autofluorescence may need to be assessed for different agars.
Required Materials
The following materials are required to follow the instructions in this document.
Odyssey M Imager
Petri plates
LI‑COR® Acquisition Software version 1.0 or later (licor.com/AcquisitionQuickStart)
Materials (such as from a kit) for generating bacterial colonies.
Follow the manufacturer's instructions for your kit or for individual materials you will be using to prepare the assay.
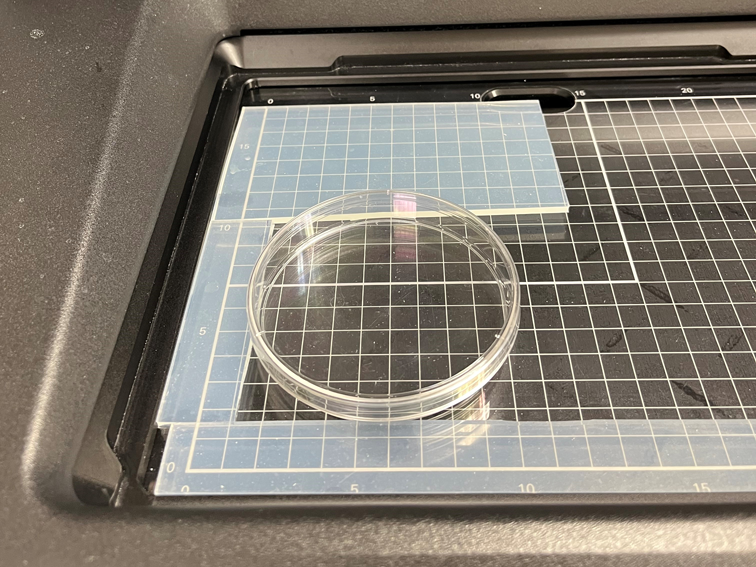
Place the Petri Plate on the Odyssey M Imager
Set the Petri plate into one corner of the Odyssey M Scan Surface. Use the silicone mat (926-70003) to keep the plate from moving.
The silicone mat may need to be cut into several pieces to hold the plate in place.
If multiple plates are being imaged, ensure all plates are adequately secured in place.
Acquire Image
Follow the steps below to image your Petri plate.
Start LI‑COR® Acquisition Software
 .
.Connect to the Odyssey M Imager.
On the Choose Assay page, click Custom.
In the Assay list, click Gel.
Select the location on the Scan Surface to image by drawing a box around the location of Petri plate on the Scan Surface.
Click Next.
Select a Detection Channel(s).
RGB Trans provides an image of the actual visual appearance of the plate and can be combined with up to three fluorescent channels. Fluorescent channels cannot be combined with individual epi- or transillumination channels.
On the Detection Options page, set the focus offset to 5.00 mm.
Click Scan.
When the image has been acquired, click .
When you are done, click Leave.