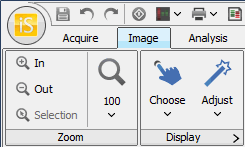
Image Tab
The Image tab has controls for zooming, viewing, copying, rotating or flipping, reducing noise, aligning channels, and cropping an image. Selecting any of the options in the Create group creates a new image. Any analysis of the image is not copied. You can also specify a print/export area or quickly copy the image or a region of the image to the system clipboard.

Zoom
There are several zoom controls for zooming the image on the current analysis:
- Zoom In — Zooms in on the image. The zoom view is centered on the current pointer position on the image. Press Zoom In again to zoom in another increment.
- Zoom Out — Zooms out on the image. Press Zoom Out again to zoom back out another increment.
- Zoom Selection — Zooms to the highest zoom that will display all selected features so that all the features are visible.
- Restore — Restores the zoom to fit the window.
- Zoom by % — Selects a zoom value for the current image view.
Adjusting the mouse wheel over the image will also zoom in or zoom out.
Display
Click Choose Display and six display options with varying intensities are displayed. Click the desired display.
Click Adjust Display to adjust how the current image is displayed. Select a channel to adjust and the current image is displayed in that channel, along with brighter and dimmer options. Adjust the signal, background, or midtones. Adjust the midtones to change the mapping from linear to logarithmic. This 'compression' of the intensity values may improve the appearance of less intense bands while avoiding overly bright bands.
View Mode
The View Mode lets you specify the view mode to use for displaying images. Select either the editable Single Image View mode or the Multiple Image View mode to display images in the main application window. Adjust display parameters for these images using the Display Panel (see Display for details.)
- Single — Shows a single image that is fully editable. Any image in the Images Table can be displayed in an image view.
- Multiple — Shows several images from the Images Table. If there are a large number of images in the Images Table, only a subset of the images may be displayed. No edits can be made directly on these views. Use the drop-down menu to choose how many images to display horizontally.
Slide Show
Click Start and the images in the Table will appear in the window sequentially. Click Stop to return to normal viewing. Click the arrow on the Slide Show group to open the Slide Show Parameters dialog. Choose to display the images in the Table and stop at the end, or return to the beginning of the table and continue displaying the images. Adjust the slider to modify the amount of time each image is displayed.

Adjust Display
The Adjust Display dialog helps you set the min and max points of the display mapping. These settings affect the display of the image only. They do not affect the data or quantification of the data. See Image Display Panels for more information.
Click Adjust in the Display group on the Image tab to open the Adjust Display dialog.
You can also click the Adjust Display button (![]() ) on the Display panel on the right side of the window.
) on the Display panel on the right side of the window.
The Choose Display and Adjust Display dialogs automatically open after a scan for each channel acquired. Click the arrow (>) in the Display group to open the Display Options dialog and remove the check marks to disable this feature.
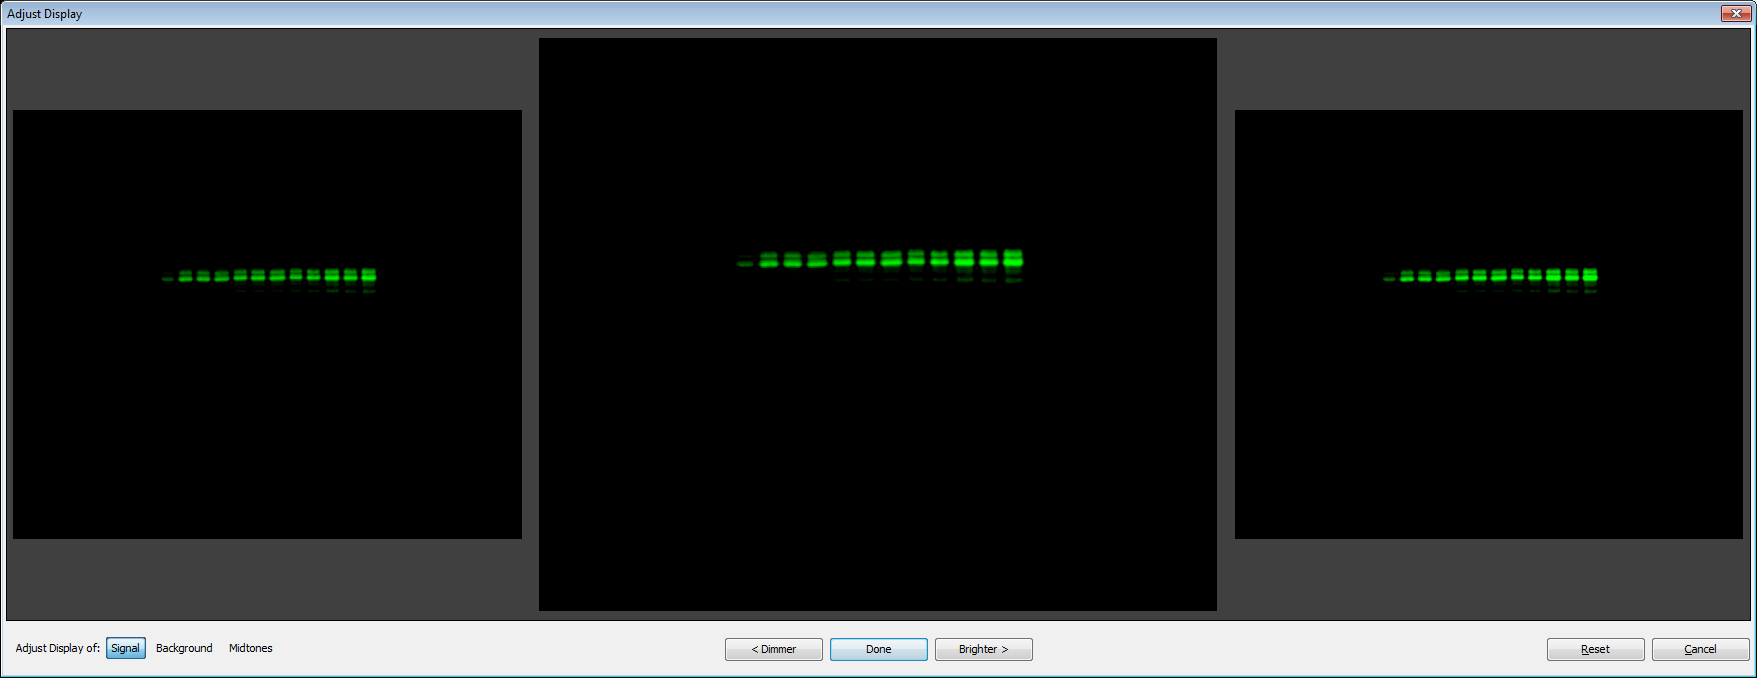
The middle tile displays the image with the current settings. Click the tile to the left or the right to change the settings to that display. You can also click Dimmer or Brighter below to change the settings.
Click Done to close the dialog. The image will be displayed with the settings from the middle tile. To close the dialog without changing the settings for the display, click Cancel at the bottom right. Reset the display in the dialog to the original settings by clicking Reset.
Choose the settings to adjust at the bottom left of the dialog. Click Signal, Background, or Midtones.
Choose Display
The Choose Display dialog allows you to choose the best display of the image from six options. This dialog affects the display of the image only. It does not affect the data or quantification of the data. See Display for more information.
Click Choose in the Display group on the Image tab to open the Choose Display dialog. Select the channel to display.
You can also click the Choose Display button (![]() ) on the Display panel.
) on the Display panel.
The Choose Display and Adjust Display dialogs automatically open after a scan for each channel acquired. Click the arrow (>) in the Display group to open the Display Options dialog and remove the check marks to disable this feature.
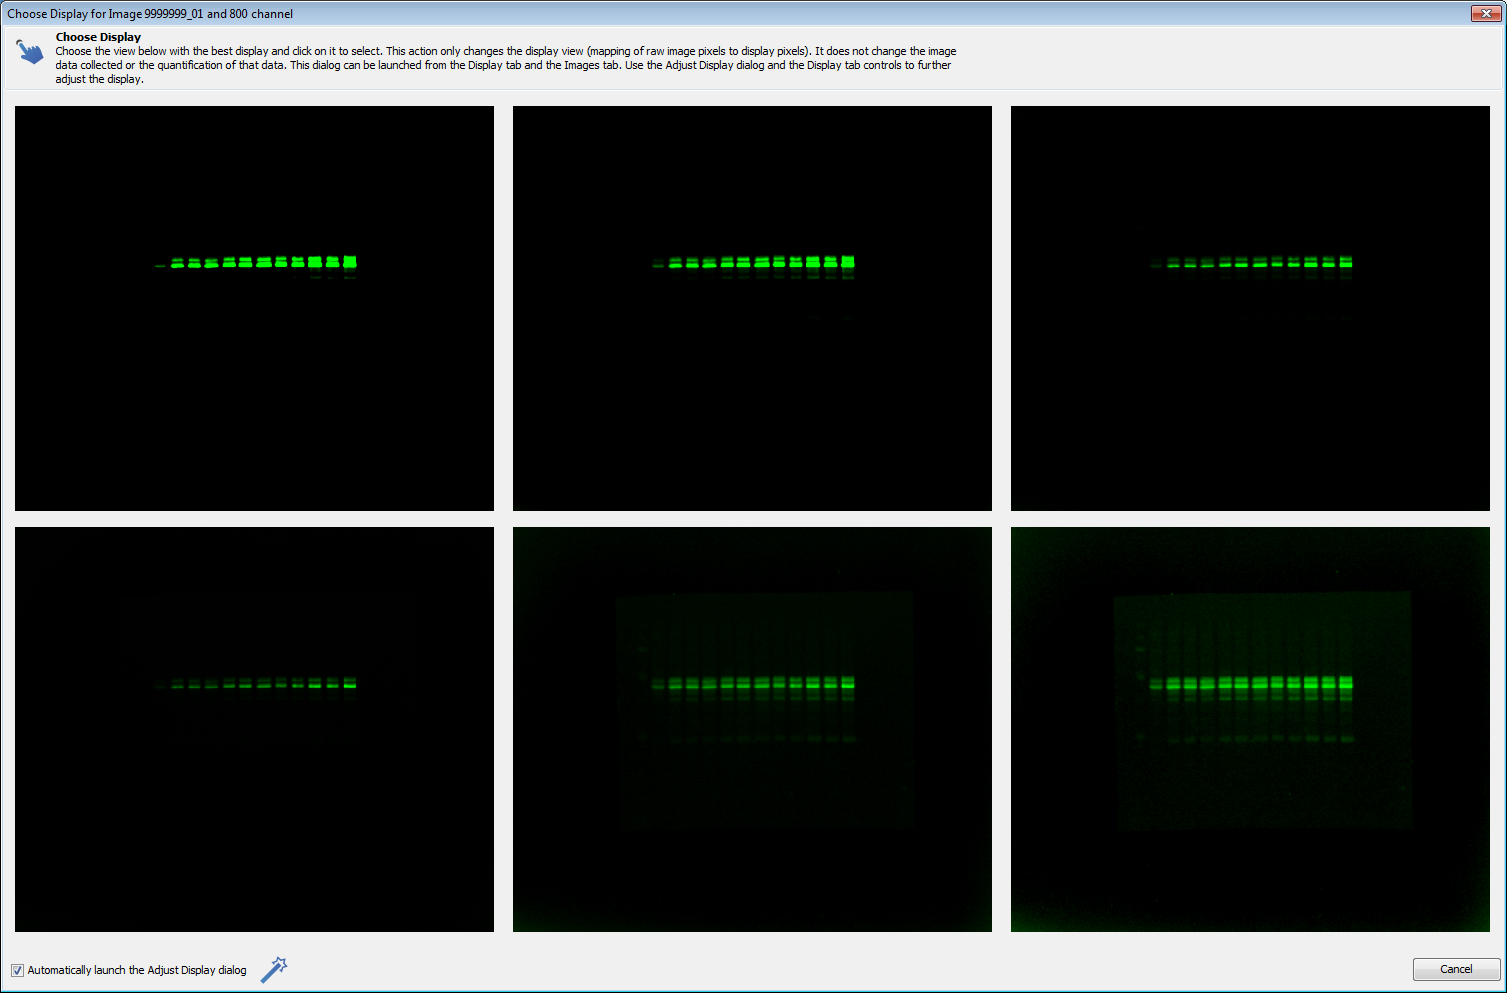
Click the tile that best displays the data. The Adjust Display dialog will then open to allow further adjustment of the display. You can disable this feature by removing the check mark by Automatically launch the Adjust Display dialog at the bottom right of the Choose Display dialog.
Copy Image
Copy Image makes a copy of the original image (without the analysis) and gives it a new name. You will get a message that tells you that the copy was successful and the name of the new image.
Rotate or Flip
Rotate or Flip Image creates a copy of the image and then displays the choices for rotation or flipping.
- Select the image that you want to rotate or flip.
Click Rotate or Flip. The Rotate or Flip Options dialog is displayed.
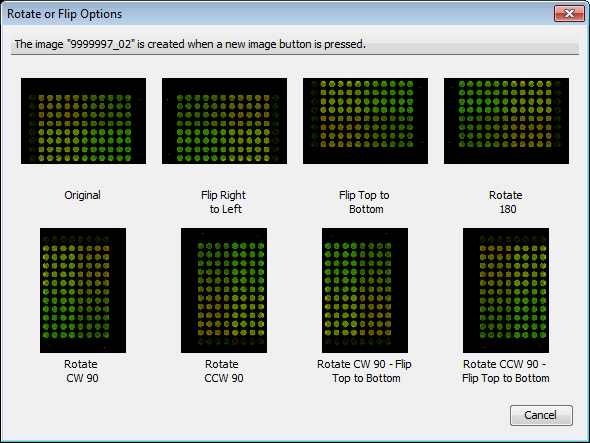
- Choose the direction to rotate or flip. The new image is displayed.
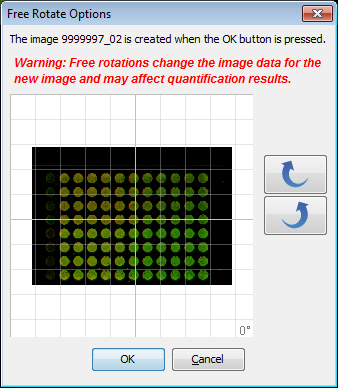
Free Rotate
Free Rotate creates a copy of the image and then displays the choices for rotating.
- Select the image that you want to rotate.
- Click the Free Rotate. The Free Rotate Options dialog is displayed.
- Use the Rotate buttons to rotate left or right. Repeat until the image is rotated as needed. Click OK and the new rotated image is displayed.
Reduce Noise
Reduce Noise creates a new image and reduces the noise on that image.
- Select the Image.
Click Reduce Noise. The Reduce Noise Options dialog is displayed.
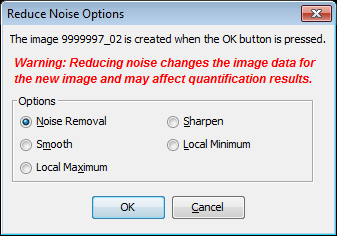
- Noise Removal — Removes salt & pepper noise using a median filter from 3x3 closest pixels
- Smooth — Enhances the image using the local average from 3x3 closest pixels
- Local Maximum — Enhances the image using the local maximum from 3x3 closest pixels.
- Sharpen — Enhances contrast at image boundaries using 3x3 closest pixels
- Local Minimum — Enhances the image using the local minimum from 3x3 closest pixels
- Click OK. A new image is created and noise on the new image is reduced.
Align Channels
Align Channels displays a window where the placement of one channel can be adjusted in reference to the other channel. A new image is created when the OK button is pressed.
This action cannot be undone once the OK button is clicked.
- Select the image that has channels that you want to align.
Click the Align Channels on the Image tab. The Align Channels dialog is displayed.
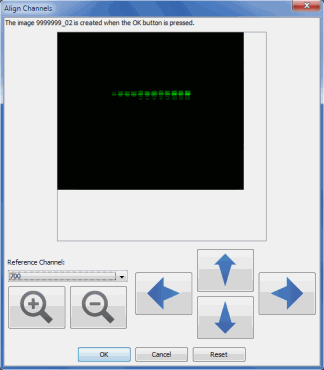
- Select the Reference Channel from the drop-down menu. This channel will not move.
- Use the up or down arrows to move the other channel(s) to the top or bottom, or use the bars on either side of the arrows to move the other channel(s) left or right.
- Click OK. A new image is created with the channels aligned.
Crop
The Crop tools define an area of the display for exporting and printing as well as for cropping. You can crop the image by clicking Crop, or define an area for exporting and printing single images.
If you crop the image, a new image of the cropped area is created. The original image remains unchanged.
Modify the Crop Area
This action is used to define an area to display when exporting or printing an image for publication.
- Display the image that you want to define.
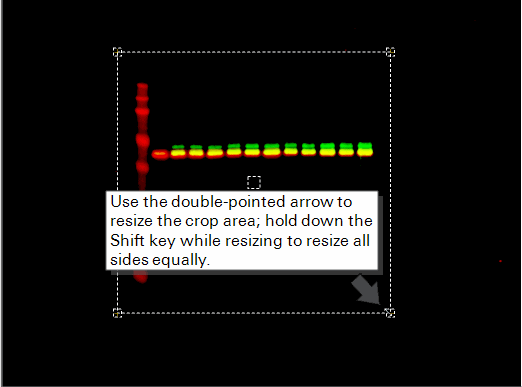
Click the Modify in the Print/Export Area group. The crop area is outlined in a dotted line with a box on each corner and a box in the center. The Modify Image Print/Export Area dialog is also displayed. You may need to move the dialog if it is blocking the view of the crop area.
You can change the color of the crop outline while it is selected by clicking Edit Color... at the top right of the dialog.
- Click the box in the center to move the entire crop area by using the four-pointed arrow to drag it to the area you want cropped.
- Click one of the boxes in a corner to resize the crop area by dragging the double arrow (up or down or right or left).
When you have set the crop marks the way you want, select whether to apply the crop area to the current image or to all the images in the Images table. Select Only adjust size and the same crop area will be applied to all of the images. Select Adjust size and location to apply the same crop area in the same location on all the images.
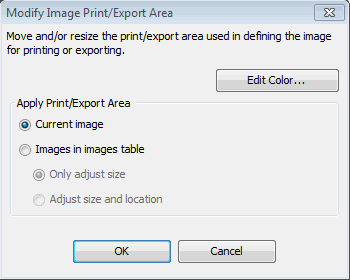
- Click OK. Click Apply in the Image tab to highlight the button. The crop area is defined for printing or exporting. The image is not cropped.
Crop the Image
The Crop button uses the crop marks on the current image to create a new cropped image. You can modify the crop marks first.
- Click the Crop button in the Create group. The Crop to New Image dialog is displayed and the crop area is outlined in a dotted line with a box on each corner and a box in the center. Adjust the crop area in the same ways as described in Define the Crop Area above.
- Click OK. A new image of the cropped area is created.
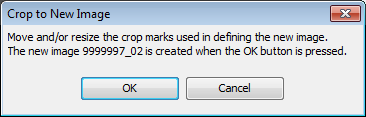
Image Formats
This page contains essential information about image formats, how they function in Image Studio™ Software, and tips for accurate quantification.
The wide range of imaging modalities available in the Odyssey® M Imager require a wide range of image formats. Empiria Studio® Software and LI-COR® Acquisition Software already supported this range of image formats, but support for some formats was introduced in Image Studio version 6.0 to work with the Odyssey M. Given the huge range of functionality in Image Studio and the expanded support for additional image formats, it is worth learning about the new formats and how Image Studio handles them.
Definitions
- Image
- Within LICORbio software, “image” refers to a visual depiction of a sample in a single channel. Each pixel within the image corresponds to a specific location on the sample.
- Channel
- Specific wavelength(s) of light used to produce an image. In fluorescence imaging, channels are sometimes referred to by a name that contains both excitation and emission wavelengths, and sometimes they are referred to by a nominal excitation wavelength.
- Acquisition
- Image(s) from one or more channels grouped with image metadata. Acquisitions are imported/exported between LICORbio software applications using zip files to group the images and data together and to keep them organized.
- Pixel
- The smallest area unit of an image. Depending on the image format, each pixel in the image will be represented by either A) a single numeric value that is proportional to the intensity of light detected at the pixel’s location or B) the pixel will be represented by a set of numbers that indicate the red, green, and blue components of the light detected at the pixel’s location.
- Pixel Intensity
- A number that is proportional to the light detected at a pixel’s location.
- RGB
- RGB is an acronym for “red, green, blue” - the three primary colors that are combined to create full-color images. Each pixel in an RGB image contains a set of numbers - one number that represents the red value for the pixel, one number that represents the green value for the pixel, and one number that represents the blue value for the pixel. Computer software and monitors display the pixel’s color by blending these three components proportionally.
- Image format
- In this explanation, “format” refers to the format of the image file (e.g.,
.tif,.png,.jpg). - Image type
- In this explanation, “type” refers to the imaging modality that produced the image, e.g., fluorescence, Epi, Trans, RGB.
Image Type Reference
Type 1: Fluorescent and Luminescent Images
- Number format for pixel values
- Half-float
- Number format standard
- IEEE 754
- Bit depth
- 16 bit
- Example applications
- Fluorescent Western blots, In-Cell Western™ Assay
- Available analyses
- All analysis types (Manual, Western, MPX Western, DNA Gel, Plate, Plate Array, Grid, Grid Array, In-Cell Western, Small Animal Image)
- Available quantification values
- Signal, Total, StdDev, Width, Height, Area, X, Y, Width, Height, Min, Max, Mean, Median, Bkgnd., Bkgnd. StdDev, Trim Bkgnd., Trim Bkgnd. StdDev, Trim Mean, Trim Signal, Trim StdDev; Note: Concentration values (Conc. Std. and Concentration) are computed using a user selection of Signal, Total, Mean, Median, Trim Signal or Trim Mean.
Type 2: Epi-Illumination Images
- Number format for pixel values
- Unsigned Short Integer
- Number format range
- 0 to 65,535
- Bit depth
- 16 bit
- Image format description
- Epi images represent reflective light from a sample. Pixels within Epi images are unsigned integer values that range from 0 to 65,535. In versions prior to Image Studio 6.0, third-party images are automatically converted on import from the unsigned integer format to the half-float format. A major new feature of Image Studio 6.0 is support for the unsigned integer format used for both Epi and Trans images types. When an Odyssey Epi or Trans image is imported into Image Studio 6.0, the unsigned integer format is retained and the image is not converted to half-float format. Earlier versions of Image Studio marked values in imported images above 65,504 as infinity, but Image Studio 6.0 does not have this limitation. In Epi images, it is common for the sample area to have lower pixel values than background region. In prior versions of Image Studio, Image Studio used a heuristic to determine when images should be inverted to make sample areas have higher pixel values than the background, but Image Studio 6.0 provides an Invert button so that the analyst can choose when to invert an image.
- Example applications
- Western blot membranes using colorimetric substrates or stains; Colorimetric MW markers used in chemiluminescent Western blots
- Available analyses
- All analysis types (Manual, Western, MPX Western, DNA Gel, Plate, Plate Array, Grid, Grid Array, In-Cell Western, Small Animal Image)
- Available quantification values
Signal, Total, StdDev, Width, Height, Area, X, Y, Min, Max, Mean, Median, Bkgnd., Bkgnd. StdDev, Trim Bkgnd., Trim Bkgnd. StdDev, Trim Mean, Trim Signal, Trim StdDev; Note: Concentration values (Conc. Std. and Concentration) are computed using a user selection of Signal, Total, Mean, Median, Trim Signal or Trim Mean.
Epi channel images provide the same quantification value types as fluorescent and chemiluminescent channel images, but the values are based on the integer pixels so the range of values will be different. These values are also typically not as linear as fluorescent channels, so some quantification values for Epi channel images should be used with caution.
Type 3: Transillumination (Transmitted Light)
- Number format for pixel values
- Unsigned Short Integer
- Number format range
- 0 to 65,535
- Bit depth
- 16 bit
- Image format description
- Pixels within Trans images are unsigned integer values that range from 0 to 65,535. In versions prior to Image Studio 6.0, 3rd party images are automatically converted on import from the unsigned integer format to the half-float format. A major new feature of Image Studio 6.0 is support for the unsigned integer format used for both Epi and Trans images types. When an Odyssey Epi or Trans image is imported into Image Studio 6.0, the unsigned integer format is retained and the image is not converted to half-float format. Earlier versions of Image Studio marked values in imported images above 65,504 as infinity, but Image Studio 6.0 does not have this limitation. In Trans images, it is common for the sample area to have lower pixel values than background region. In prior versions of Image Studio, Image Studio user a heuristic to determine when images should be inverted to make sample areas have higher pixel values than the background, but Image Studio 6 provides an Invert button so that the analyst can choose when to invert an image.
- Example applications
- Coomassie or silver staining of protein gels; H & E stained tissue sections
- Available analyses
- All analysis types (Manual, Western, MPX Western, DNA Gel, Plate, Plate Array, Grid, Grid Array, In-Cell Western, Small Animal Image)
- Available quantification values
Signal, Total, StdDev, Width, Height, Area, X, Y, Min, Max, Mean, Median, Bkgnd., Bkgnd. StdDev, Trim Bkgnd., Trim Bkgnd. StdDev, Trim Mean, Trim Signal, Trim StdDev; Note: Concentration values (Conc. Std. and Concentration) are computed using a user selection of Signal, Total, Mean, Median, Trim Signal or Trim Mean.
Trans channel images provide the same quantification value types as fluorescent and chemiluminescent channel images, but the values are based on the integer pixels so the range of values will be different. These values are also typically not as linear as fluorescent channels, so some quantification values for Trans channel images should be used with caution.
Type 4: Color Images
- Number format for pixel values
- Integer
- Number format range
- 0 to 255
- Bit depth
- 24 bit (8 bits for each component)
- Image format description
- Color images use a 24-bit RGB color model (i.e., 8 bits for red, 8 bits for green, and 8 bits for blue) to represent pixels within images. Each color component – red, green, and blue – are represented by 8-bit values that range from 0 to 255. Prior to Image Studio 6.0, 3rd party color images were imported by creating separate channels for each color component (R, G, and B). The pixel values are converted from the original value (between 0 and 255) to a half-float value. Image Studio 6.0 introduces support for RGB. Imported 3rd party color images are imported as native RGB.
- Available analyses
- All analysis types (Manual, Western, MPX Western, DNA Gel, Plate, Plate Array, Grid, Grid Array, In-Cell Western, Small Animal Image)
- Available quantification values
- Area, X, Y, Width, Height
- Shapes added to RGB Epi and RGB Trans channels will not provide all quantification values that are shown for shapes on other image types. Quantification values that are not supported in Image Studio 6.0 for RGB images will be shown as NaN.